

A few months ago I received the Eachine QX110 V-Tail mini racer for review. First flights went smoothly, even after minor crashes it was flying like a new one. Courageously, I tried to do some flips in “Acro” mode and I landed upside down. Lots of smoke and fun was gone.
Arrived home, I powered up the drone – one motor started to spin permanently. When I saw this it was clear that there is a problem with the flight controller (FC).
While brushed motors (like the QX110 has) are simply driven by MOSFET transistors integrated into the flight-controller, brush-less motors are driven by ESCs (Electronic Speed Controller). As construction quadcopter, ESCs are 3 types, individual for each channel, 4:1, and integrated into the flight controller.
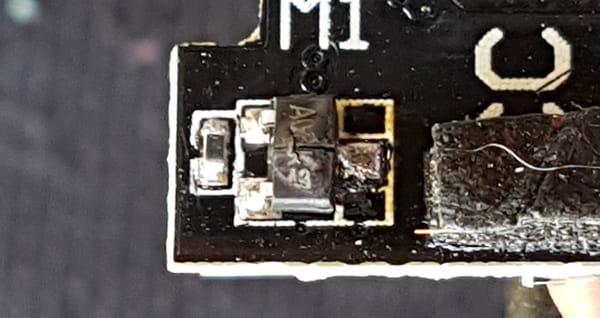
Using a magnifying glass I carefully inspected the drone’s FC and I found out that a tiny SMD-Transistor was exploded – the label can’t be recognized. Checking the corresponding IC on another channel I realized that I need an “A08K” Fet. Five minutes later, my order was placed for 10 pieces.
To ensure that I’m ready to fly asap, I ordered from Banggood a brand new flight controller too.
Eachine QX110 Flight controller repair
In just 8 days, the package arrived. Surprise! I didn’t get exactly what I ordered. Instead of an A08K, I received A09T (AO3400). I contacted the seller, he said that “these two N-Channel MOSFETs are 100% compatible“.
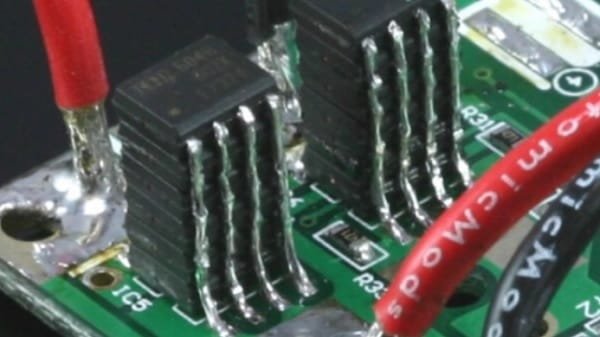
In order to repair the flight controller, I had to remove it from the frame.
Using a $15 soldering iron, I desoldered the defective MOSFET and soldered back the new one. You need some dexterity because the tiny transistor measures only about 1.5 x 3 mm.
After I put everything back, checked the wires, and soldering I powered up the quad-copter. No more instant motor spin.
Using Betaflight – Configurator I checked if every motor spines freely and correctly. Yep, the operation was successful :)
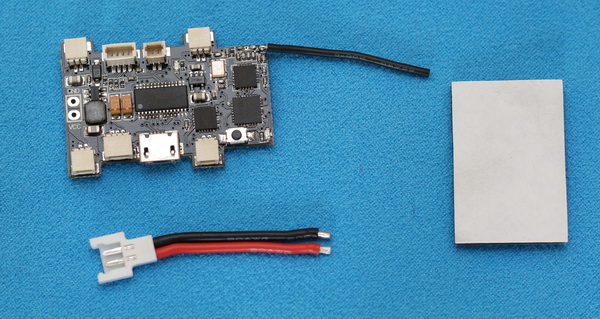
Flight controller replacing with newly purchased one
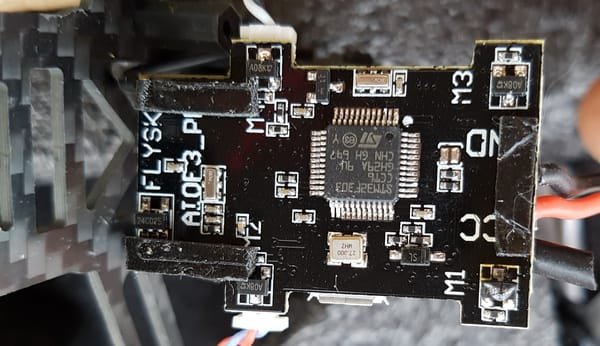
About 3 weeks later, finally arrived the replacement flight controller.
Luckily all the motors and the VTX camera are linked to the flight controller through connectors, so no soldering required. I managed to replace the flight controller in just 10 minutes.
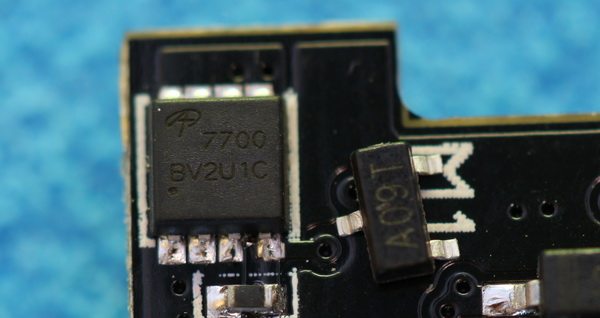
After I put everything back, I realized that I received an upgraded FC board with different FETs (7700 BV2U1C), instead of 3 pin ones it has 8 pin ones!
Note: the receiver board is integrated into the flight controller and you need to rebind it with the transmitter.
Which procedure was more cost and time effective?
- 10 pieces of transistors cost me $2, which allows repairing the FC 9 more times (in case the same damage will happen). The new flight controller costs about $30. Repair vs Replace 1:0;
- In order to replace the transistor, I needed soldering iron, magnifier, screwdriver, and about 30 minutes. Switching the new flight controller took 10 minutes and only a screwdriver is required. Repair vs Replace 1:1;
- The latest Eachine BAT QX105 Vtail QX110 AIOF3PRO flight controller comes with an upgraded FET that can handle more power. Repair vs Replace 1:2;
If you like to do DIY thinks I would recommend trying to repair your drone by yourself. If you are new in the field and you don’t have the necessary tools you should go with original spare parts.
What burned out my flight controller?
Later I found out that the motor drivers (FETs) seem to be under-rated. When the current consumption is too big (long term full throttle or locked propeller) they give up with smoke. In order to eliminate this design issue, you have 3 options:
- do not heavily stress the motors;
- replace the stock MOSFET IC with a higher rated one (I have not found one compatible yet);
- you can stack more ICs, 2 – 3 pieces in parallel.


Hi sir, it was very interesting to hear from you about the repairs that you have done, and I have a quadcopter where, my brother connected the terminals of the battery wrongly and it blew up one of the power transistors and I could not find the code of the transistor and so, please suggest me how to find it out.
How on earth did you solder that back on? The same MOSFET blew on my 3d printer and I have no idea how I’m going to be able to solder a new one on.
It was not that hard. I have a cheap (~20$) soldering stand with a magnifier and LED light. I used a tweezer to place the MOSFET in its place and solder it easily.
good luck with your repair process!
Thanks for your article … I fixed the 5v of my flight controller. Later I realize that the battery status is not working.
Do you know how to fix it? Maybe the ADC is not working. In the beta flight the configuration is corrected.
Thanks again.
Thanks for guiding me in the right direction too. I’m not sure if you figured already, but according to their website (aosmd dot com), the markings on the chips are first and last letter of product code, week of production and assembly location. So I assume the chips are in fact identical, only with another manufacturing date/location. (AO3400 -> A0, week 8/9 and whatever location means).
Now I know its been a while, but my FC are marketed as capable of 10A or more, which is a big lie (rated 5.8A). Have you found stronger N-FET’s around? I heard rumors of some SOT23-3 capable of 11A, but cannot seem to find them anywhere :)
Glad I found this repair instruction as I am facing this very same thing with a Eachine QX105 Bat, I got it a few days ago and was immersed in the water for 5 mins. now is dead :(
anybody knows what is the original rating of A08K and what is the rating of A09T
Very useful page, thanks for writing up your experience, it helped me to identify the same issue with my flight controller!
There does seem to be an updated FET which you can use to replace/upgrade the original, the part reference is: AO3400 A09T
These have a slightly higher current rating and should be a direct replacement for the original which are definitely under-spec’d! :(