I’ve always been a big fan of BetaFPV’s PAVO series because with every new generation, it somehow gets better and better. The latest model, the Pavo20 Pro II, continues that tradition. This third-generation upgrade features a refreshed design with mounting points compatible with both DJI O4 Air Unit systems and an RGB LED strip, providing improved visibility and style.
In this review, I’ll walk you through my first impressions, highlight what’s new, and explain whether these upgrades translate into real flight performance and an improved user experience. Plus, I’ll cover the initial setup process and provide an O4 Pro installation guide to help you get started quickly and confidently.
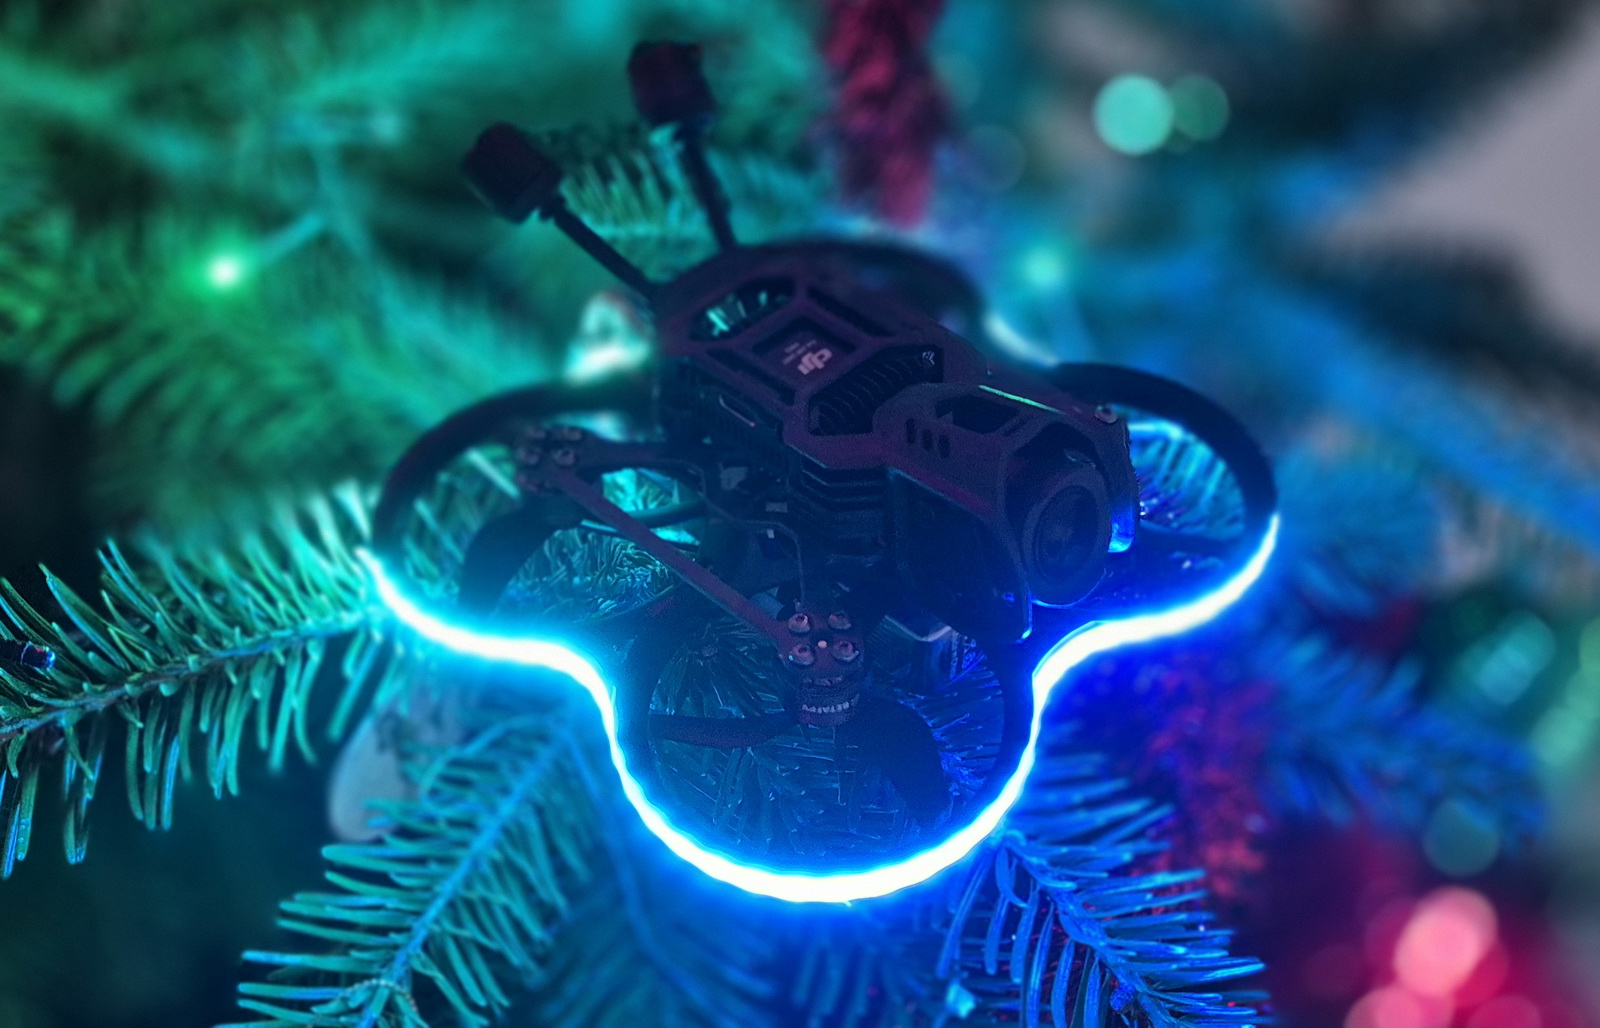
At first, my Pavo20 Pro II review had a different tagline. Then I installed the NightFire LED strip, saw the cool light schemes, and watched the drone turn into a Christmas decoration. It may not be the most important FPV feature, but flying with a bit of Christmas spirit is hard to resist.
BetaFPV Pavo20 Pro II Review: Redesigned Frame and Full O4 Compatibility
Disclosure: I received this Whoop-style FPV drone in a product review collaboration with BetaFPV. Product specs and quality may vary according to the manufacturer’s reliability, so I cannot guarantee that you will get a drone that performs the same as in my article.
I was first contacted by BetaFPV, about the possibility of testing the Pavo20 Pro II, roughly two weeks before its official release date on November 21, 2025. Unfortunately, due to slow shipping, I received the unit only after the launch day. While the delay was disappointing, it gave me extra time to dive into the specs and anticipate what this third-generation upgrade would bring.
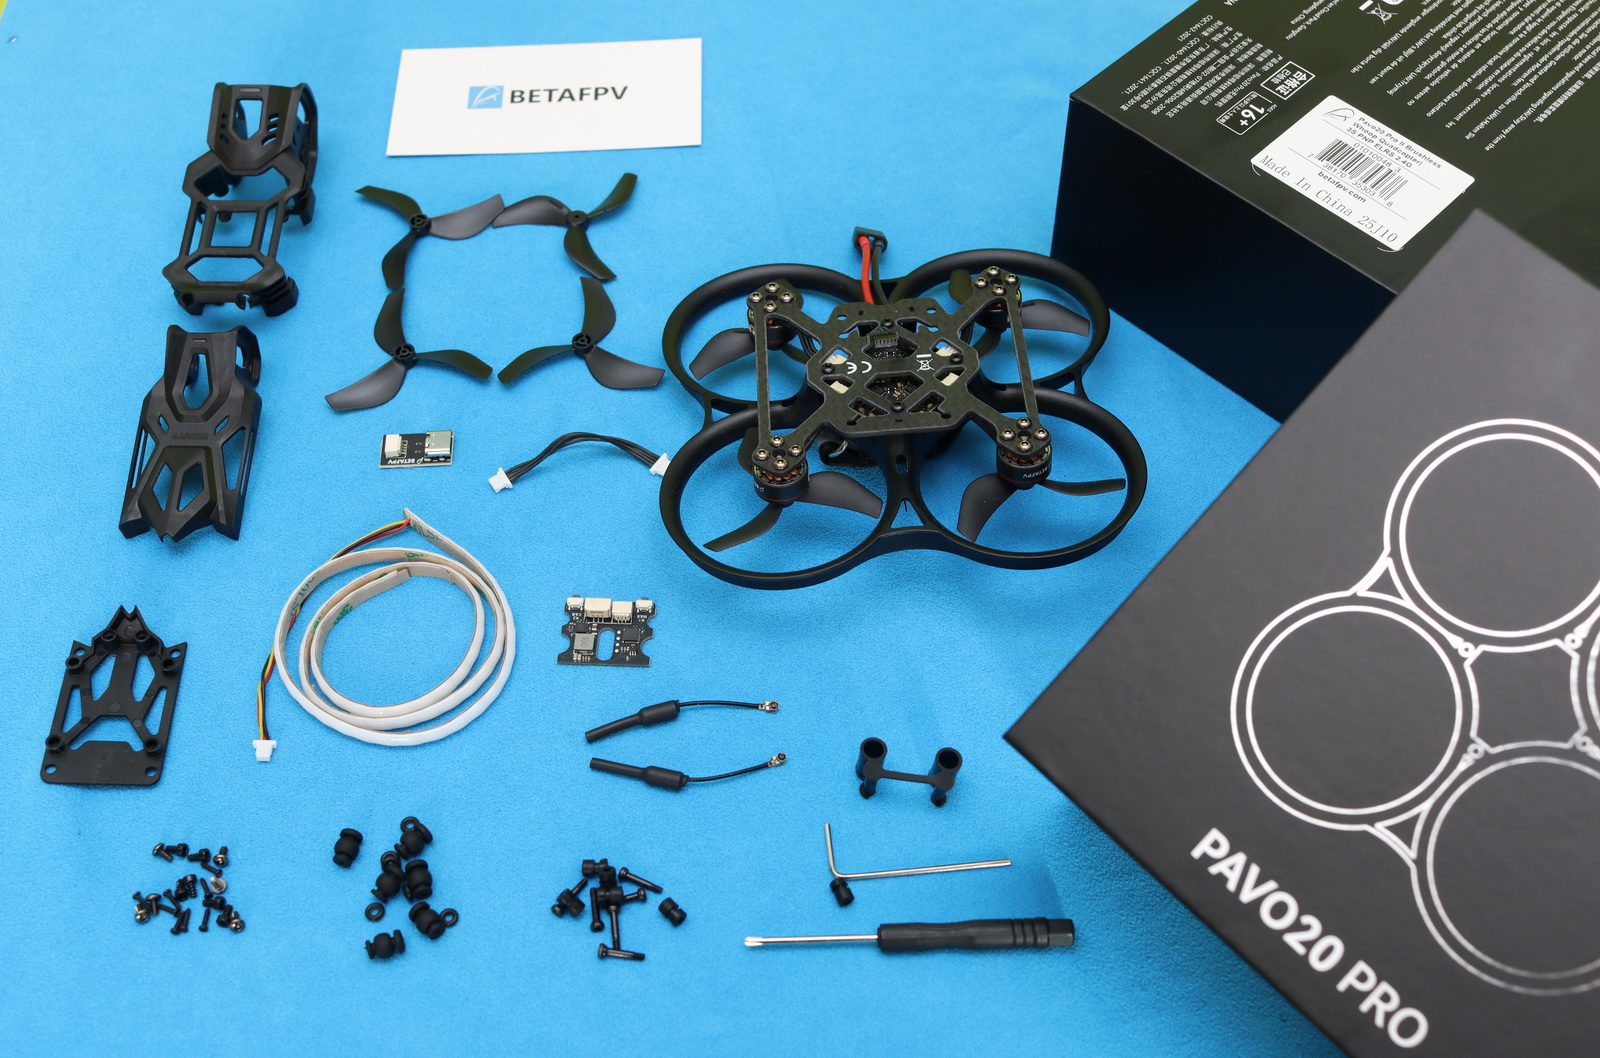
In addition to the Pavo20 Pro II, they sent me two sets of LAVA 3S 550 mAh 75C batteries, which was a nice touch. The drone comes in exactly the same box as its predecessor; only a white label on the back shows that it contains the second-generation (II) Pavo20 Pro. Once unwrapped, the only difference I noticed was the extra canopy (DJI O4 Lite bracket). Below is the complete list of included parts:
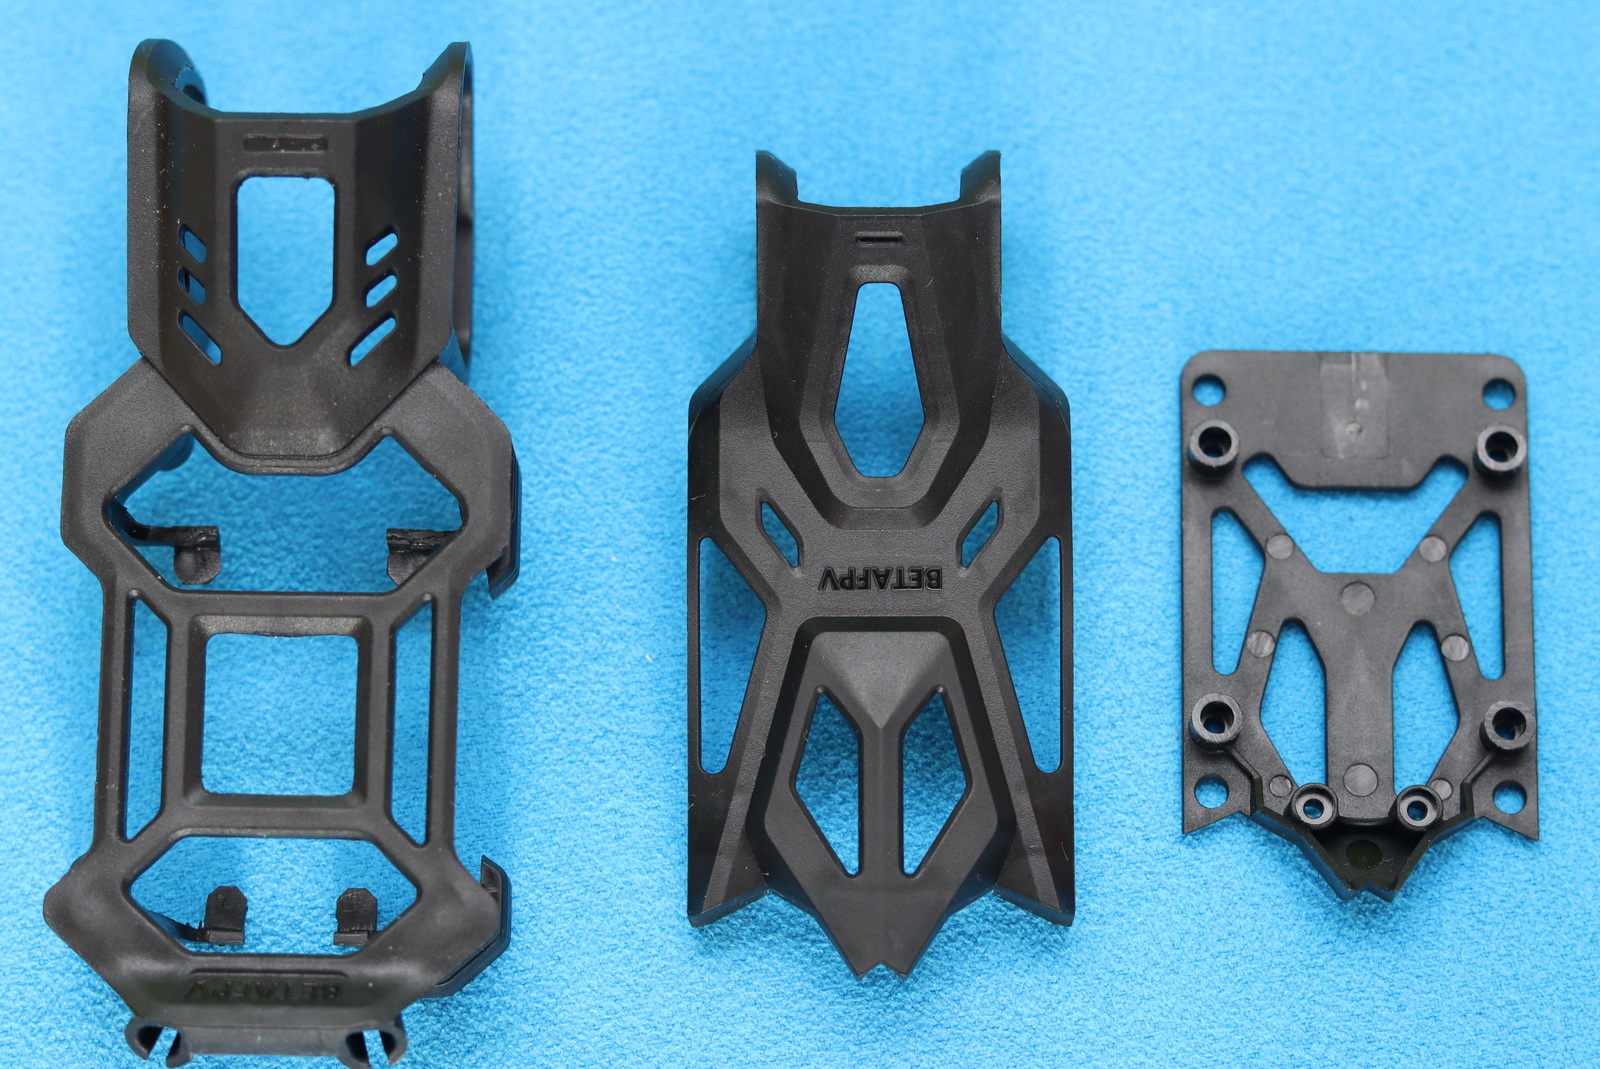
- O4 Air Unit Pro mounting bracket
- Bottom plate and mounting bracket for O4 Air Unit (Lite)
- Set of spare Gemfan (GF) 45 mm 3-blade propellers
- Type-C to SH1.0 flight controller USB adapter with SH1.0 4-pin cable
- Six shock-absorbing balls for O4 Air Unit Pro bracket (6.6 mm)
- Twelve shock-absorbing balls for O4 Air Unit (6 × 8.8 mm and 6 × 1.5 mm)
- Bag of screws (6 × M2 × 10, 6 × M2 × 4 flat head, 6 × M2 × 4 socket head, and 8 × M1.4 × 6)
- Two 5.8 GHz VTX antennas with TPU mounts
- Phillips screwdriver and H1.5 hex screwdriver
- NightFire RGB Board and RGB LED Strip (500mm)
Pavo20 Pro II: What’s new?
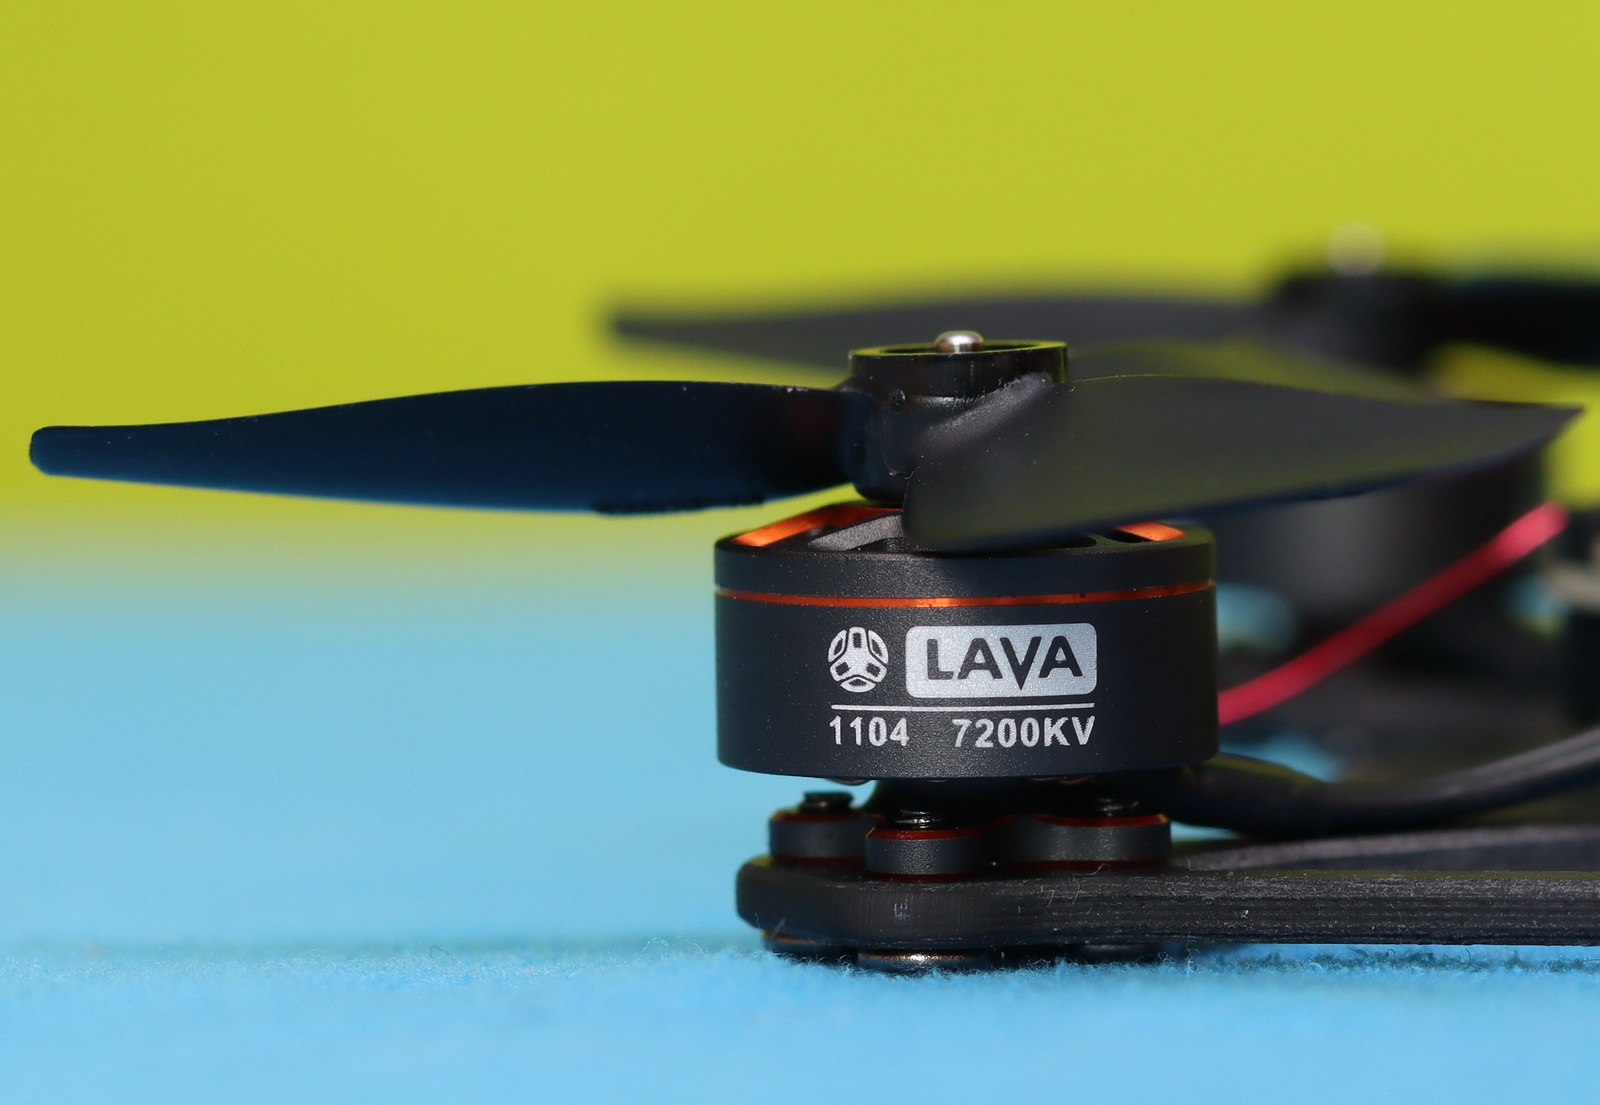
The main hardware of the original Pavo20 and the new edition is the same. Both are built around the same F4 2–3S 20A AIO flight controller and use LAVA 1104 7200KV motors. The 360-degree duct protector also appears to be unchanged.

As shown in the photo below, the carbon fiber plate has been slightly redesigned to support both O4 mounting brackets. The Pavo Pico II shares the same mounting pattern, which allows straightforward swapping between the two platforms within minutes. Maintaining this standardized mounting approach across future models would enable quick, hassle-free upgrades and improve long-term hardware compatibility.
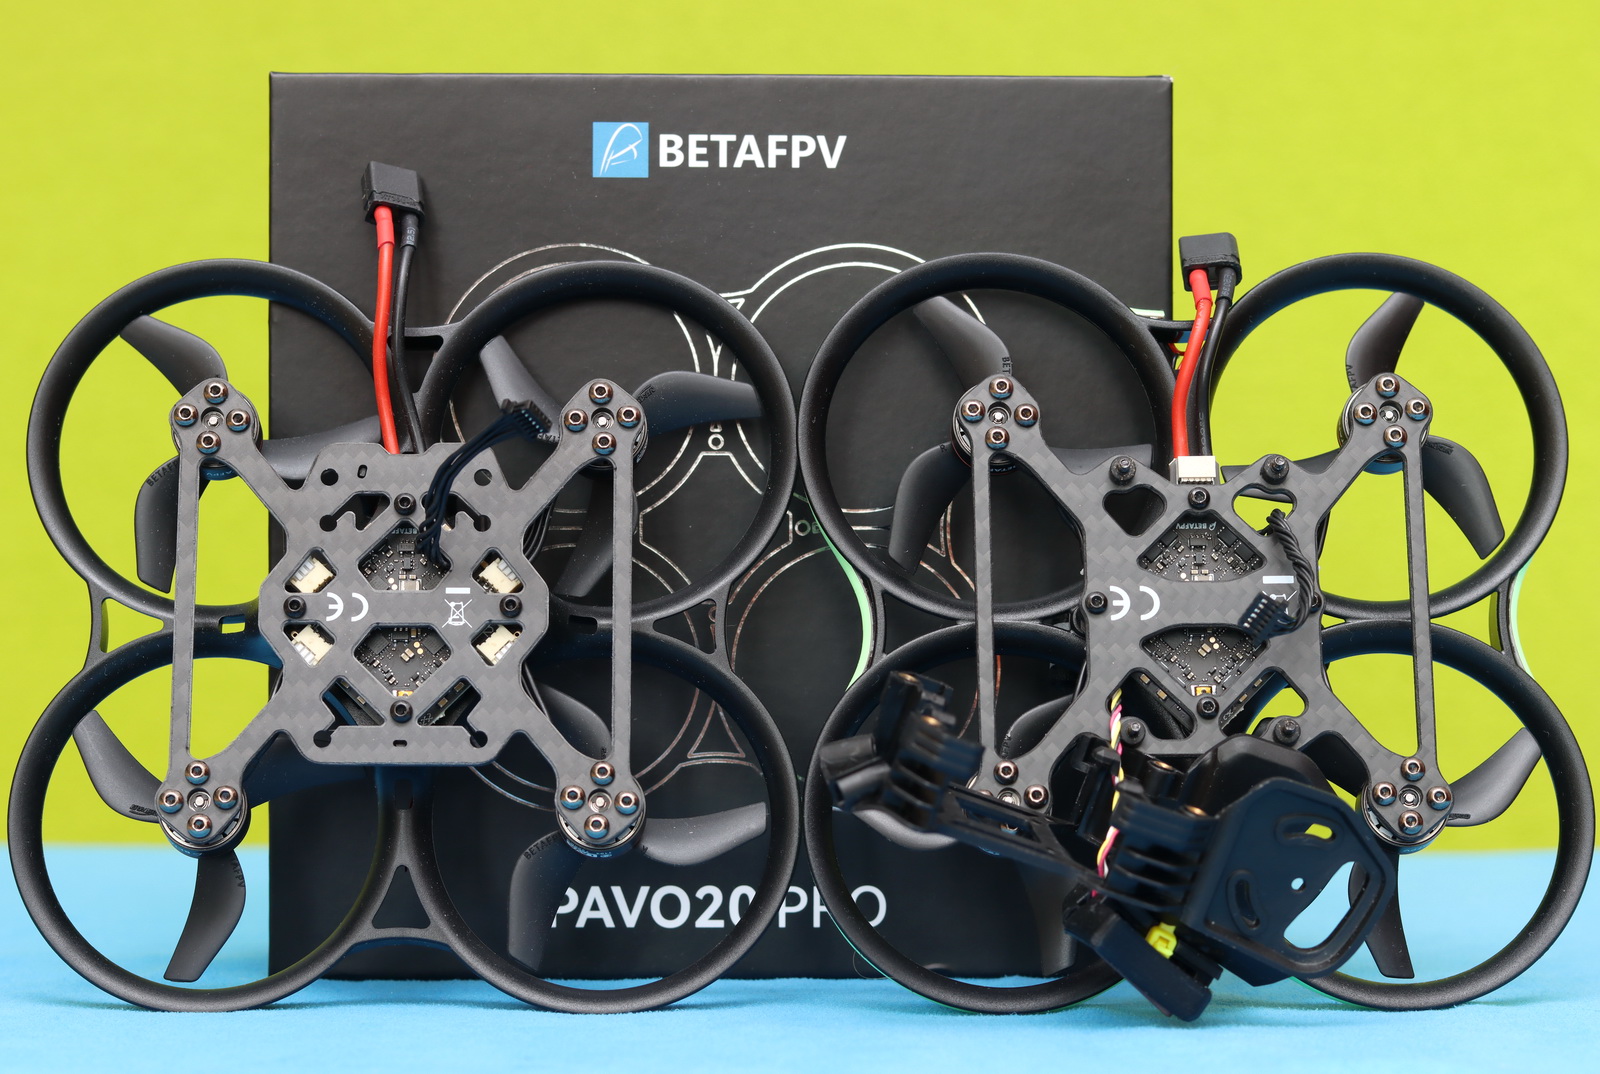
The differences between the two editions of the Pavo20 Pro end here, so anyone expecting significant upgrades will likely be disappointed. Despite many pilots designing custom GPS mounts for this platform and repeatedly requesting official support in the updated version, BetaFPV chose not to include this feature, which feels like a missed opportunity.
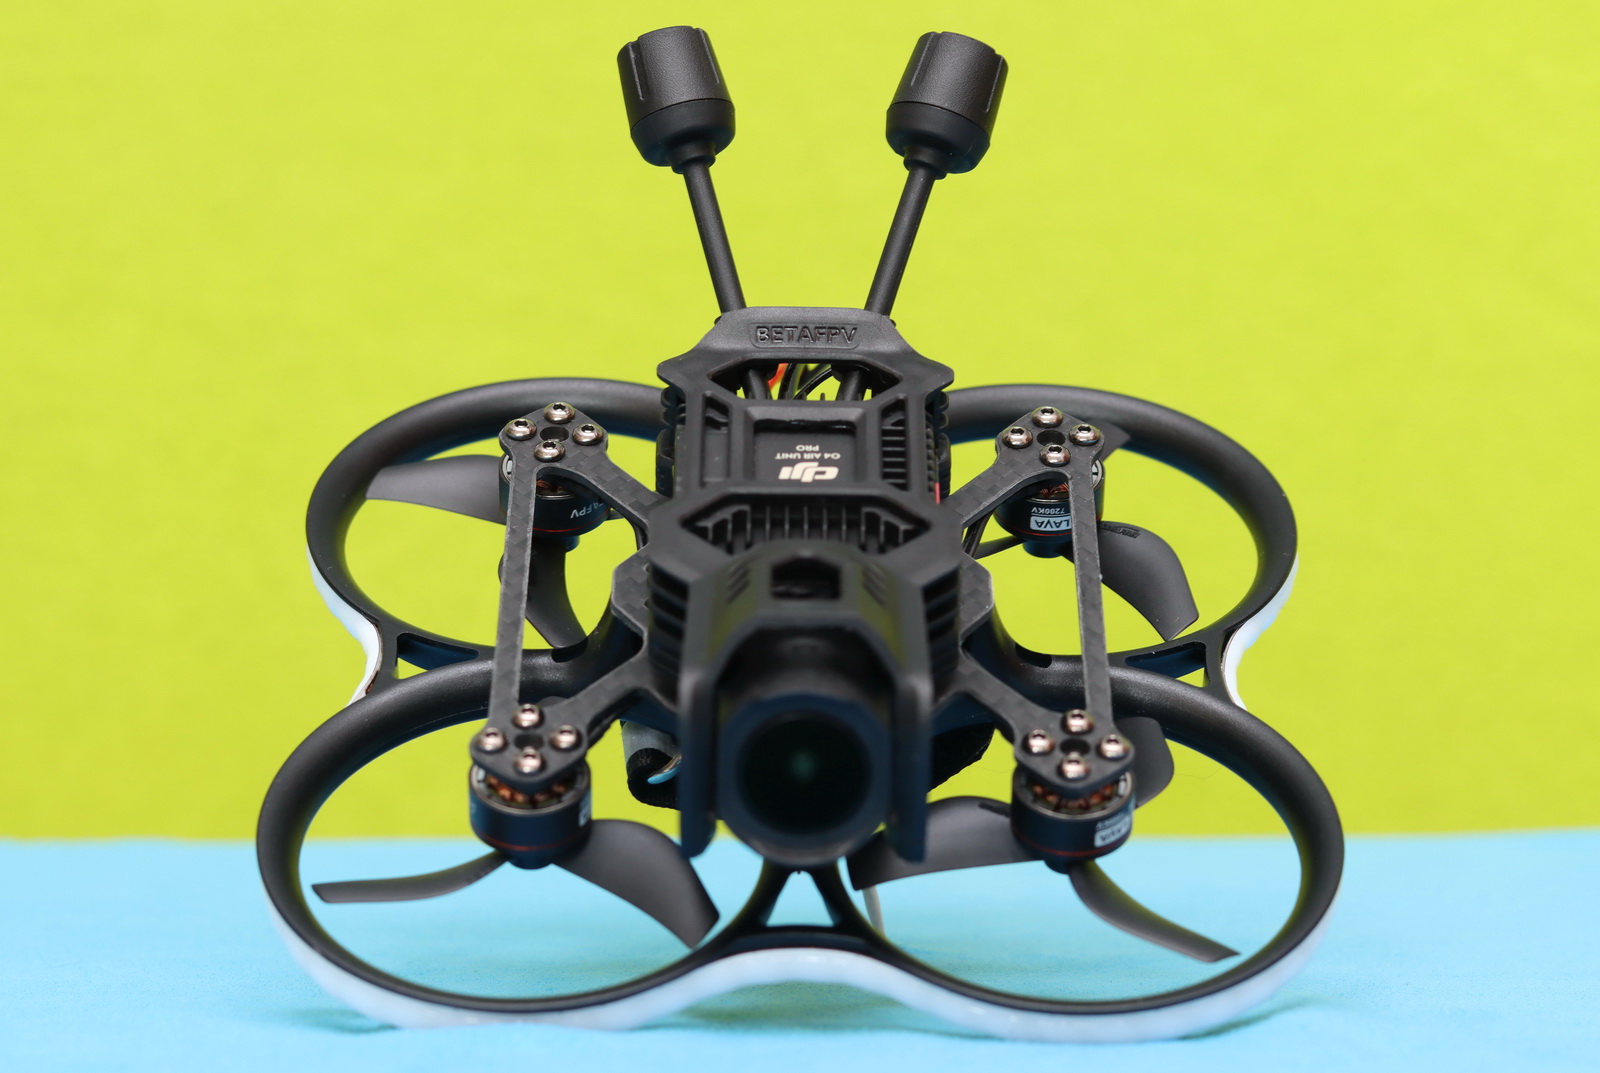
With the O4 Air Unit Pro onboard, the LED strip installed, and a 3S 550 mAh battery, the Pavo20 Pro II weighs around 140 grams, making it very legislation-friendly and easy to fly without requiring a pilot license.
NightFire RGB LEDs Christmas Glow
Usually, drones end up under the Christmas tree — but with the NightFire RGB LED, this one belongs right on top. Ten flashing themes, seven colors, multiple speeds, and four brightness levels turn it into a glowing Christmas decoration.
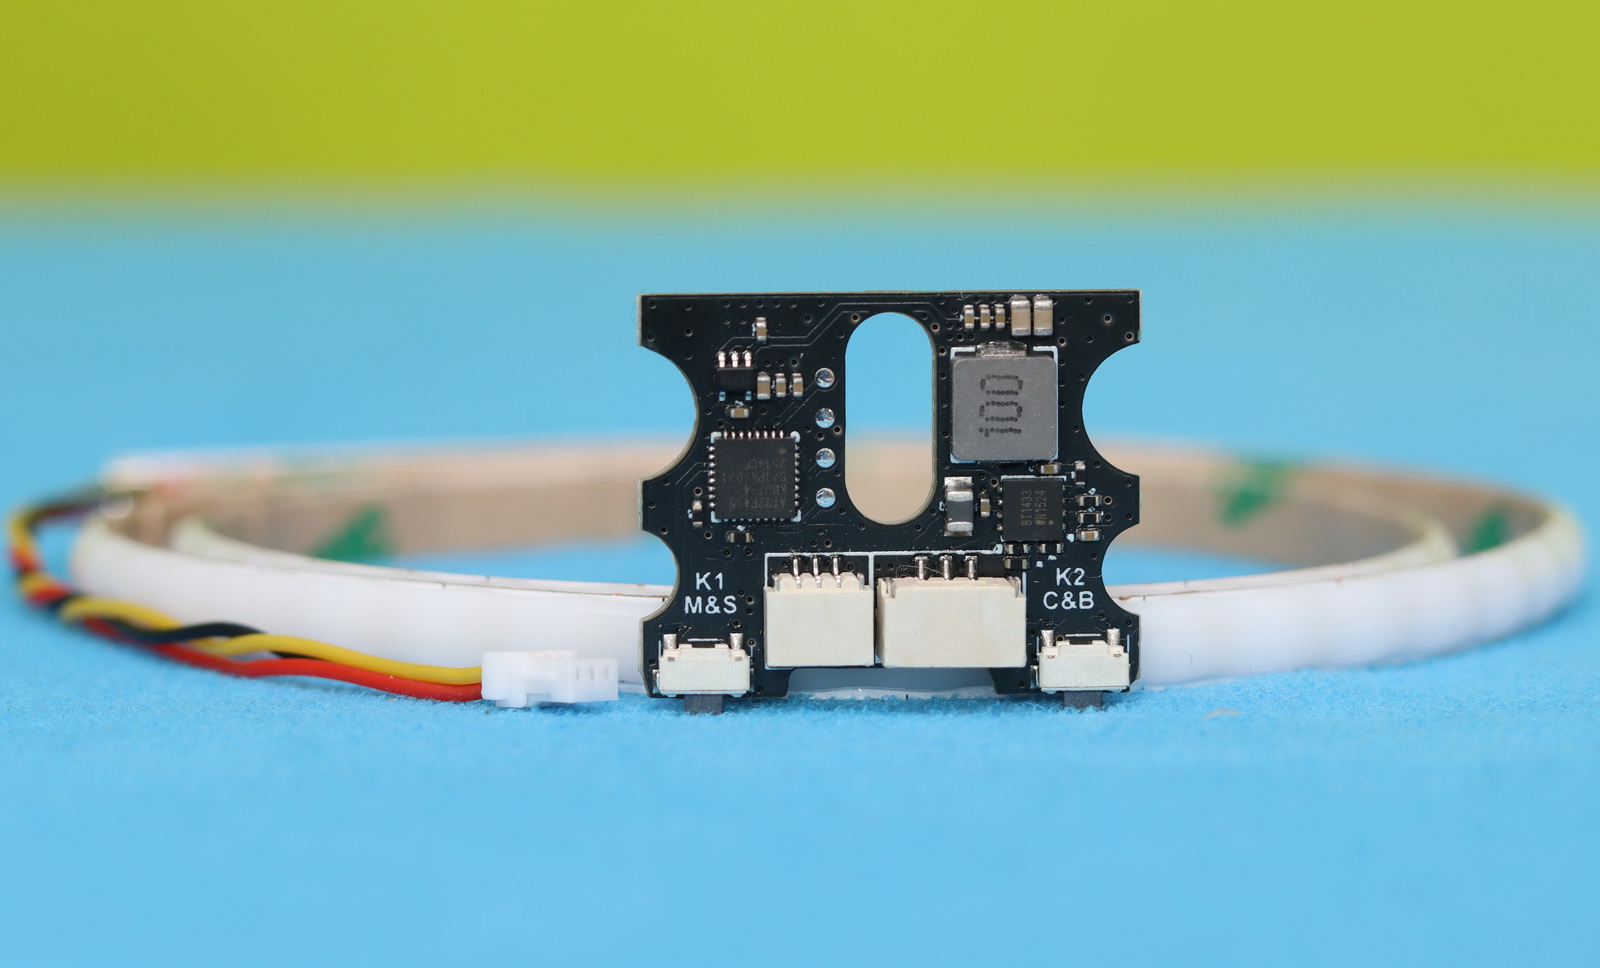
The kit consists of a 500 mm long LED strip with WS2812B RGB LEDs and a controller board. The total weight is around 8 grams. With cut lines, the strip can be trimmed to fit your drone’s frame. It supports power from 6 V to 18 V (2S–4S batteries).
The controller board has two 3-pin connectors (input: GH1.25 mm, output: H1.0 mm) and two buttons. By long-pressing Key 1, you can toggle between ten flashing themes, and a short press changes the speed. Long-press Key 2 to adjust brightness levels (100%, 75%, 50%, 25%), and a short press changes the color (White, Red, Yellow, Blue, Green, Cyan, Magenta, Off). If you plan to control the LED strip remotely via your radio, you will need to solder it to the TX6 UART port and make a few adjustments in the BetaFlight configurator.
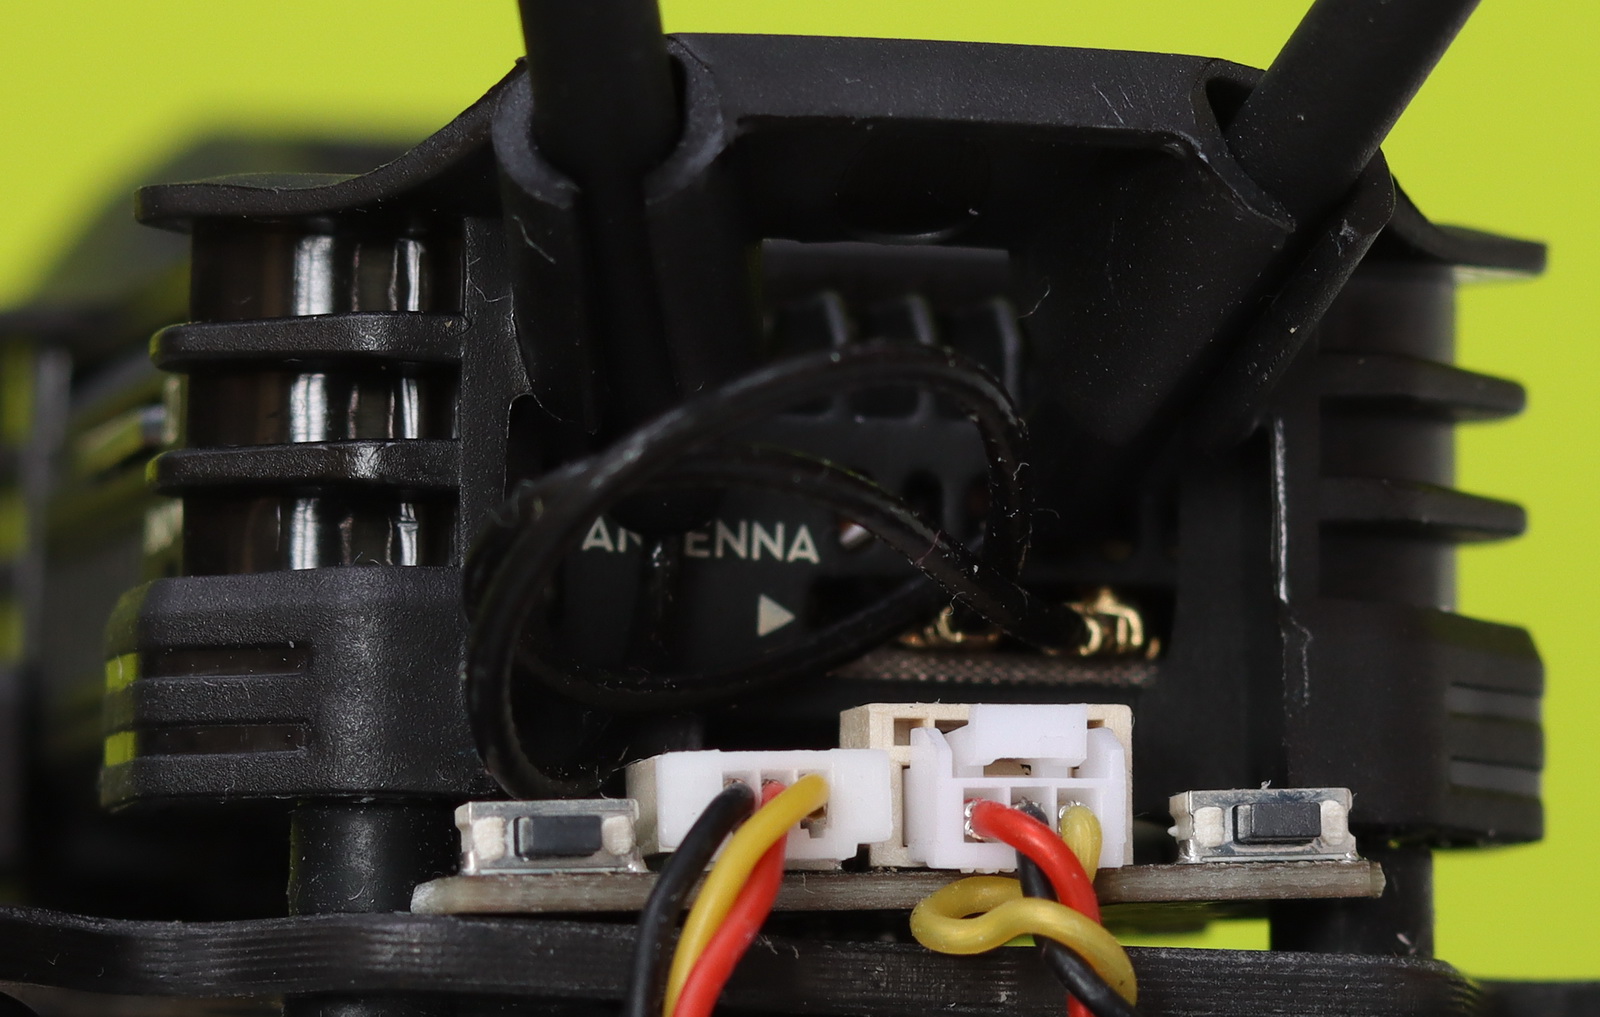
On BetaFPV’s Facebook group, many users asked where the controller board should be installed, as no documentation was provided. The PCB sits at the rear of the frame, between the carbon fiber plate and the O4 VTX, with its “ears” aligned to the rubber grommets of the camera bracket. No screws are required to secure it.
How to Install the O4 Air Unit (Pro & Lite) on the Pavo20 Pro II
As they use different mounting brackets, there’s a slight difference between the DJI O4 Air Unit Pro and Lite installation steps, but both are clearly shown in BetaFPV’s installation video guide. Furthermore, if the FPV kit is already installed in the bracket, moving it from one Pavo drone to another can be done by unscrewing and screwing just four screws and reconnecting the VTX cable. It’s like performing an F1 pit stop! 😄
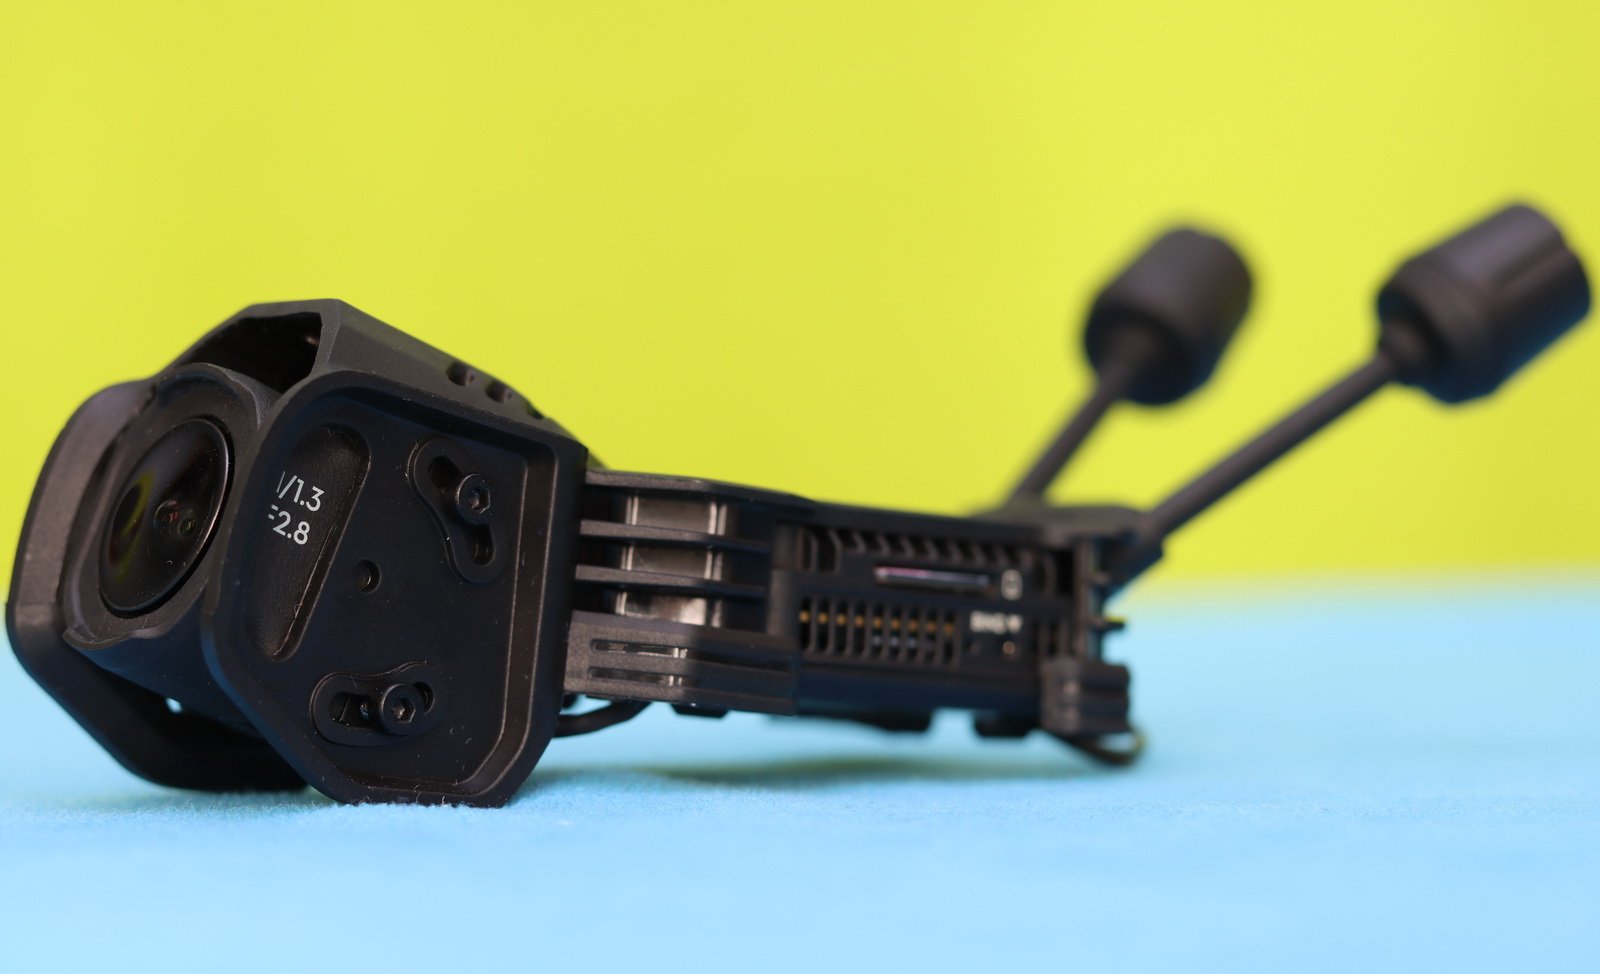
For the best range, you can keep the stock antennas. But for flight-time–oriented, lighter setups, you can replace them with the included tiny dipole ones. After installation, the micro SD slot and USB port of the O4 Air Unit Pro are easily accessible, as is the FC’s configuration port.
Price, availability, and options
The Pavo20 Pro 2, officially released on November 21, 2025, retains the same attractive price point as its predecessor:
You can choose between an onboard ELRS or SBUS (DJI) radio receiver. Additionally, a pair of LAVA 3S 550mAh 75C batteries is available for $26.99.
Key features
- Next-Gen Frame: The supported structure with guided mounting points and 4-screw design makes assembly quick and incredibly rigid.
- O4 & O4 Pro Compatibility: A redesigned carbon plate seamlessly integrates both O4 and O4 Pro for stunning HD footage and build versatility. The O4 Air Unit bracket ensures that every frame you capture is perfectly smooth.
- Lightweight Powerhouse: Weighing only 107.7g (O4 Pro Version), this 2.2″ cinewhoop is the perfect gateway for DJI pilots to dive into FPV.
- Freestyle-Tuned Propulsion: The co-developed GF 2218 3-Blade Props and LAVA 1104 | 7200KV Brushless Motors offer unparalleled thrust, while the aerodynamic frame adds an 8–11% boost for aggressive maneuvers.
- Flight Controller: The ultra-light F4 2-3S 20A AIO FC V1 (5.92g) is engineered for crisp digital performance, offering enhanced computing power and rapid response for precise freestyle control.
- New RGB LED Strip (WS2812B): Enhanced visibility for in-flight orientation and a striking visual presence.
BetaFPV Pavo20 Pro II: Flight performance
Using the same propulsion system (motors and propellers), AIO flight controller, and frame geometry as its predecessor, the flight characteristics were largely predictable. Out of the box, the Pavo20 Pro II is well-tuned and flies confidently. On a 3S battery, it delivers slightly more power than the Pavo Pico II, resulting in improved thrust and better authority outdoors, particularly when flying in mild wind conditions.
My first test flights were on calm, windless days, and the Pavo20 Pro II was super stable and easy to keep in position. I averaged 4–6 minutes of flight time using the stock 3S 550 mAh LiHV battery. With the LEDs turned off, flight time was slightly better; once enabled, the extra weight (around 8 grams) and power draw of the LED strip slightly reduced endurance. Using color effects and moderate brightness, I typically saw a reduction of around half a minute compared to flying without LEDs. It’s a reasonable trade-off for the added visibility and visual flair, especially for line-of-sight flying or seasonal shots. At full white and 100% brightness, you can expect a loss of one minute or more of flight time.

Top Whoop-Style Drones with O4 Onboard: Pavo20 Pro II alternatives
A few months ago, I reviewed the DarwinFPV CineApe20, which also supports both O4 Pro and O4 Lite and even claims parts compatibility with the Pavo20. What I liked most about the CineApe20 was the pre-installed GPS module.
The GEPRC DarkStar22 HD O4 Pro is also a serious contender to the Pavo20 Pro II. GEPRC nailed the design of the DarkStar22 with its orange canopy and RGB LED strip. Powered by a slightly higher‑capacity battery (3S 720 mAh), you can expect a bit longer flight time. The O4 Pro bracket’s design includes a dedicated spot for a GPS module installation.
Sub250 released the DollyFly V2 HD O4 Pro Whoop in two sizes—16 (1.6″) and 25 (2.5″). With 2.2″ propellers, the Pavo20 Pro II sits squarely between the two. While smaller drones are ideal for confined spaces, larger platforms offer greater stability and are better suited for outdoor flight in windy conditions.
You Can Trust Our Reviews!
Since 2014, FirstQuadcopter has reviewed, thoroughly tested, and rated hundreds of products, including drones, gimbals, power stations, action cameras, 3D printers, video lights, and other high-tech gear to help you make better buying decisions.
We don’t do paid reviews or agree to affiliate links. All products are tested fairly and equally, and if anything changes over time, I will update the written reviews.
As always, if you found this review helpful, don’t forget to like, share, comment, and bookmark for more content like this!
With that, I’d like to wish you smooth flights, clear skies, and plenty of airtime this holiday season. Merry Christmas and a Happy New Year — may 2026 bring you even better drones, calmer winds, and more unforgettable flights! 🎄✨