

The Foxwhoop25 is advertised with the ‘Unbreakable drone’ headline. Foxeer even promises a lifetime warranty for the protection guard. Some dude on YouTube did a car-crushing test. Being strong and slightly flexible at the same time passed the torture. Of course, this does not mean, that if you fly at full speed in a concrete wall nothing bad will happen.
There are two colour options (teal and green) and 3 FPV versions (Analog, Vista, and HDZero). In addition to the BNF versions, you can purchase just the frame if you want to build your own CineWhoop.
Original parts (recommended by the manufacturer)
- FoxWhoop 2.5 frame kit;
- Foxeer 45A Reaper AIO V2 flight controller;
- Datura 1404 3850KV motors with Dalprop New Cyclone T2530 propellers;
- Optional Caddx Vista, HDZero Digital or Reaper Nano 350mW Analog VTX.
Foxeer Foxwhoop 25 review
Disclosure: I received this 2.5″ frame kit as part of a product review collaboration with Foxeer. Product specs and quality may vary according to the manufacturer’s reliability, so I cannot guarantee that you will get exactly the same frame as seen in my article.
When I read for the first time about the Foxwhoop 25, I contacted Foxeer regarding the possibility of testing their new ‘Unbreakable’ CineWhoop drone. As they already sent out all review units, they offered me only the frame kit. Due to incomplete shipping details (missing county name), they had to send it 3 times till I finally got it.
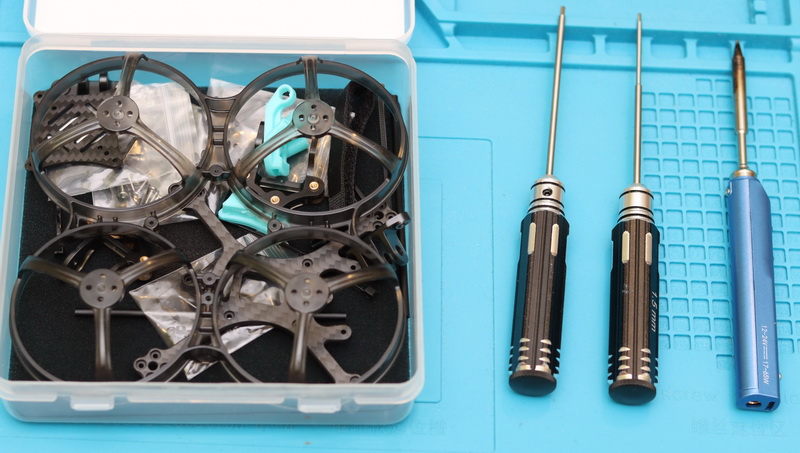
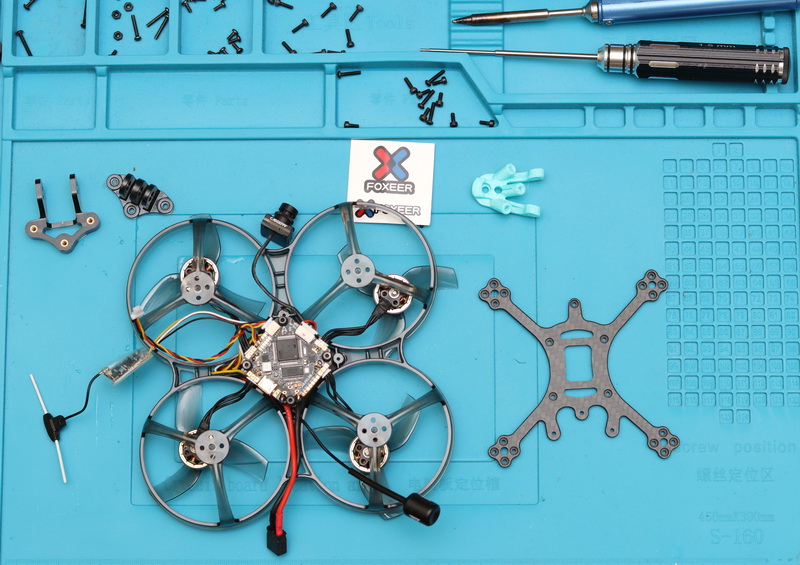
The kit is packed in a nice transparent plastic box. Below, you can find the detailed list of the included parts. Unfortunately, Foxeer does not provide any assembly instruction in the box or online.
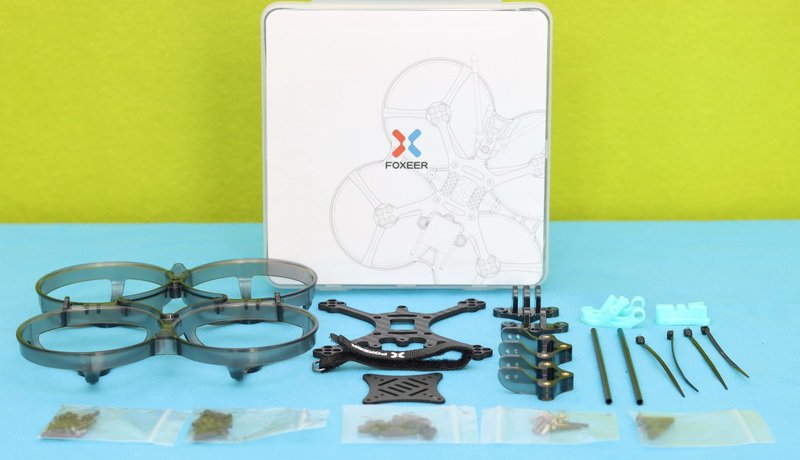
Frame kit parts
- 360° Propeller guard;
- Top and bottom carbon fibre plates;
- 3D printed action camera mount and FPV camera mounts (19cm and 14cm);
- Antenna/Receiver TPU Mount
- Receiver Antenna Protector Tube with Cap
- Battery Anti-slip Mat
- 10x160mm Silicon Battery Strap
- M2*20 and M2*6.5 standoff;
- Bag of screws (M2*8mm x 4, M2*7mm x 16, M2*7mm x 8, M2*5mm x 8, M2*4mm x 2, M3*16mm x 1, M2*12mm x 4, M2*10 x 4, and Plastic Nuts x 10.
At a glance
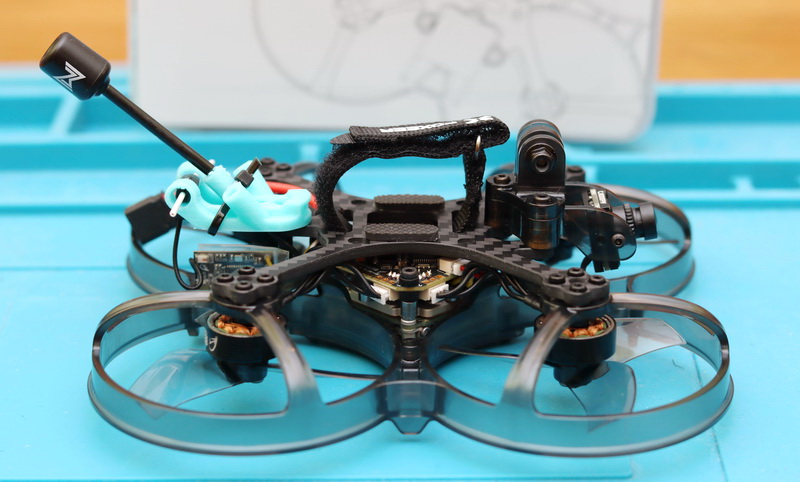
The Foxwhoop 25 CineWhoop frame kit has 4 main components: top plate, bottom plate, prop guard, and mounts (camera & RX+vTX antennas). While the top plate is intended to install the motors and flight controller, the bottom plate is for the VTX (Caddx Vista/HDZero). The frame guard with the bottom plate attaches to the top plate through the 16 motor screws. Additionally, there is also a standoff on the tail that holds together the two main parts.
The included 3D printer antenna mount accepts T and V-type RX antennas. It is attached to the top plate using a single screw which gives the flexibility needed in case of a crash.
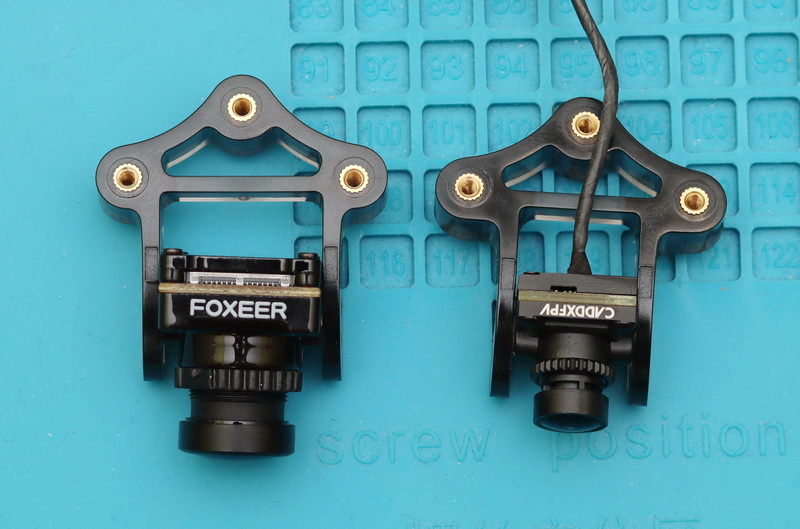
Foxeer provides two sizes of FPV camera mounts (16 and 19mm), so you are covered for the majority of available cameras.
For financial reasons, instead of using the original parts, I opted to use my PAVO 25 as a donor for the electronic components (motors, flight controller, camera, vTX, and RX). Its convenient plug-and-play design allows easy disassembling.
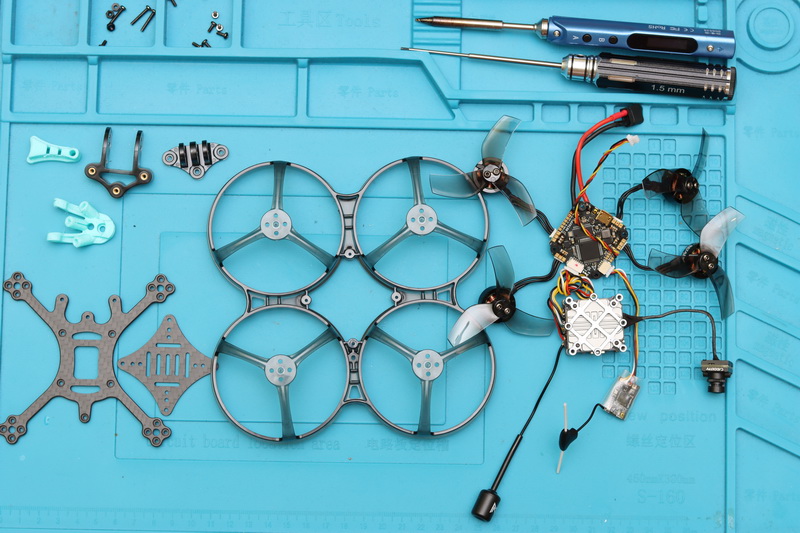
Almost all flight controllers, including my F405 AIO, have an arrow that indicates the mounting orientation on the frame. Also, each motor output is labelled accordingly. In case it is needed, these ‘hardware’ settings can be changed also from the BetaFlight Configurator (BFC).
As the FoxWhoop’s top plate is specially designed (mounting points) for the Foxeer 45A Reaper AIO V2 flight controller, I had to mount my FC on top of the Caddx Vista. I used rubber grommets for soft installation.

After I installed the motors, I noticed slight friction when I tried to spin them. Initially, I thought that I used screws that were too long, but after a more accurate visual inspection, I noticed that the motor shaft touches the blade guard -instead of being perforated as it has only a small depth. To fix this problem I drilled a 2.5mm hole next to the shaft, this also helps in cooling the motors.
The rest of the building process was easy. As the hardware was already configured and tuned in BFC, I was ready for my first flight in just 2 hours.
Is it indestructible?
Till now, I had only a few flights and a single crash with the FoxWhoop25 drone. The frame feels very solid and can take light collisions for sure. In order to reduce the impact force, when crash\collision is inevitable, it is recommended to stop motors immediately (disarm). This will also help to avoid breaking the propellers or even worth damaging the motors.
Remember that Foxeer’s lifetime warranty is valid for normal usage, so if you hit it with a hammer, the damage will not be covered :)


Can this little thing carry a GoPro 11 Mini?
what are the best motors for the Foxeer Foxwhoop 25 frame?
most durable cinewhoop frame ever!
I’ve been looking for something small with a Whoop guard that can carry an Insta360 GO2. This looks perfect for the job!
I bought the frame kit to make a custom build Cinewhoop for GoPro Bones….
The FoxWhoop25 is tough drone ! Perfect for beginners
That’s a great little backyard ripper!
thanks! it is nice to know that you can use old parts from crashed drones.