

Today, I had to review the Freewell anamorphic lens for the DJI Mavic Air 2 drone in a stunning location in Italy, but let’s talk about anamorphic lenses or anamorphic format first.
The process of anamorphosis optics was developed by the French astronomer and inventor Henri Chrétien. The optical process is called ‘Hypergonar’ and it is capable of showing a field of view of 180 degrees. Later, the technology was first used in a cinematic context.
Back in time movies were recorded on 35 millimeters films with spherical lenses but whenever cinematographers wanted to film wider formats, they would waste a lot of the film because the film was presenting black bars at the top and at the bottom of the image, simply because the aspect ratio of these images was different compared to the usual aspect ratio they were using at the time, and materially, there was a lot of waste of the actual film. That’s when they started to use anamorphic lenses.


Basically, an anamorphic lens squeezes the image horizontally, making it look taller than what it really is, and then, in post-production, they used a different lens to de-squeeze this image and turn it back to its original aspect ratio. In a nutshell, using these lenses, we can achieve a wider field of view compared to the spherical lenses.
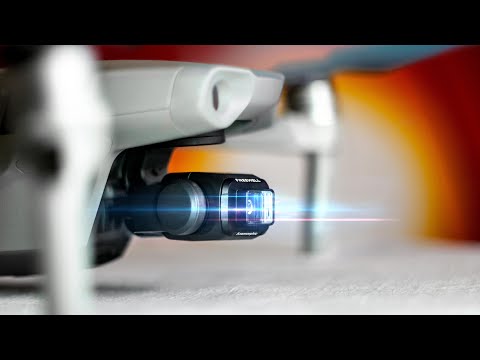
Freewell Anamorphic lens gives a new perspective for your Mavic Air 2
The Freewell anamorphic lens is very easy to mount on the Air 2’s camera and it looks good too. Hope that the extra weight will not stress too much the sensitive gimbal.
One of the downsides of having this lens is that you can’t mount ND filters and anamorphic lenses at the same time which means also you want to compromise the shutter speed, ISO, and motion blur of your image. Although, Freewell now released anamorphic lenses that act also as ND filters.
Testing parameters and post-processing
During my test, I was recording in 4k@60 frames per second to have the maximum resolution, the maximum quality of the image, and a bit of slow motion. The shutter speed was double my frame rate which was set at 1/120th but the image was still very bright, so I had to lower the ISO to 100. At that point, the image was still too bright and I had to compromise the motion blur and set the shutter speed to 1/1000 of a second.
In post-production, all I needed to know was that the lens has a de-squeeze factor of 1.15, which means that the image is squeezed 115 percent vertically so what we want to do during the video editing process is just to reverse that process and de-squeeze the image 115%, and you can do this simply in Premiere Pro. I had to change the sequence settings from Ultra HD, which is 3840 pixels by 2160, to a horizontal resolution of 4416 pixels. That’s very simple math, as 115% of 3840 is 4416.
A simple way to also see if your image is reflecting the right aspect ratio is to film something spherical so, in post-production when you de-squeeze the image, you can easily understand if the proportions are correct.
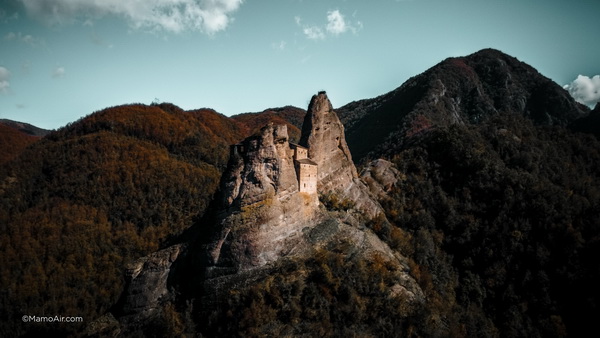
The Results
The lens does deliver what it promises, in terms of including more view inside the frame, and I didn’t notice any change of tone and temperature of the image, which is good.
But when I zoomed into the images, I noticed some blurriness issues. With this anamorphic lens, nothing is really on focus and that’s was a big downside for me. I also noticed that the noise becomes a bit higher. I was overall happy about the look of the video, especially after grading the footage, but still, the blurriness of the image somehow bothered me, just by knowing that it was there.

Conclusions
If I had to choose between ND filters and an anamorphic lens for my Mavic Air 2 drone, I would invest that money for the filters and keep a natural motion blur rather than having a not very focused image and buy the anamorphic lens. I think you can achieve the same image results just by moving the drone a bit further away from your subject and include more view in the frame.
If you want to test the lens yourself anyway, I drop a link here: https://amzn.to/3nFJqEP
Thanks for watching and fly safe!


Did you use a circular object to confirm the 1.15 squeeze. I purchased the 1.15 anamorphic lens for my pocket 2 and it’s actually 1.09. Timeline had to set to 3840 x 1994 to get a true circle.
Sorry, but the “blurriness” this lens adds to the Air 2 is actually a good thing since the stock video of the Air 2 is way too artificially sharpened. If you want that digital look, then by all means go stock. As a filmmaker, I prefer the film look that this lens somehow provides naturally. FYI, they now have anamorphic lenses with ND filters, so motion blur + analog film look = a winner.
I had a bad experience with this lens on my Mavic Air 2. 3 to 5 minutes into a flight, the gimbal overload occurs and from then onwards the video becomes shaky.
Hi Tom, thanks for the feedback. I actually didn’t have any overload problem…but wasn’t very happy about the noise the lens add to the image.;-) Safe flights!