

I tested tons of FPV drones in the last few years, but this Pavo30 will be the first with the BetaFPV logo. I like playing with CineWhoops and I wanted to get one in my hand since the first rumors. My BetaFPV Pavo30 review covers initial setup, binding instructions, and flight experience.
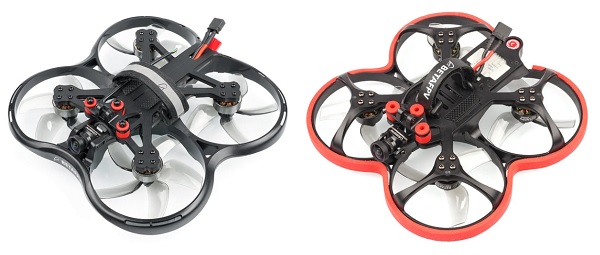
Established in February 2017, BetaFPV is a relatively new quadcopter brand. They focus on creating FPV drones and parts with superior quality by helping more people get into FPV hobby. The Pavo30 is the direct successor of the 95X V3. It adopts a similar pusher (inverted motors) design, just in a larger size (95mm vs 118mm). Actually, the Pavo30 looks like a 95X V3 on steroids.
Like its smaller brother, the BetaFPV Pavo30 is available with two FPV systems (analog and HD digital). Besides the camera and VTX difference, these two versions adopt a separate propulsion system too (1505-3400KV motor + HQ75 5-blade prop vs 1506- 3000KV motor + Gemfan D76 5-Blade prop).
BetaFPV Pavo30 CineWhoop in-depth review
Disclosure: I received this Pusher CineWhoop as part of a product review collaboration with BetaFPV. Product specs and quality may vary according to the manufacturer’s reliability, so I cannot guarantee that you will get a drone that performs the same as seen in my article.
I’ve been thinking about buying DJI FPV goggles for a while. The first time I tried, they were out of stock, and now the V2 is not available for orders in my country, therefore I had to opt for analog BetaFPV P30. Maybe in the close feature, I will review the digital Pavo 30 too.
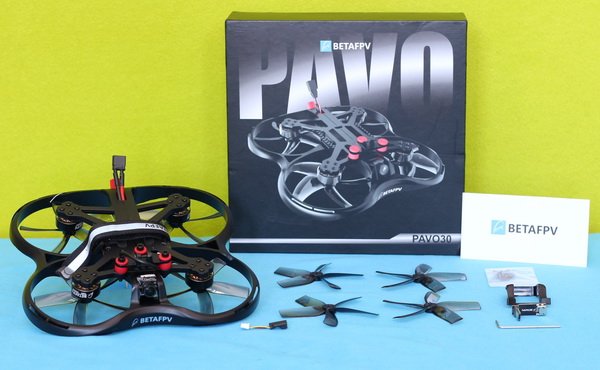

BetaFPV sent the Pavo30 with YunExpress and pre-installed FrSky (FCC version) radio receiver upon my request. There were also included in the box a set of spare propellers, FPV camera mounting frame, hex wrench, 90° USB adapter, and Naked GoPro power connector. No printed user manual was provided.
Design and build quality
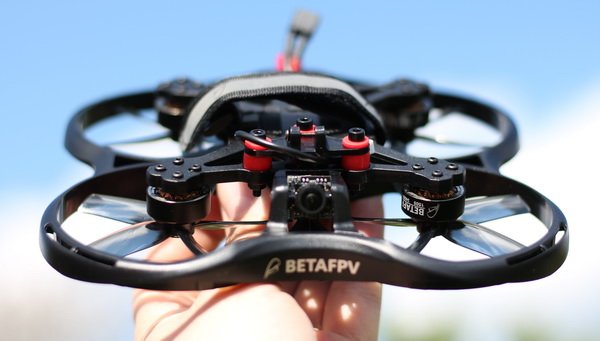
The Pano30 adopts a ‘Pusher Whoop’ design with duct blade protectors and inverted motors. The most visible difference between the PAVO30’s design and its predecessors is the absence of the red foam padding.

Pavo30’s frame is made from durable PA12 plastic. The inner carbon fiber brace that provides extra strengthens is barely visible.
Without an additional camera on top, its max height is just 46.8mm. If you have the skills, you can even fly it under a parked car. It measures 174x174mm with a 118mm wheelbase (diagonal motor-motor distance). Out of the box weighs just 146 grams (without battery). Centering the drone’s gravity provides extra maneuverability.

By definition, CineWhoops are designed to be installed with an additional UHD camera. For this purpose, the Pavo30 has in front a dedicated mount with 3 anti-vibration damping balls. Also, it comes with a pre-soldered SMO 4K camera power cable. In the case of using a Naked GoPro, there is an adapter cable included as well. The top plate has anti-slip rubber padding for battery installation.
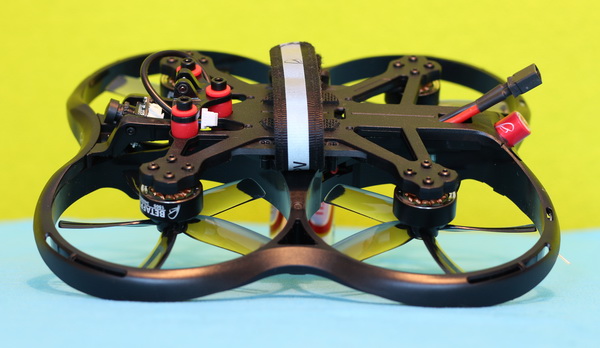

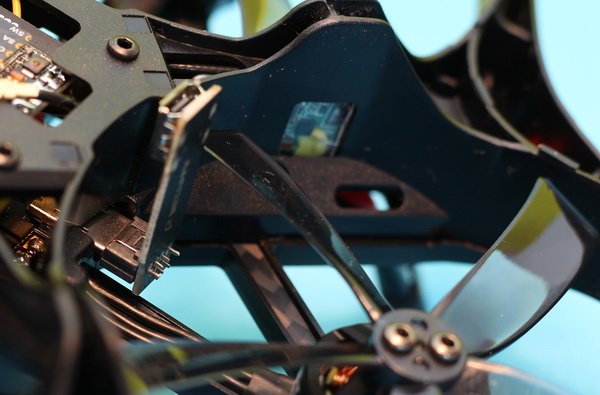
The radio receiver has its own compartment on the back, with a tiny window for the binding button. All the wires are well routed, with nothing left loose. Pavo 30 also hides the antennas within the frame, providing a super clean appearance.
Price, availability, and options
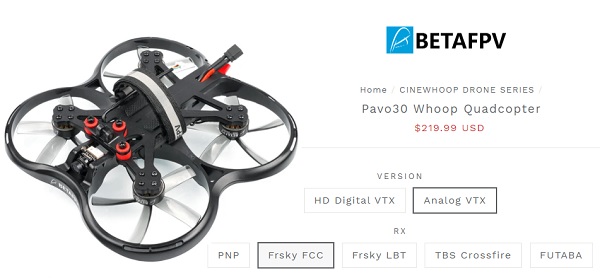
The BetaFPV Pavo30 (Analog + FrSky) seen in my review can be ordered from here for $219.99. It will cost you 30 bucks more in case that you want it with a TBS Crossfire receiver. As the CaddxFPV Nebula Nano Vista Kit alone costs $135, the digital Pavo30 is fairly priced for $309.99. For those who want to build their own 3-inch CineWhoop, the Pavo30 frame Kit can be purchased for $22.99. Pair of 4S 850mAh batteries are available for $37.99.

FPV system
BetaFPV offers the Pavo 30 CineWhoop with two types of FPV rigs. In comparison, the analog edition is equipped with a tiny Caddix ANT Nano camera and M02 5.8GHz VTX, the HD digital version with Nebula Nano camera and VISTA HD Digital VTX. The analog PAVO30 is about 30 grams lighter than the digital one, which is about the weight of an SMO 4K camera.
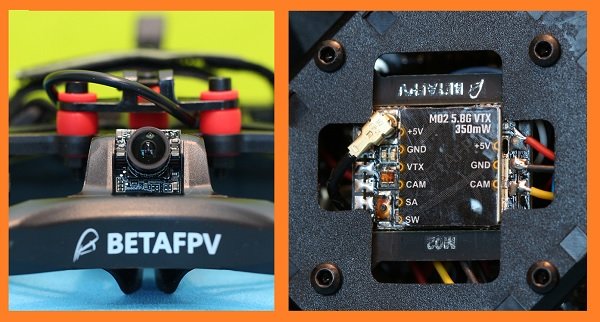

What I miss from the analog setup is the onboard recording. Maybe a Caddx Tarsier 4K camera would have been a better choice. The MC02 VTX features SmartAudio and up to 350mW broadcast power. According to BetaFPV, you can obtain up to 600 meters FPV range at the highest power rate.

BetaFPV Pavo30 battery options and flight time
I tested it with all my XT30 batteries that allowed keeping the take-off poundage under 055lbs. Using a 4s/650mAh battery weights 232 grams, respectively 246 grams with a 4S/850mAh LIPO pack. I also test it with 3s 850 mAh and 3s 450 mAh packs.
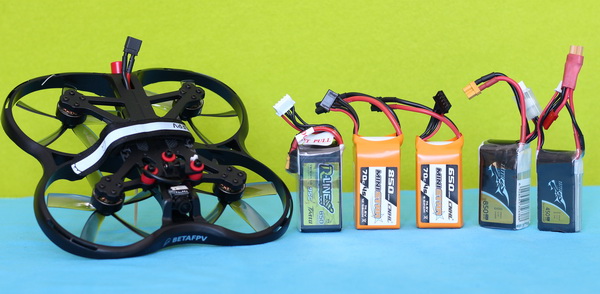

I got the best flight time using the 4S 850mAh pack. Without an extra camera on top in low wind conditions, it managed to stay in the air for about 9 minutes. I estimate that you get about 6-7 minutes with the same battery but with an SMO 4K or Naked GoPro.
Initial setup and BetaFlight configuration
In order to connect the F722 AIO flight controller to your computer, you need to insert the included 90° USB adapter (remember to remove it prior to flight because it blocks a propeller).

I suggest you make a configuration backup before making any changes. This operation can be done by running the ‘dump’ command from the CLI tab.
As most things were set correctly, I had to change only the aircraft name and adjust the OSD display as I’m used to.
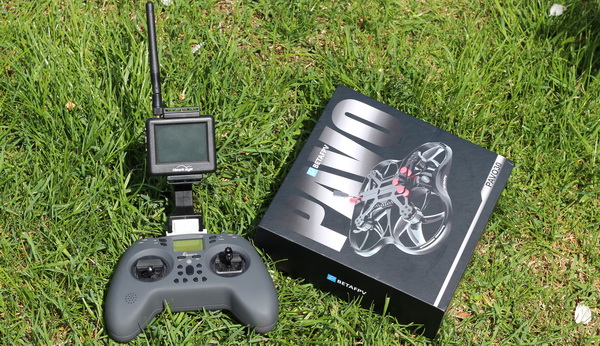
Binding with Jumper T-Lite
Firstly I created on my Jumper T-Lite transmitter a new model named ‘BetaFPV P3’ and set internal RF to FrSKy X D16. Next, I enabled the “Bind” option, then I powered on the Pavo 30 drone while using a toothpick to press and hold the receiver’s F/S button.

Now you can go back to the BetaFlight configurator and customize the stick assignment. Personally, I use the left two-position switch to Arm/Disarm the motors and the right 3 position switch to toggle between flight mods (poz1 – Stabilized, poz2 – Horizon, and poz3 – Acro). As ‘Air’ mode is always enabled, I assigned a switch that allows turning it off if need it.
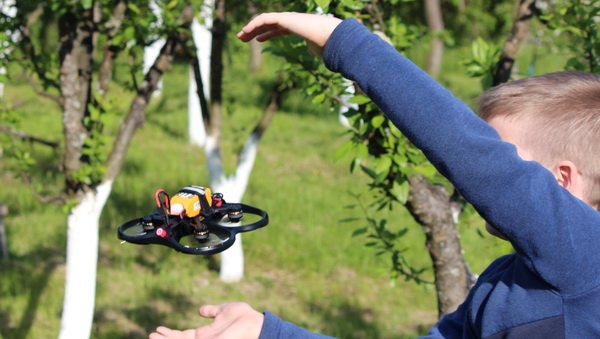
Flight experience
From unboxing to indoor test took less than one hour. Due to its pusher design, the props are close to the ground and you need to avoid taking off from puffy carpets or high grass. The best is to use a dedicated landing pad. I was a bit scared when I saw that the metal cover of the VTX pop-off for no reason. Besides mechanical protection, I think it improves heat dissipation as well, so I will solder it back.
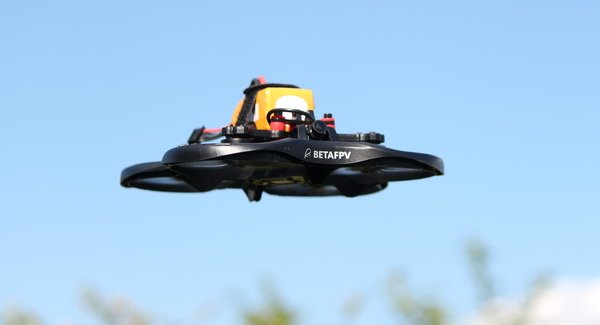

Compared to my Veyron 3 CineWhoop makes lots less noise. In low wind conditions is very stable without too much drifting. It has lots of power but can’t be compared to an ultralight (85gr vs 146gr) 3″ toothpick. The advantage of the Whoop prop guards comes when you bump into something accidentally. If you have luck, the drone will not even crash, and you can continue your flight. The PA12 material is flexible and durable too. If you are not flying into a concrete wall at full speed, will last many flights.

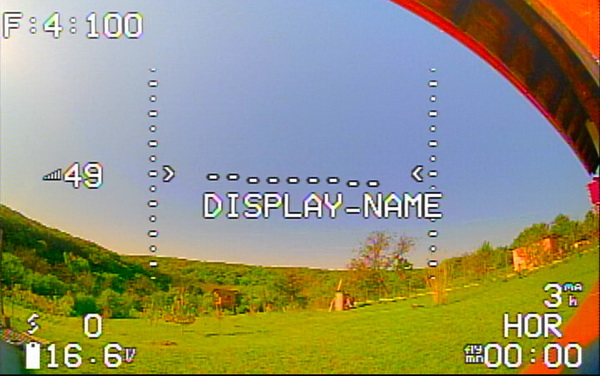
It does not have an onboard beeper but you can configure the OSD with a low battery alarm. The SmartAudio menu is present on Betaflight OS but there is no option to change VTX Channel or Power remotely. The tiny Caddx Ant camera has a good white balance and decent low-light performance. In sunlight, the colors are great, but it doesn’t handle sunlight that shines directly into the lens from a low angle.
Next, I will install a full-size action cam to see how it can handle the extra weight.


Does anyone know the typical flight time of the BetaFPV PAVO30? I’m curious how long it can fly on a full charge, especially for outdoor shoots.
Flight time is depending on the battery u use. Also your flight stile.
During our tests, we got flight times between 5 and 12 minutes.
I think building the new Pavo30 Pro with a 40A AIO FC. Will it be able to carry a full-size GoPro?
What size motors and props would you use on a 250g Whoop with O3 Air Unit
Cheers from Italy
Hi. Can you share “dump” file for Pavo30? thanks…
I can’t bind with the x20 or the radiomaster 16.
Visitor Rating: 2 Stars
Visitor Rating: 3 Stars
Had mine up and flying for a few days and love it!! Great CineWhoop for GoPro Bones
Visitor Rating: 4 Stars
Visitor Rating: 3 Stars
Suggestions on props for a Pavo 30 HD?
Visitor Rating: 3 Stars
El perdido la señal de la cámara analógica y no se como hacer el enlace con las gafas.Cual el el comando del bind? Gracias
He lost the signal from the analog camera and I don’t know how to make the link with the glasses. What is the bind command? Thanks
You need to search on your FPV goggles for the right channel, or you can change channel from BetaFlight configurator
Will 4s 650mah 100C be okay with Paco30?
Yes, anything between 650-1100mAh should be fine.
Visitor Rating: 5 Stars
I’m getting horrible range on 350mw. Is something wrong with the VTX or is it just the bad placement of the antenna?
Does anyone have beginner-friendly PIDs for Pavo30 with SMO4K?
Thanks!
Visitor Rating: 1 Stars
Now both Pavo30 (analog and digital) have the same 1506- 3000KV motors!
Can the Pavo30 frame take a digital Vista VTX?
Yes, Don! BetaFPV has a digital version of PAVO30 as well.
Visitor Rating: 5 Stars
This was my very first FPV drone. I crashed it hard in a month, then bought another one. PAVO30 has so much fun!
Visitor Rating: 1 Stars
very nice packaging, the protective frame looks really good quality and sturdy
Visitor Rating: 5 Stars
Visitor Rating: 5 Stars
Superb drone! Good upgrade from 95X V2. It’s more manageable, more powerful, and really stable and quieter too. With 4S 550 5-6 min. Super happy with this CineWhoop :)
Hello is there 6S version of Pavo30 or another 6S CineWhoop?
BetaFPV has only 4S version, for now
Visitor Rating: 5 Stars
This is really helpful. I have been thinking of buying this drone and the review is really great.
Does anyone have a great tune for the Pavo30 digital? Great review, BTW
Visitor Rating: 5 Stars
Visitor Rating: 5 Stars
Visitor Rating: 3 Stars
Visitor Rating: 4 Stars