

The fact that, after only 2 hours we published the article about the DTS GT200 drone, its authorized dealer contacted us regarding the possibility to review it, gives us confidence that we are doing a good job here on FirstQuadcopter. We will continually strive, during 2019, to provide even more exciting drone news and honest quadcopter reviews.
Zonda Hobby’s portfolio has three major product brands: “E-sky”, “DTS” and “GWY”. On their website, you can find a couple of RC helis and two racing drones. Both, DTS GT200 and DTS Q220 are offered in RFR aka PNP versions (no radio & battery).
Built around a highly integrated flight system (flight controller, ESC and VTX), the DTS GT200 quadcopter has a very clean aspect. Unfortunately for lazy pilots, the radio receiver is not integrated into the GWY007731 main controller unit, and they will need to make personally the installation. According to your radio system, you can opt for a DSM or SBUS connector cable. The main difference between the cables is that, while the first one powers the receiver with 3.3V, the second one powers it with 5V.

Zonda Hobby DTS GT200 drone review
Disclosure: I received this FPV drone from ZondaHobby (Rainbow Model Technology) in order to test it and make an in-depth review. Although the product was offered for free, all opinions in this review remain my own, and my partner in no way influenced me!
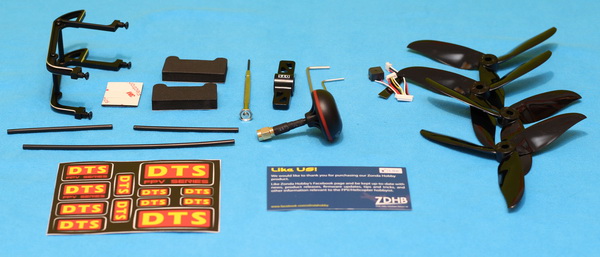
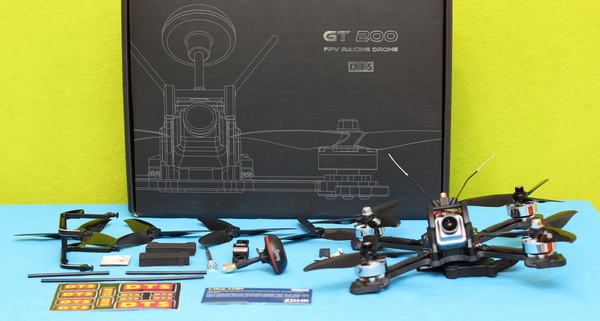
Every time I receive a new drone, I get enthusiastic like a 5-year-old boy on Christmas Eve. I can’t wait to get home and unpack my new toy. The DTS GT200 comes nicely packed in a black box. Besides the drone, I found the following accessories: a spare canopy, two sets of DTS 5046 props, GWY 5.8G circular polarized antenna, DSM radio cable, two radio receiver antenna protector tubes, DTS stickers, 3M adhesive taps, lots of tools (screwdriver, hex wrenches and prop nuts key) and user manual.

In-depth analysis
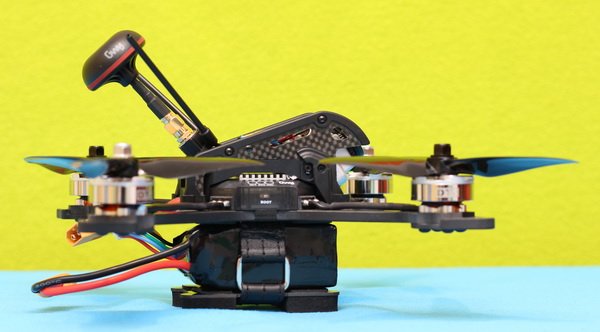
For sure, holding the ZDGB DTS GT200 in my hand looks at least as good as in the advertising photos. I could say that is beautifully manufactured, like a Swiss-made watch :). It has a super clean build with well-organized wires. Moreover, all the electronic parts are well protected. While all the frame parts, including the propellers, are black, the motors and the FPV camera have silver color. The nice black/silver contrast grants a very professional look for the DTS GT200 drone. Weighting about 372 grams, it is heavier than similar-sized FPV drones.
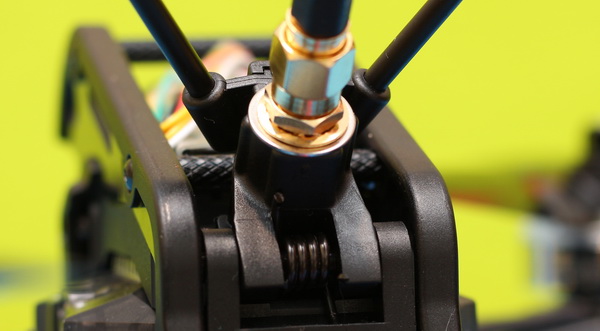
As I previously mentioned, the brain & heart of the GT200 quad is an all-in-one flight system. To ensure good heat dissipation, it has an aluminum heat sink on top. VTX buttons (CH & Band) and a micro USB port are on the left side of the main unit. As it should be normal, the battery cable with XT60 plug and FPV antenna pigtail is on rear. The antenna mount has a spring, which should reduce the shocks during crashes.

In order to allow stable take-off, the DTS GT200 has some kind of landing skid made from a carbon fiber plate and self-adhesive foam. The skid also secured the LIPO battery under the drone firmly. Both, battery contact plates are padded with non-slip rubber.
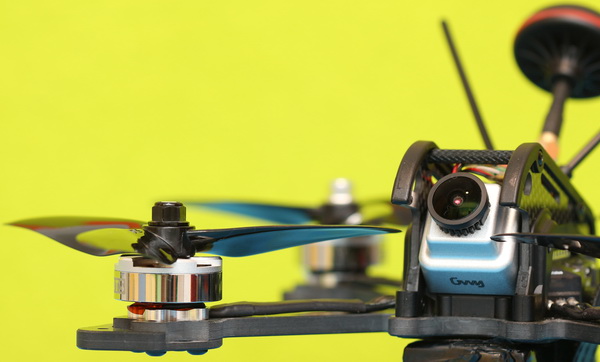
The RunCam Eagle 2 Pro camera is well protected by the aluminum canopy. You can adjust the angle of the camera according to your flight style. On top of the canopy, you can attach a second DVR camera. My Foxeer Legend 3 fits just perfectly.


At the end of each 4mm arm, there is a DTS 2500K brushless motor. During crashes, they are protected by carbon fiber motor guards.
DTS GT200 main parts
- 200mm sized carbon fiber frame (DTS007724);
- Aluminium canopy (DTS007727);
- Motor guards (DTS007725);
- All-in-one flight system – Flight controller, ESC & VTX (GWY007731);
- 2206-2500K brushless motors (DTS007732);
- DTS 5046 3-leaf propellers (DTS007729);
- RunCam Eagle 2 Pro w/ 2.1mm lens (GWY007734).
DTS GT200 review: Camera, FPV and OSD
As I already mentioned in the introduction part of my ZDHB GT200 review, DTS opted to use a RunCam Eagle 2 Pro (GWY edition) camera which doesn’t just have brilliant image quality but also very low latency. Eagles 2’s “Pro” version comes with built-in OSD (battery voltage, timer, and pilot name) and an on-board microphone.

If you want to fine-tune the camera’s settings, you will need an OSD keyboard.
By default, craft name, elapsed flight time, flight mode, and battery voltage OSD values are displayed on the FPV monitor. Of course, you can add more OSD info like virtual horizon and instant current.


The camera is paired with a 5.8G/48CH video transmitter with adjustable broadcast power. According to your needs, you can set 25, 200, or 600mW TX power.
DTS GT200 review review: Flight experience
First of all, Do not power ON the DTS GT 200 with installed propellers till everything is configured properly and double-checked. Another important thing is that the DTS GT 200 adopts a reversed motor direction, so the propellers need to be installed according to this (check the quick start guide for more details). Also, by default, if you arm the motors, they start to spin even at zero throttle.
Although I did these pre-flight steps many times, I’m always excited like the first time. You know that the first successful throttle is very important :)
Flight preparation (radio receiver installation & binding)
If you have the luck to own a radio receiver with a compatible plug, the installation process is very easy and can be done in just a few minutes. The manufacturer thought about everything. You have easy access to the radio plug, 3M adhesive tape applied, antenna holder, and antenna protector tube. Also, there is enough room for larger receivers like my FrSky XSR 16CH ACCST.
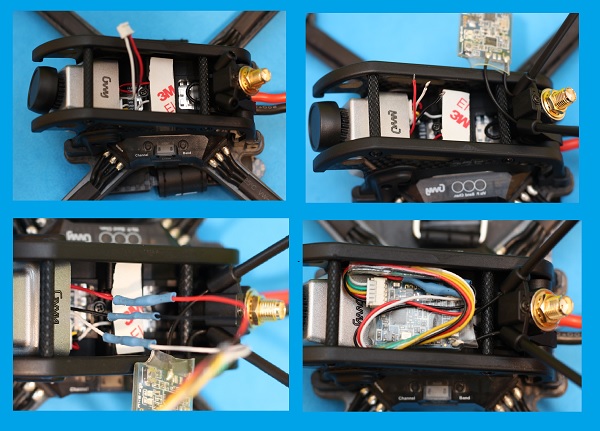

As not everything can be perfect, my receiver’s plug didn’t match the one provided with the DTS GT200, so I had to cut it down and solder together the wires. You have three wires: black – GND, red – 5V (for SBUS) and white – Signal.
Binding DTS GT200 with Taranis Q X7 transmitter
Firstly, I created a new model on my remote controller and named it “DTS GT200”. After that, under the “Model setup” screen, I set “Internal RF”, operation mode to “D16” and channel number to 16. Finally, I selected the “Bind” option. When the transmitter enters the “Bind” state, it makes a high-pitched beeping.


Now, you can plug the battery while you hold down the receiver’s F/S button. Successful binding will be confirmed by a solid green light.
Critical BetaFlight settings
If you are completely new in the field, I suggest you to edit only the following settings:
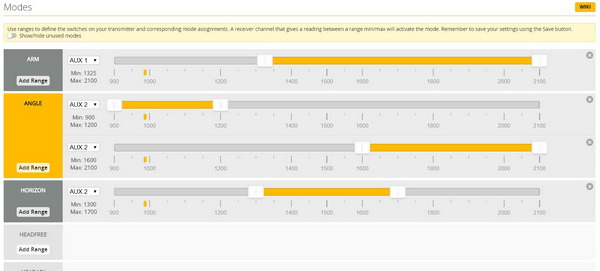
- Channel mapping & switch assignment. Here, you need to assign switches to arm/disarm motors, to toggle between flight modes, and to activate the buzzer. Additionally, you can set a pre-arm switch (this safety measurement is necessary if you have kids);
- OSD values: You can customize telemetry info to your OSD screen.

You can remotely access the BetaFlight OSD menu using the following stick combination: Throttle Mid + YAW Left + Pitch Forward.
How it performs in the air?
The first take-off was a nightmare, I almost cut the carpet, and my wife was about to kill me :D. While I always suggest reading the drone manual before powering ON, somehow, I skipped this step. I installed the propellers normally, but the motors have reversed direction. After 30 minutes of guessing which may be the problem for not taking off and just flipping on one side, I took the manual to read it. There is a dedicated page that warns you that the motors have reversed direction, and it shows the right order of the props. Switching the props, I finally managed to take off, finally :).
Updates: Following my suggestion, Zonda Hobby added a “Caution” sticker, which warns about the reversed motor direction.


Although my flight field was covered by about 20cm of snow, and it was windy, I went out for a test flight. For the maiden, I used a freshly charged 4s – 1300mAh battery.
Take-off was smooth, but after a few flight movements, I felt it a bit shaggy and heard a pitched noise. I landed immediately and performed a visual inspection. One of the prop nuts was not tight enough. Two minutes later, fix it and get back in the air. The rest of the flight was smooth and pleasant.

I tried a few punch-outs and flips. Although it has good power, I felt it was less nimble than my Kopis 2. In my opinion, the difference could be due to the weight difference (372 vs 282 grams).
FPV quality is excellent; the RunCam camera does a good job. It has a good response on light level changes and negligible latency. Only a slight part of the front propellers are visible in the video feed.
My first flight ended after 6 minutes. Of course, this time, it could be less if you fly more aggressively.
Price and Availability
The DTS GT200 can be ordered either directly from Zonda Hobby or from other reputable online retailers. You can find it on Bangggood for US$279.32. Don’t forget that you will need to additionally to purchase a compatible radio system (receiver & transmitter) and flight battery.


Visitor Rating: 3 Stars
Visitor Rating: 5 Stars
Visitor Rating: 5 Stars
Visitor Rating: 5 Stars
Visitor Rating: 4 Stars
Visitor Rating: 5 Stars
Visitor Rating: 3 Stars
Visitor Rating: 5 Stars
Visitor Rating: 5 Stars
Visitor Rating: 5 Stars
Visitor Rating: 5 Stars
Visitor Rating: 5 Stars
Visitor Rating: 5 Stars
Visitor Rating: 3 Stars
Visitor Rating: 5 Stars
Visitor Rating: 5 Stars
Visitor Rating: 5 Stars
Visitor Rating: 5 Stars
Visitor Rating: 2 Stars
Visitor Rating: 4 Stars