
The BETAFPV Pavo Pico is a micro-class CineWhoop-style flying platform intended for DJI O3, Walksnail Avatar, and Caddx Vista FPV systems. BetaFPV sent out a couple of PAVO PICO kits for evaluation a few months before the official release. FPV enthusiasts across the globe gave their feedback about what improvements should be made to be a close-to-perfect product.
A micro CineWhoop is a small, lightweight FPV drone designed for indoor and outdoor flight. Its defining characteristic is incorporating a protective 360° frame, which enhances durability and allows the drone to fly safely around people and objects. This feature makes them ideal for capturing cinematic footage in tight spaces and dynamic environments.
When I showed a friend some photos of my PAVO PICO O3, he said it looked like a rickety DJI AVATA. Somehow he’s right. It is a flying O3 AU camera with the minimum parts around it.

BETAFPV Pavo Pico hands-on review
Disclosure: I received this CineWhoop kit as part of a product review collaboration with BetaFPV. Product specs and quality may vary according to the manufacturer’s reliability, so I cannot guarantee that you will get a drone that performs the same as seen in my article.
The PAVO Pico comes in a stylish foam-padded cardboard box with one flight battery, an FC to Type-C adaptor, two VTX brackets, two antenna mounts, two O3 mini dipole antennas, a set of spare propellers, a 3D printed lens hood, protective UV lens filter, a bag of screws, and a sheet of brand stickers. BetaFPV also sent me two sets of spare frame kits, a blue and a grey one.

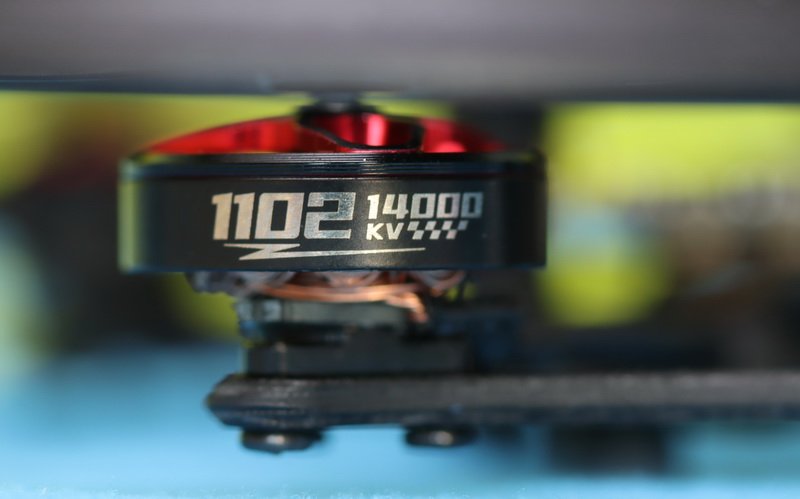
The drone comes almost fully assembled with all the electronic connections made. You just need to install the O3 unit into the dedicated cage and connect the plug. The PAVO PICO uses the third-generation BetaFPV’s F4 AIO V3 flight controller with an integrated 12A ESC and Serial ELRS 2.4GHz radio receiver. A short red wire serves as the antenna for the RX. The tiny 1102 KV14000 brushless motors are matched with Gemfan 45mm 3-blade propellers. For easy maintenance, the motors have connectors.
The Pavo Pico has a wheelbase of 81mm and consists of three parts. A 2mm thick carbon fiber frame, PA12 360° duct blade protector, and the FPV system cage (bracket).

BetaFPV Pavo Pico: Assembly instructions
First, you must replace the stock 2in1 antenna with two tiny dipole antennas included in the Pavo Pico kit -this will save you a couple of grams. If you prefer keeping the original antenna for better range, you can use the included TPU mount.
Next, you can install the O3 VTX and FPV Camera inside the injection-molded plastic mount and secure it on top of the frame. Remember to use rubber damping balls to reduce the vibration coming from the frame. Also, avoid over-tightening the screws; otherwise, there will be lots of jello. Lastly, you need to plug in the O3 AU cable.

How to bind Pavo Pico with a transmitter?
As mentioned, the Pavo Pico has a built-in serial ELRS radio receiver. You need to power ON/OFF the drone three times to activate the binding mode. You need to be sure that RX and TX run the same major ExpressLRS release (1.xx, 2.xx, or 3.xx). Otherwise, the pairing process will fail.
PAVO Pico: BetaFlight configuration
The PAVO PICO comes pre-configured. You just need to set up the arm switch in the Modes tab and customize the OSD screen. In order to connect the flight controller to your computer, you must use the tiny Type-C adapter PCB included in the box. Honestly, I do not understand why the FC lacks a USB port.

PAVO Pico: Flight time and battery options
Out of the box, the Pavo Pico O3 edition comes with the BetaFPV 2S/450mAh battery. The battery bay is designed for the size of this battery. If you want to use a different LIPO pack, you can cut down the battery cage and use a Velcro band. During my tests, I got 3 to 4 minutes of flight time with the original battery. In my oppionion, with a 650mAh pack, you can get close to six minutes of flight time.

Price, availability, and options
The Pavo Pico PNP kit is available for two FPV options. The O3 version shown in this review is priced at $104.99, and the Walksnail Avatar/Caddx Vista edition for $99.99. The price difference is that the O3 includes a 3D-printed lens hood and a protector UV filter. You can opt for ELRS 2.4GHz or TBS radio receiver according to your existing transmitter. The O3 edition is natively compatible with the DJI FPV V2 controller. Spare frame kits are available in four colors for $8.99. A spare PA12 Whoop duct costs only $3.49.
Note: According to BetaFPV, the first batch of the Pavo Pico has been sold out quickly. The next batch of supplies is expected to go on sale by early of Aug 2023.
Update: Pavo Pico is back in stock starting with Aug 11th, 2023. Subscibing to their Discord group, you can get 8% discount on your order!

Pavo Pico frame kit (no electronics)
The frameset can be purchased separately if you prefer to build your own 100g CineWhoop. The kit includes one Whoop duct guard, two VTX brackets, one main CF frame, a CF VTX adaptor, two O3\Avatar HD V2 dipole antennas, and a bag of screws. You can choose from black, transparent, blue, and grey. It has a 20x20mm mounting pattern for the flight controller. The kit includes soft mounts for FC and VTX.
Recommended parts for Pavo Pico frame
- FC&ESC: F4 1S 12A AIO V3 or F4 1S 12A AIO V2.2
- Motor: 1102 | 14000kv Brushless Motor (3-M1.4-φ6.6 mount)
- Propeller: GF 45mm 3-Blade Propeller or GF 45mm 2-Blade Propeller
- Battery: 2S 450mAh-650mAh 45C-75C Lipo Battery
- Support HD Digital VTX: DJI O3 HD Digital VTX, Avatar HD Digital VTX, Vista HD Digital VTX, or Runcam Link
BetaFPV Pico Pavo: Key features
[Super light and compact CineWhoop] Fully equipped, the PAVO PICO weighs less than 100 grams making it the lightest 4K FPV drone.
[Split-design HD VTX mounting bracket] The Pavo Pico is compatible with the DJI O3 Air Unit, Walksnail Avatar HD Pro, and Caddx Vista HD digital FPV systems. The side bracket, rubber damper vibration-damping design, lens holder, and antenna have all been reinforced to suppress low-frequency vibration and enhance the safety of HD VTX, ensuring a stable output of high-definition videos.
[Optimized for best flight performance] The battery bay and HD VTX mounting bracket duct height have been reduced to enhance the overall flying experience. DIY battery fixing methods are also supported, making them compatible with batteries of varying sizes and capacities
[Durable and easy to maintain] The frame uses PA12 material, known for its exceptional impact resistance and effortless installation process. The electronics can be swapped from one frame to another in less than 15 minutes.
[High-performance all-in-one flight controller] The newly developed F4 1S 12A AIO Brushless FC V3 weighs only 4.2 grams and is optimized for HD digital VTX. Its improved computing power, high response speed, and stable flight make it an ideal choice for HD whoops.
[3D printed lens hood + UV filter] To safeguard the DJI O3 camera lens and maintain consistent high-definition video output during flight, both a lens filter and a lens protection mount are included.
BetaFPV PavoPico: Flight experience
In the last two weeks, I had more than 50th test flights. Despite its small size, the Pavo Pico is surprisingly fast and agile. You can fly into tight spaces where it would be impossible with a 5-inch racing beast. I got a stable video and RX signal in a radius of 500 meters.
With the stock 450mAh battery, I got a flight time between 3 and 4 minutes. If you push the throttle at the highest position, you get a low battery alarm in 1-2 seconds. The 45C discharger rate is not enough for this little baby. If you like freestyling, a 75C-100C LIPO would be more appropriate.
For now, I had only a few minor crashes, and the PavoPico proved to be quite durable. However, based on my experience with lightweight drones that use thin materials, they tend to break in direct collision with walls or other hard surfaces. As the most expensive part of this tiny drone is the DJI O3 Air Unit, and the camera’s lens is quite exposed, I recommend using the 3D printed lens hood and UV filter.

BetaFPV Pavo Pico: Future upgrades
Despite its small size, the Pavo Pico has powerful hardware inside that allows it to fly pretty far, and if something bad happens and crashes your drone, it will be hard to find it. The first thing you can add is a self-powered buzzer that will make a loud noise, indicating the position of the crashed aircraft. The VIFLY Beacon is an excellent choice because it has a searchlight and does not require wiring.
The second safety upgrade would be adding a GPS module. This will give me telemetry data such as flight distance, speed, and the aircraft’s exact location. The BetaFPV F4 1S 12A AIO V3 FC has four UART ports, and the UART1 is free to use for the GPS module. Also, there is lots of space above the O3 VTX to install GPS. This upgrade will also add fail-safe RTH capability for the Pavo Pico.
If you are looking for a dedicated storage solution, Daniel Schenk shared its 3D printable case on Thingiverse that can store the Pavo Pico and six flight LIPOs. For those who prefer Walksnail Avatar HD Pro over the DJI O3, an STL file to print a dedicated mount is also available.
Does anyone have a cage to be able to install the new DJI O4 Air Unit (Lite not Pro) on the Pavo Pico. I can’t find any details on BetaFPV about this…
We shared some STL files for the O4 series. It also includes mounting frame for the Pavo Pico. Check here: https://www.firstquadcopter.com/accessories/3d-printers/3d-print-stl-files-for-dji-o4-air-unit-and-o4-air-unit-pro/
what a cutie!
Pavo Pico is the best micro frame for O3 Air Unit!!!
I don’t like the propeller protectors on the Pavo Pico, are too thin and break easily…
Best indoor / Garage / Park FPV drone. Small and Agile!
For indoor is recommended to scale throttle by 20-30%
I love how invisible and quite this drone is.
How do you know it’s in binding mode. Green led has slow and fast blinking. And
How do I know it’s on been bound. What’s the led indicator?
When ELRS is in binding mode should flash twice rapidly, pause, and so on
Remember, that both Pavo PICO’s RX and TX module needs to be the same major ELRS version (2.xx or 3.xx). Also check for binding phrase.
Insanely small, easy to maneuver and agile. It’s a flying O3 camera for the mass.
cool little yard ripper!
Did you get any black screen during your tests? The BEC can handle O3’s power need?
No black screen problem. I think the Pavo Pico powers the O3 AU directly from the main battery.
Hi,
I want to order this little O3 beast, I read in your review that it has a xt30 battery plug, but BetaFPV just released some new battery connectors named “BT3.0”. 450mah packs are already available. Do you know if fits this new battery? I prefer the new “wireless” LIPO pack.
Looking to build my first fpv drone using this pavo pico frame .I little to no experience so any helpful advice is appreciated.
Thanks
Darius
Use BetaFPV AIO FC and Motors. It should be OK
Has the promo expired?