
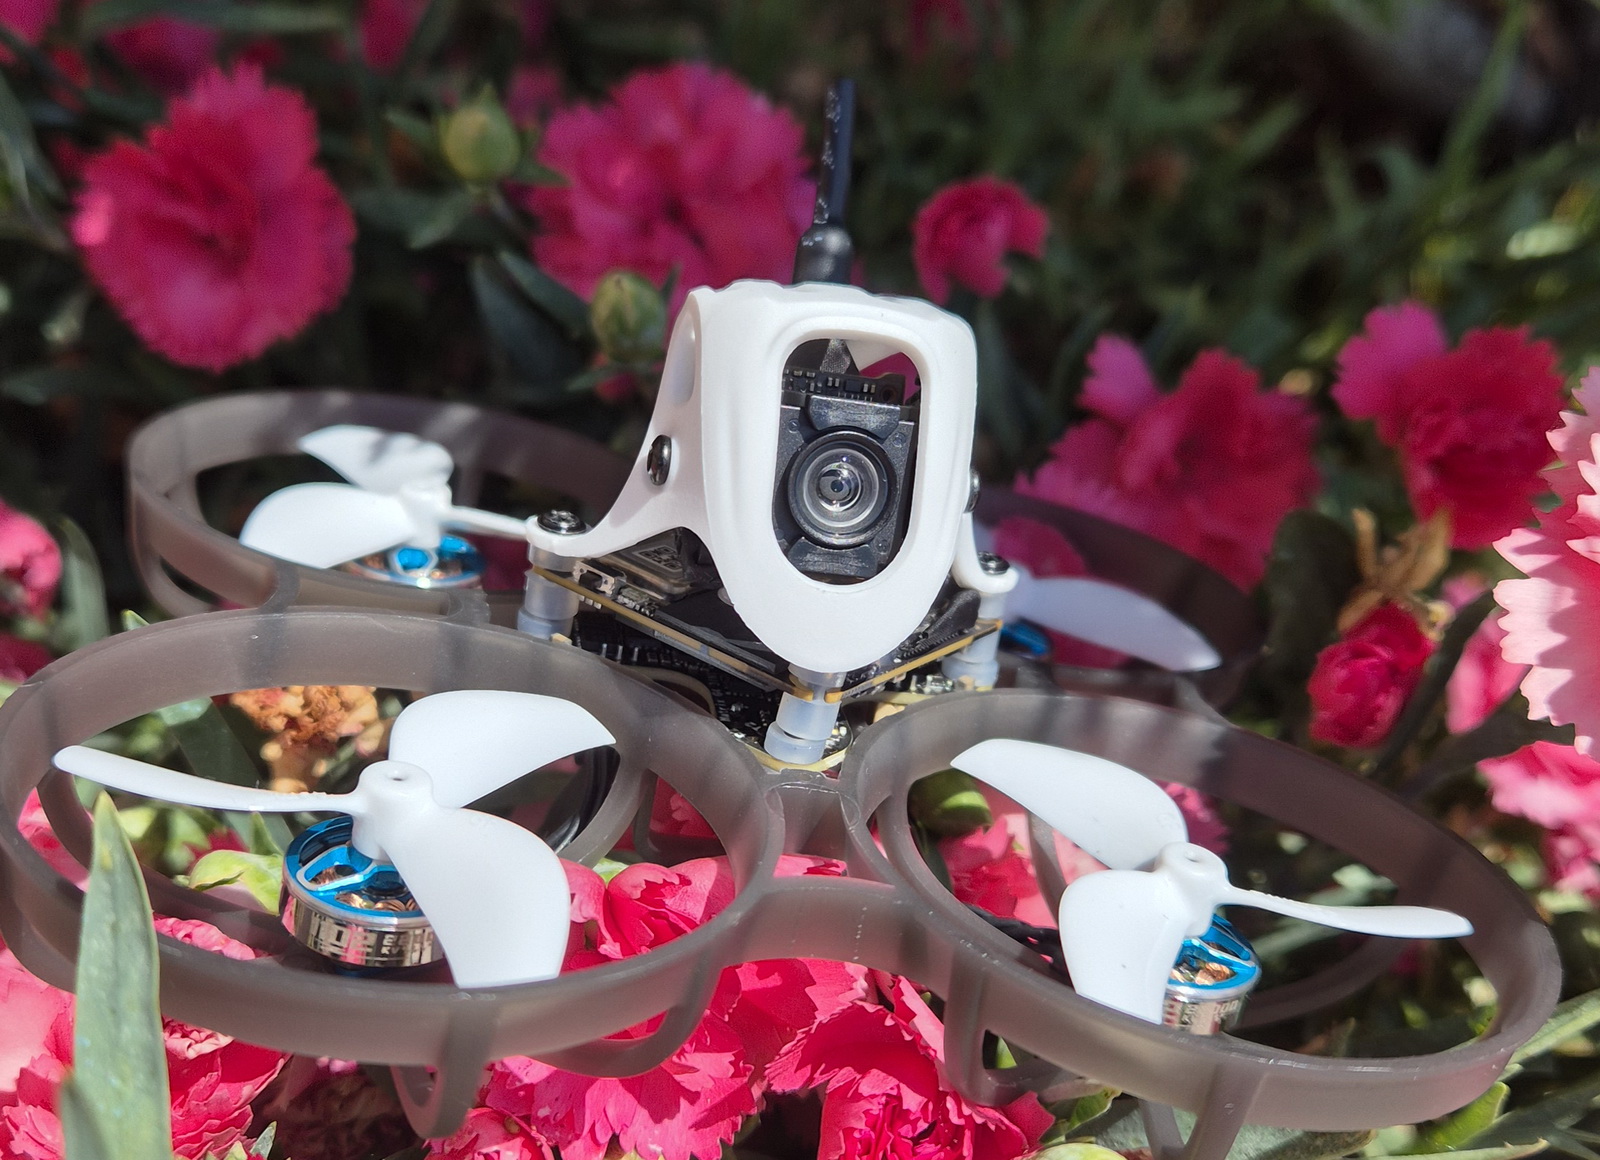
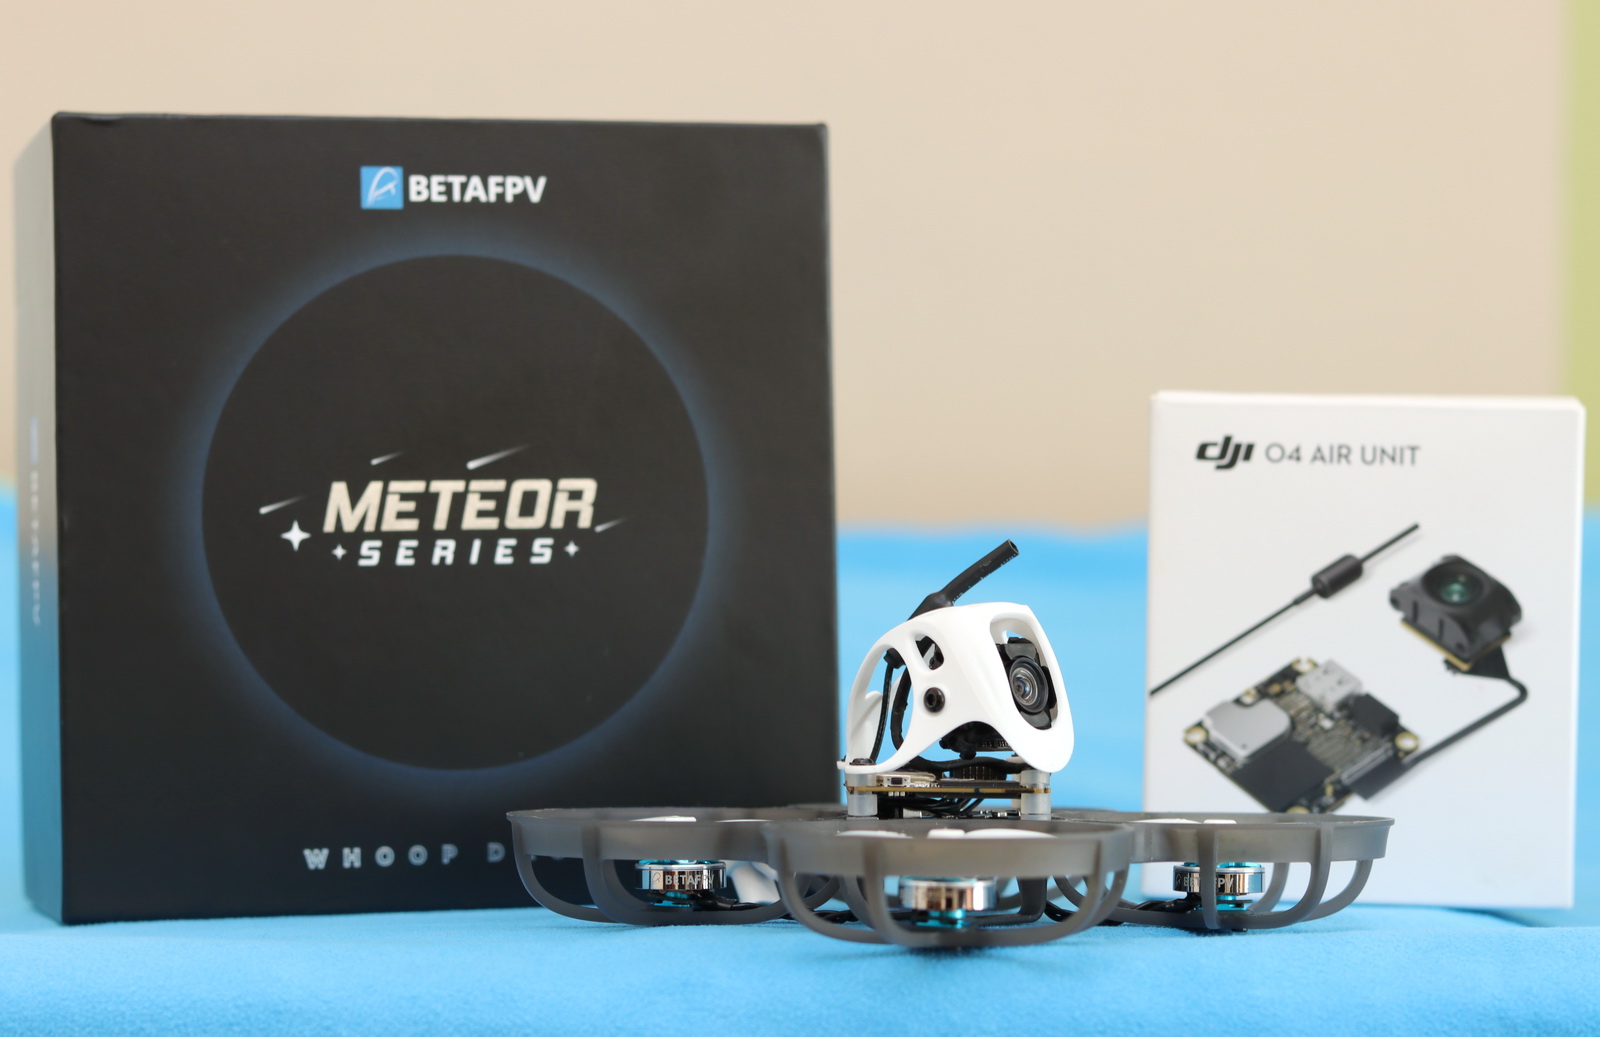
The BetaFPV Meteor75 Pro O4 is the second in the series reviewed here on FirstQuadcopter. This Whoop-style FPV drone has evolved significantly in the last five years, since the first edition was released. With improved hardware, native O4 Air Unit support, and subtle design tweaks, this model aims to deliver a smoother, crisper flight experience for indoor and outdoor micro FPV pilots. In this review, I’ll take a closer look at what’s new, what works, and where there’s still room for improvement. Also, if you opt for the PNP version, here’s how to install the O4 system into the Meteor Pro and how to make the initial setups.
1S brushless digital Whoops like this Meteor75 have gained popularity for their unique combination of indoor versatility, 4K video clarity, and lightweight performance. These tiny FPV drones offer the freedom to fly safely in confined spaces — around the house, offices, or small parks — while delivering crisp, low-latency HD video through systems like DJI O3/O4 or Walksnail Avatar HD. Powered by a 1S battery, these whoops remain lightweight and quiet, avoiding the regulatory concerns of heavier drones while still offering enough punch for practicing freestyle tricks or cinematic indoor shots.
Meteor75 Pro O4 review
Disclosure: I received this O4 Whoop as part of a product review collaboration with BetaFPV. Product specs and quality may vary according to the manufacturer’s reliability, so I cannot guarantee that you will get a drone that performs the same as in my article.
BetaFPV is one of the most recognized names in the micro FPV drone scene, known for offering a wide range of products that cater to both beginners and experienced pilots. Over the last few years, I’ve flown quite a few BetaFPV builds, and I’ve always appreciated how they balance affordability with solid, reliable performance. Whether you’re getting into indoor freestyle or looking for a capable 4K CineWhoop, they consistently offer well-designed, affordable options that perform great right out of the box. If you like building your own drone, their shop is also a good place to start looking for parts.
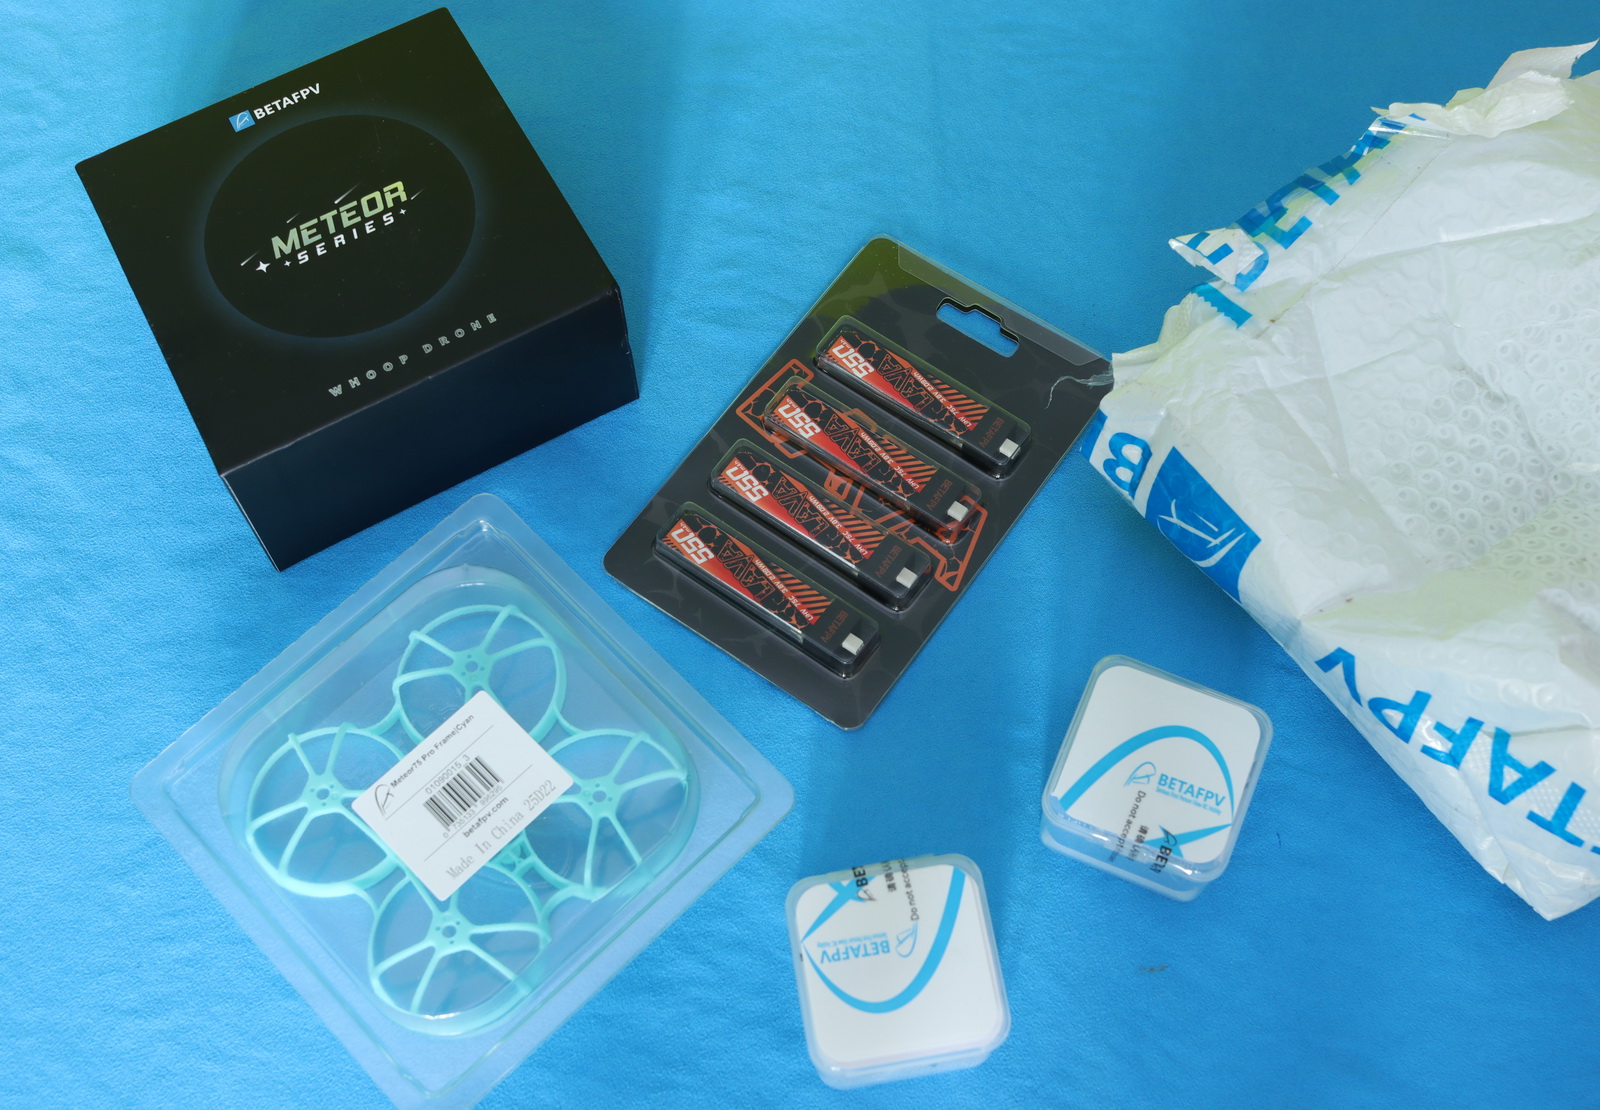
Last month, BetaFPV contacted me to test and review their latest, redesigned Meteor75 Pro O4. In addition to the PNP kit (without onboard FPV system), they sent me a blister of four LAVA 1S 550mAh 75C batteries and a couple of spare parts (frame, canopy, and Shock-absorbing O4 camera mount).
Unboxing
The drone, which measures only 80x80x20mm, comes in an elegant black box, padded with foam for protection, and featuring an image resembling a total solar eclipse, specific to the “Meteor” series. The PNP kit includes the following components:
- Meteor75 Pro O4 drone
- Matrix 1S 3IN1 HD flight controller
- 4 * 1102 | 22000KV Brushless Motor
- 4 * GF 45mm 3-Blade Propellers
- Canopy for O4 Air Unit
- Type-C to SH1.0 Adapter with SH1.0-4Pin cable
- SH1.0-6Pin HD (DJI O4) cable
- 5.8G VTX Antenna
- 4 * Shock-absorbing balls for O4 VTX and 8 * shock-absorbing balls for O4 Camera
- DJI O4 Camera Bracket and shock-absorbing mount for DJI O4 Camera
- 4 * M1.4*4, 4 * M1.4*10*4, and 4 * M2*4 screws, plus a Phillips screwdriver
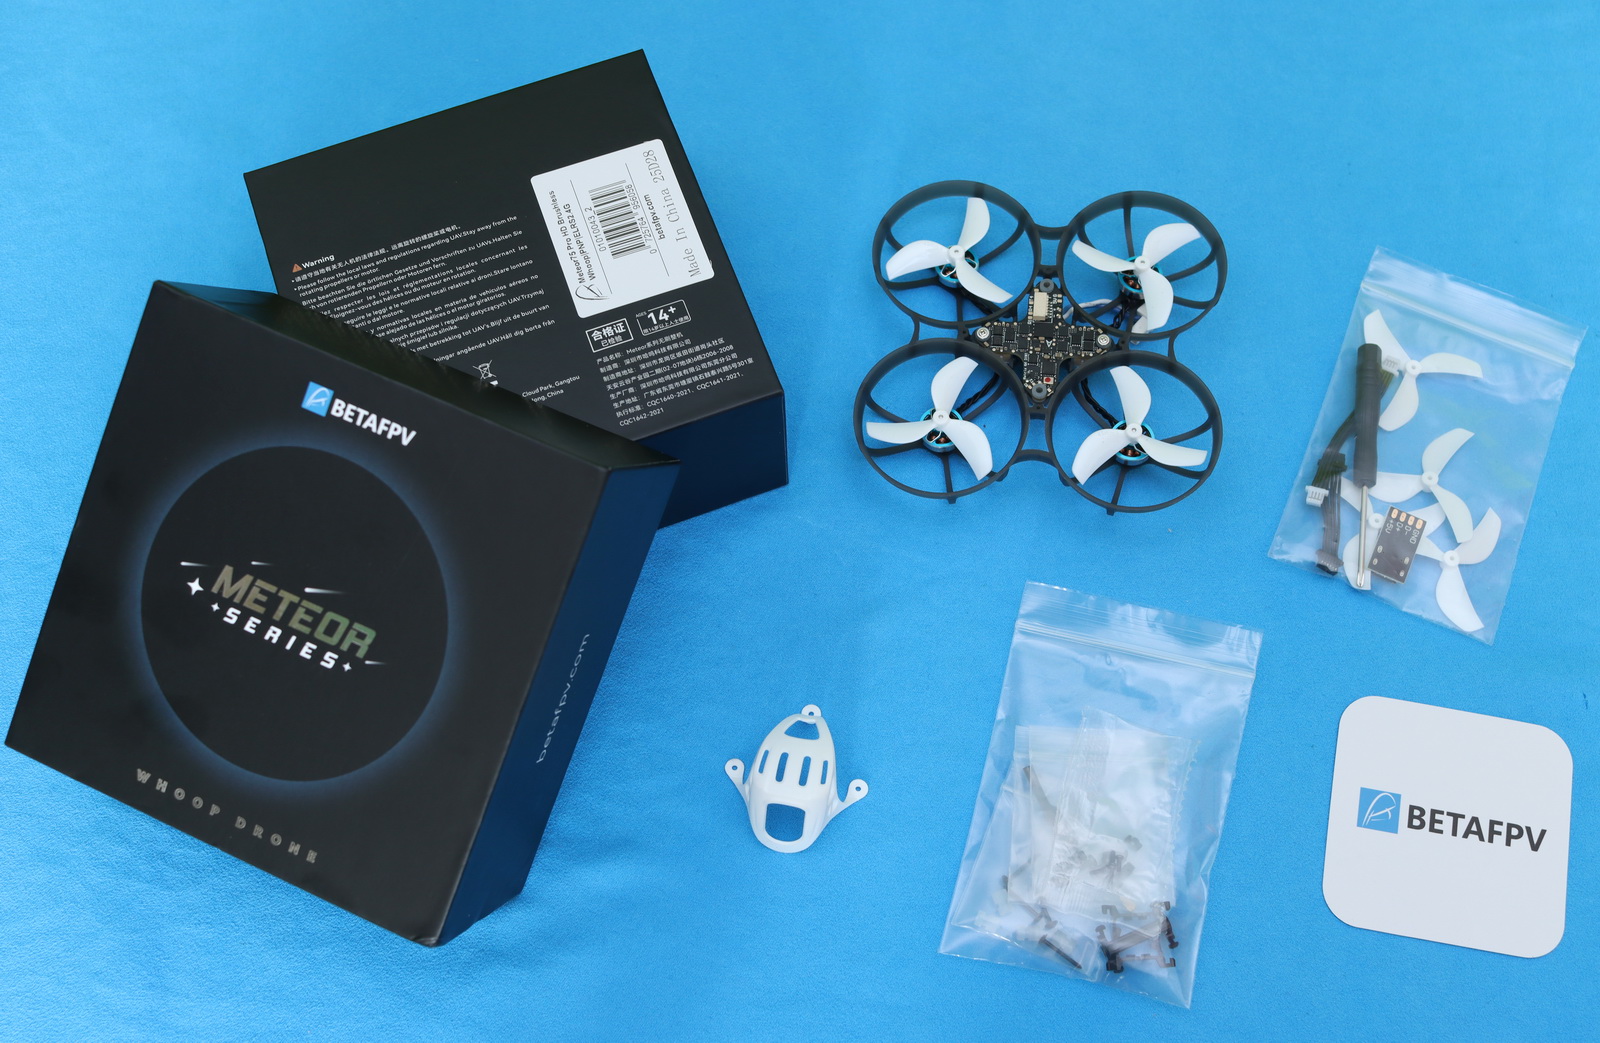
The Meteor75 Pro does not use a carbon frame in order to keep it as light as possible. The motors and other hardware are mounted directly onto the Whoop-style unibody polypropylene (PP) frame, which weighs only 7.7g and also offers good impact resistance.

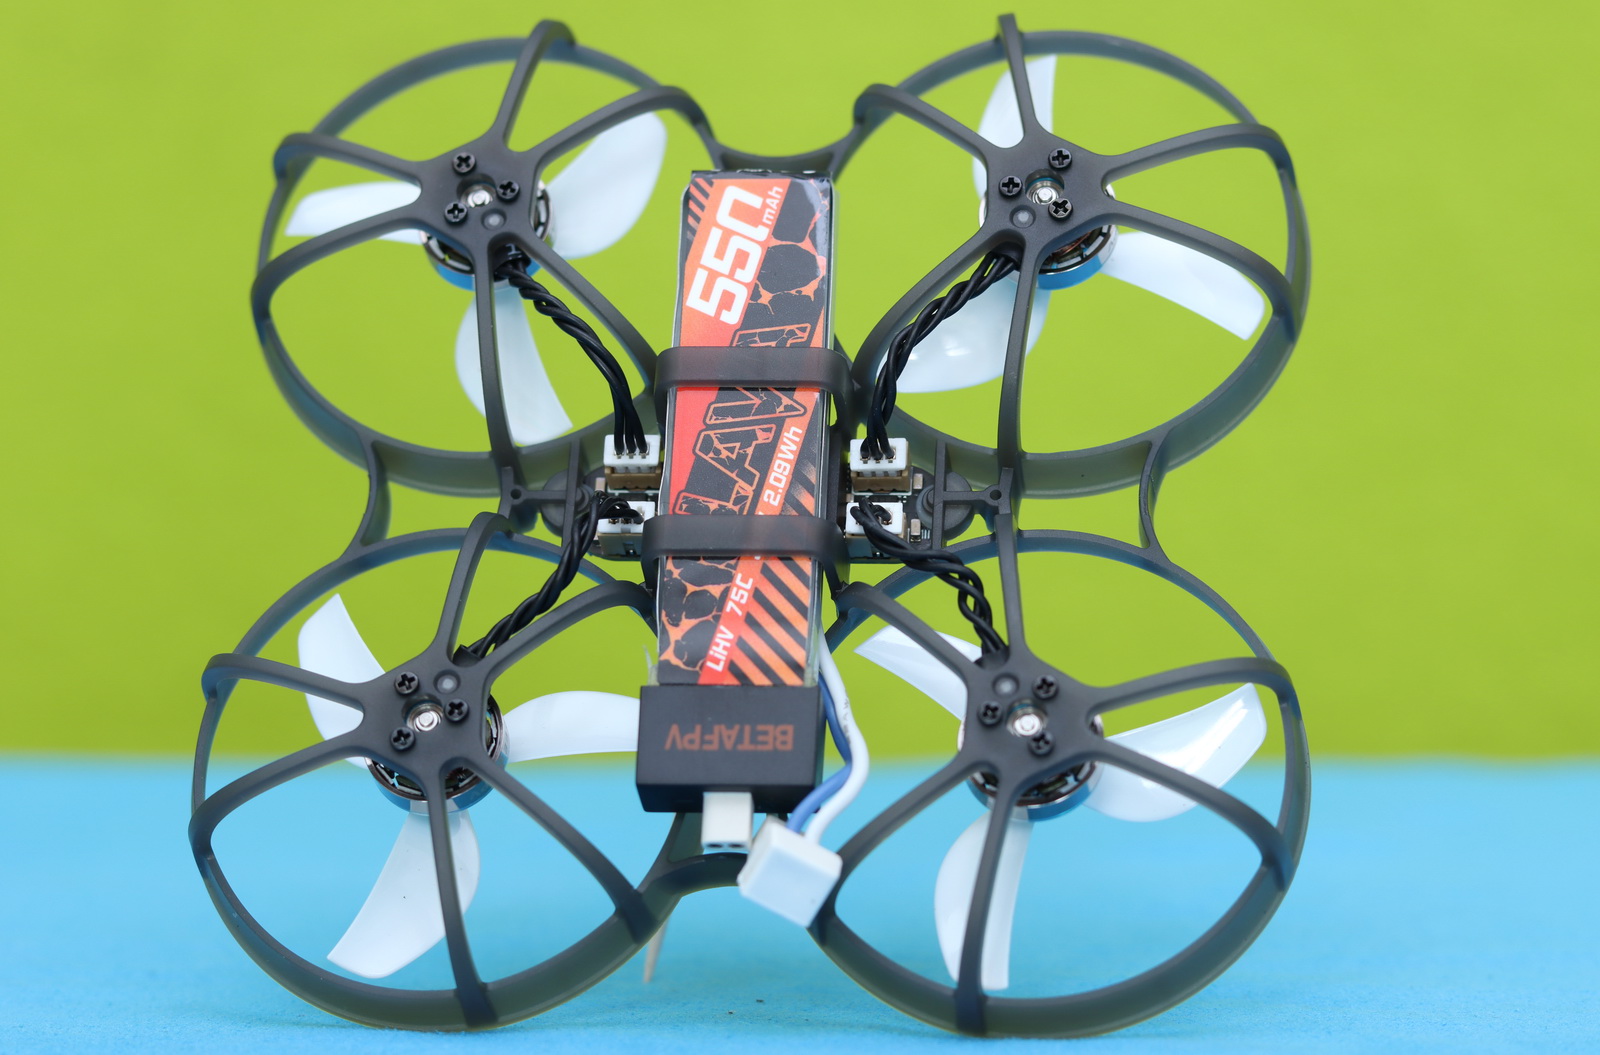
It has a wheelbase (diagonal motor-to-motor distance) of 81mm and a built-in battery holder that can accommodate batteries with a section of 16.7×6.3mm. Its tiny 1102 22000KV motors are matched with GemFan 45mm 3-leaf propellers and are equipped with connectors for easy maintenance.
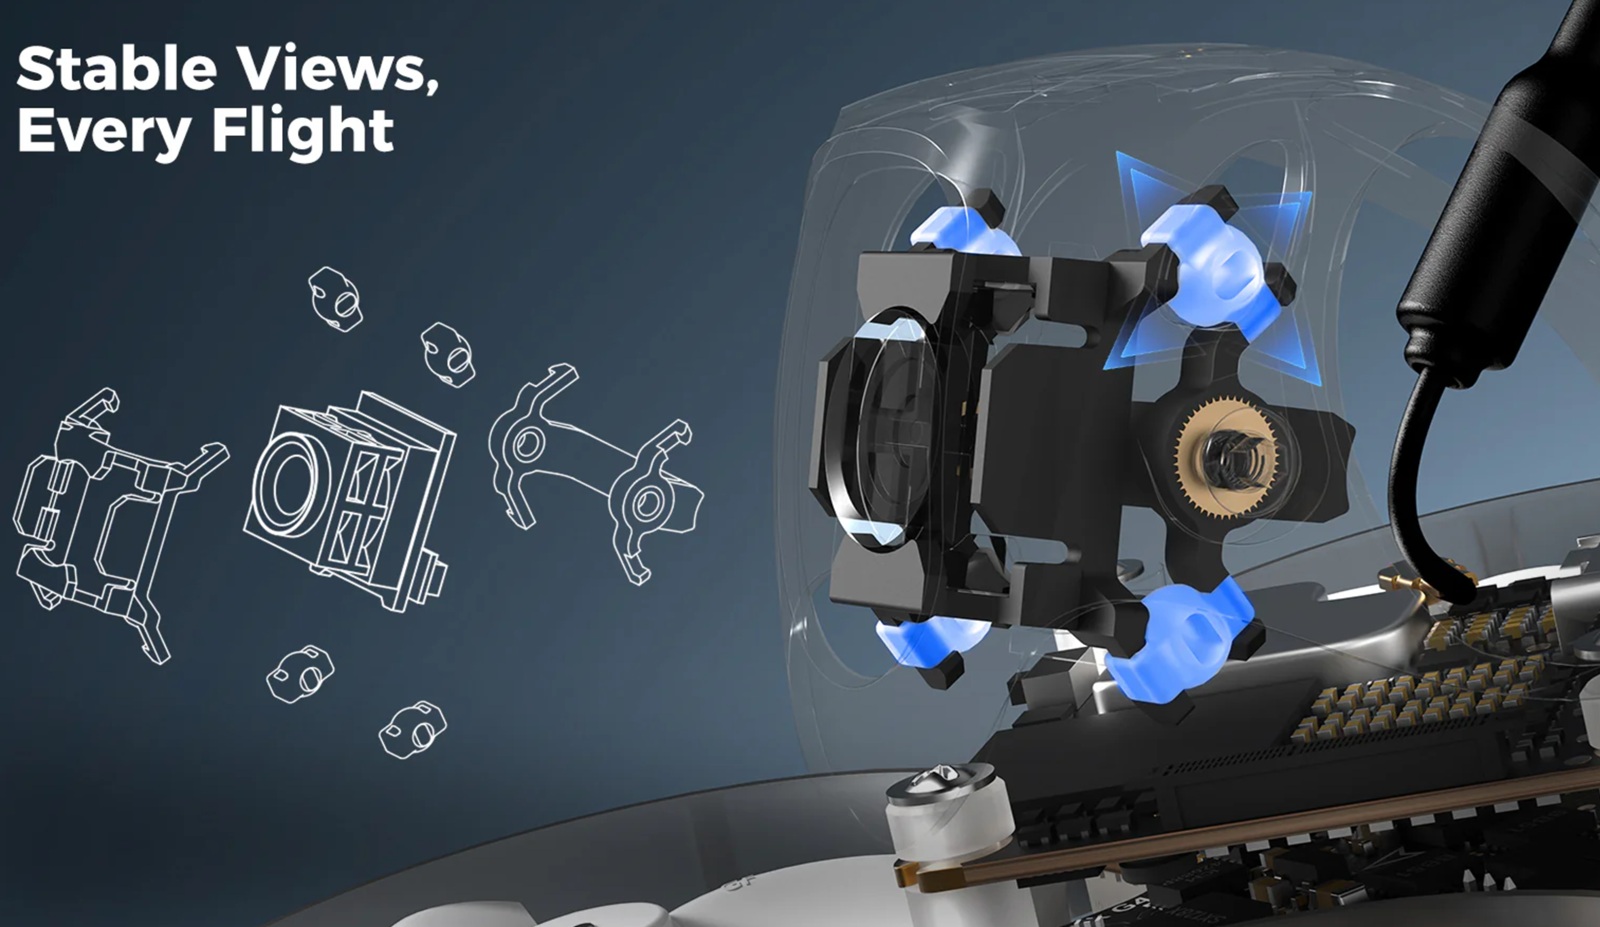
The ultra-light canopy features a large cutout in front, allowing for a wide-angle adjustment for the O4 camera. BetaFPV’s new soft mounting solution (photo above) consists of two main parts connected by four tiny silicone damping balls, essential for achieving jello-free footage with the DJI O4.
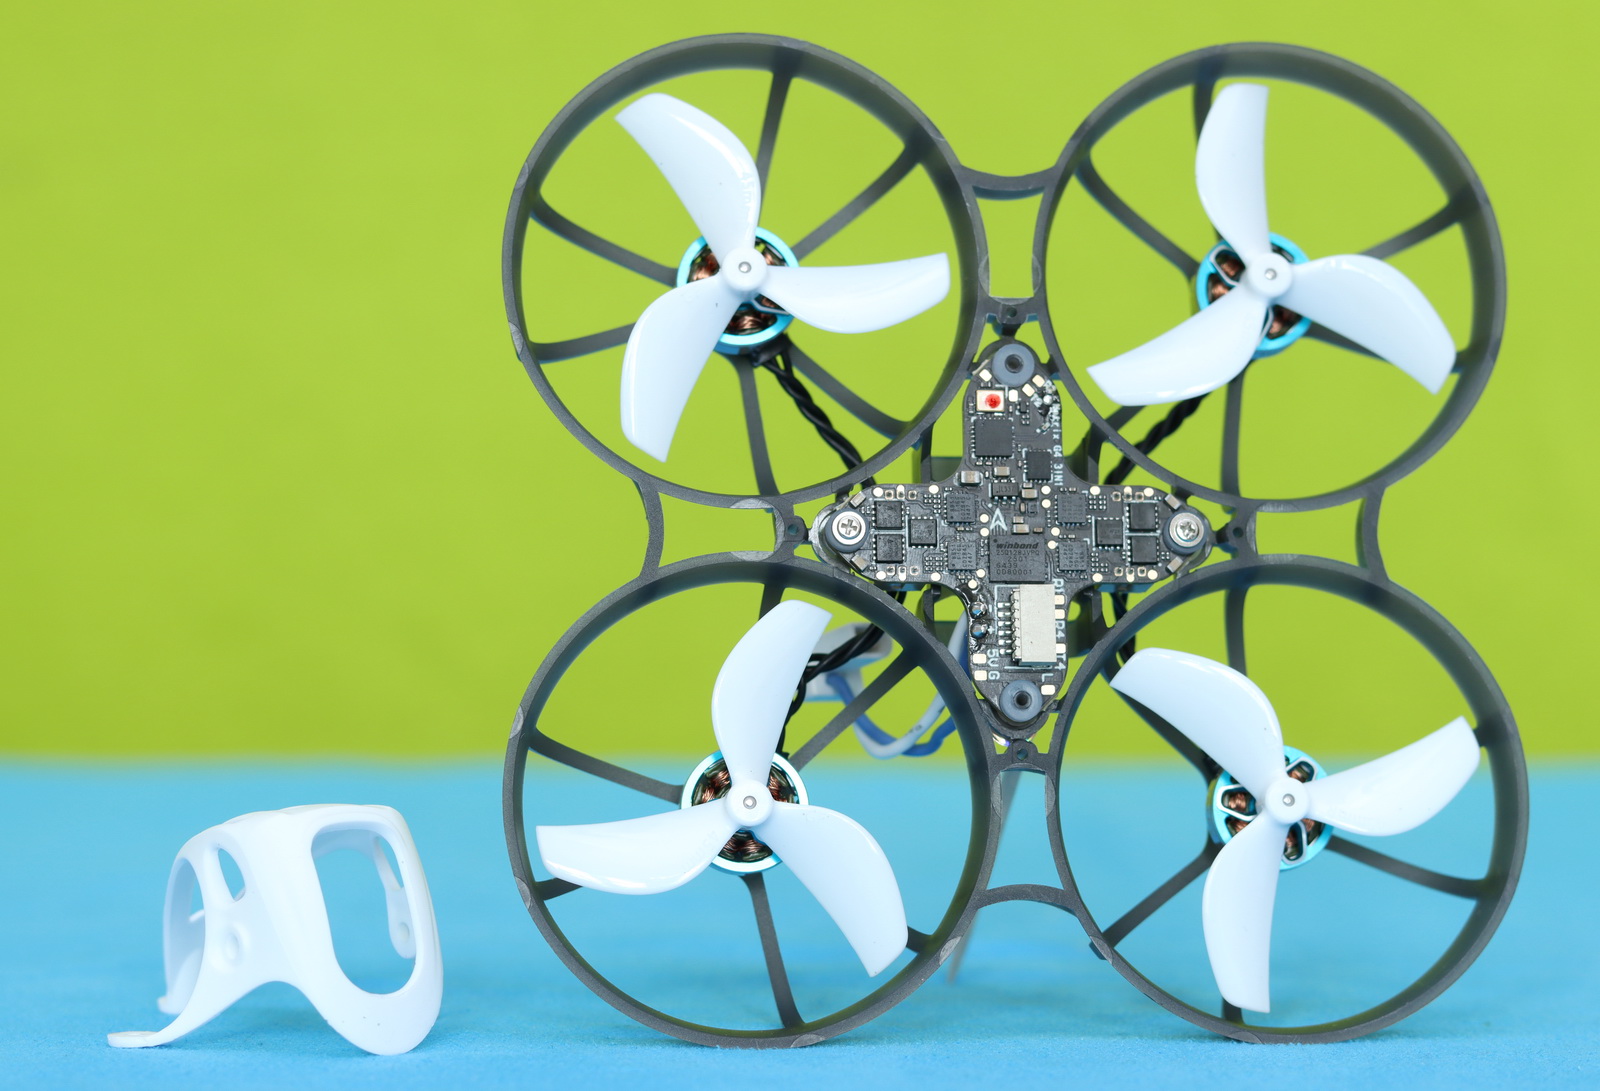
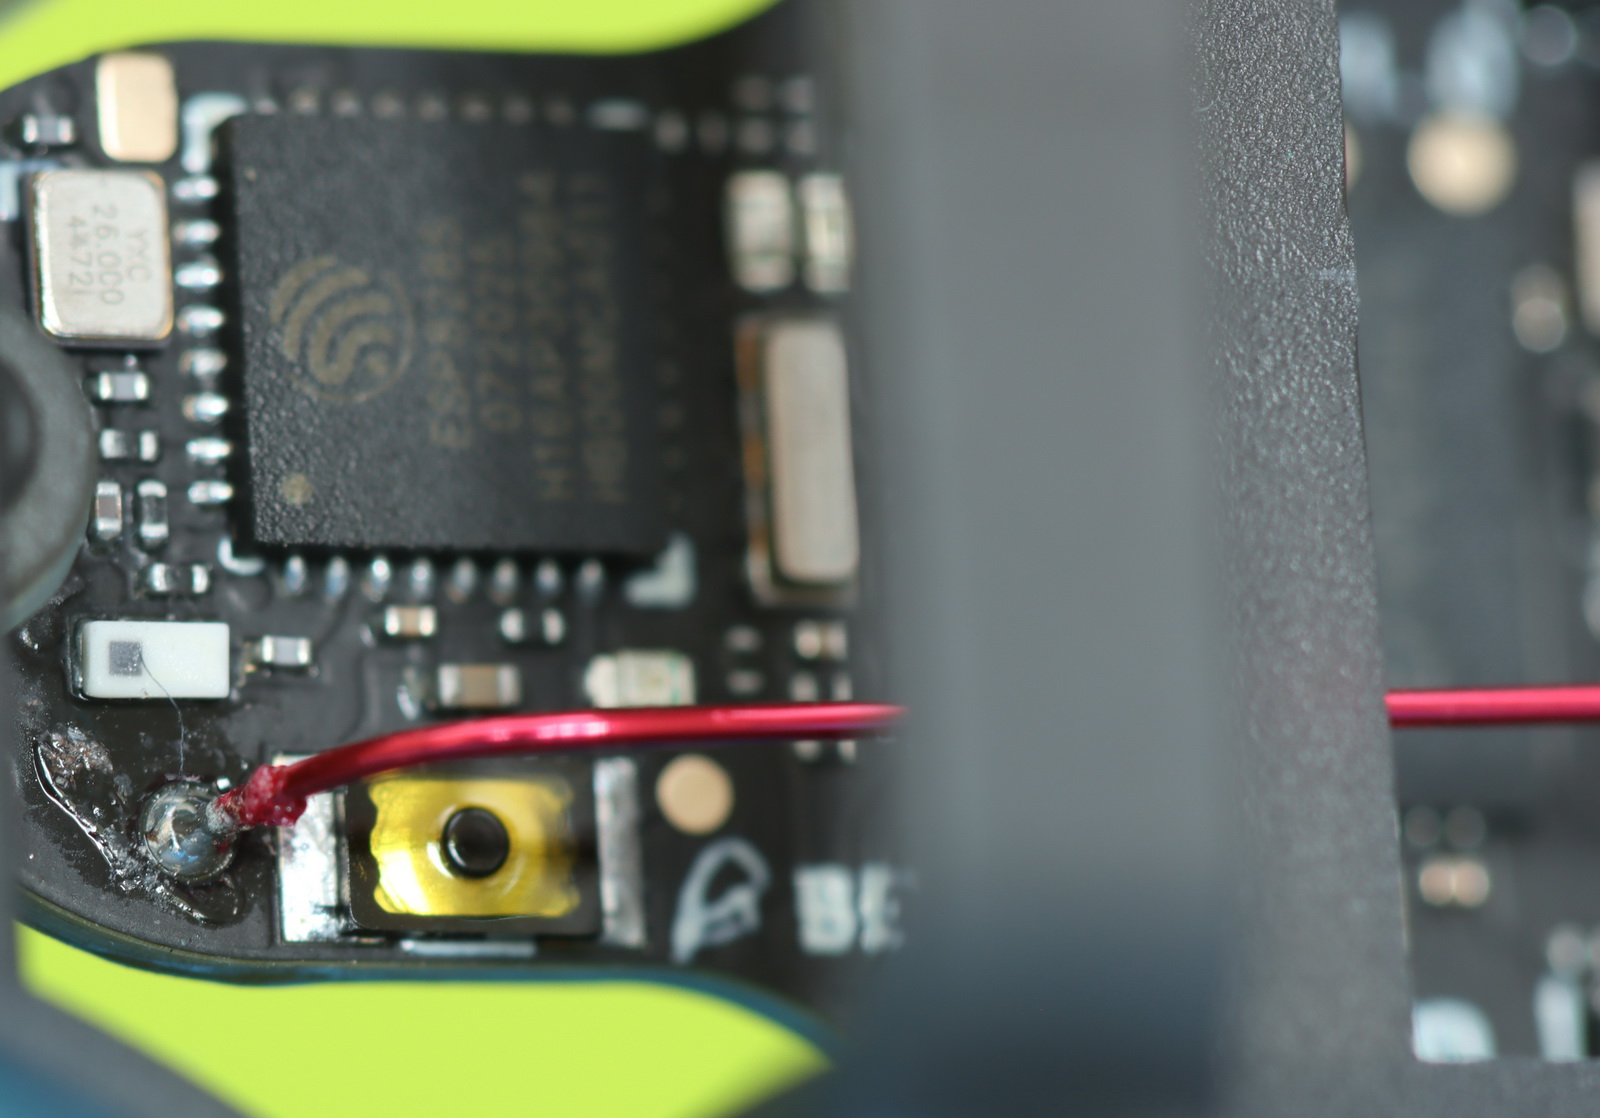
In the frame’s center is a soft-mounted plus-shaped flight controller. The Matrix F4 AIO board features a built-in 12A (18A peak) ESC and a serial ExpressLRS 2.4G receiver. The RX antenna is just a wire directly soldered to the FC, which makes any upgrade in this area difficult. In addition to the four motor connectors, the FC has a dedicated connector for digital VTXs such as the DJI O4 Air Unit Lite and a 4-pin connector for interfacing with the external Type-C port. It has a BT2.0 connector and supports 1S LIPO (4.2V) and LiHV (4.35V) batteries.
The F4 Matrix AIO flight controller features an onboard 5V/3A BEC, providing stable power to the O4 and preventing signal drops caused by low battery voltage. As the O4 supports an input voltage range of 3.7V to 13.2V, the BEC ensures reliable operation throughout the entire battery cycle (even down to 3.2V).
How do you install the DJI O4 Air Unit into the Meteor75 Pro?
Instead of printed documentation, BetaFPV provides a detailed build instruction video (watch below) showing how to install the DJI O4 FPV system. First, you need to equip the O4 camera with the soft mount. If you’re close to your 50s like me, attaching those tiny rubber grommets will be difficult — a spare set is included in case you lose or break one. Next, secure the camera into the canopy using the two side screws. Do not overtighten them so you can still adjust the angle.
The third step is to attach the silicone spacers to the O4 VTX and install it on top of the Matrix flight controller, securing it with one screw (front corner, under the camera). Use the remaining three screws to secure both the VTX and the canopy to the frame.
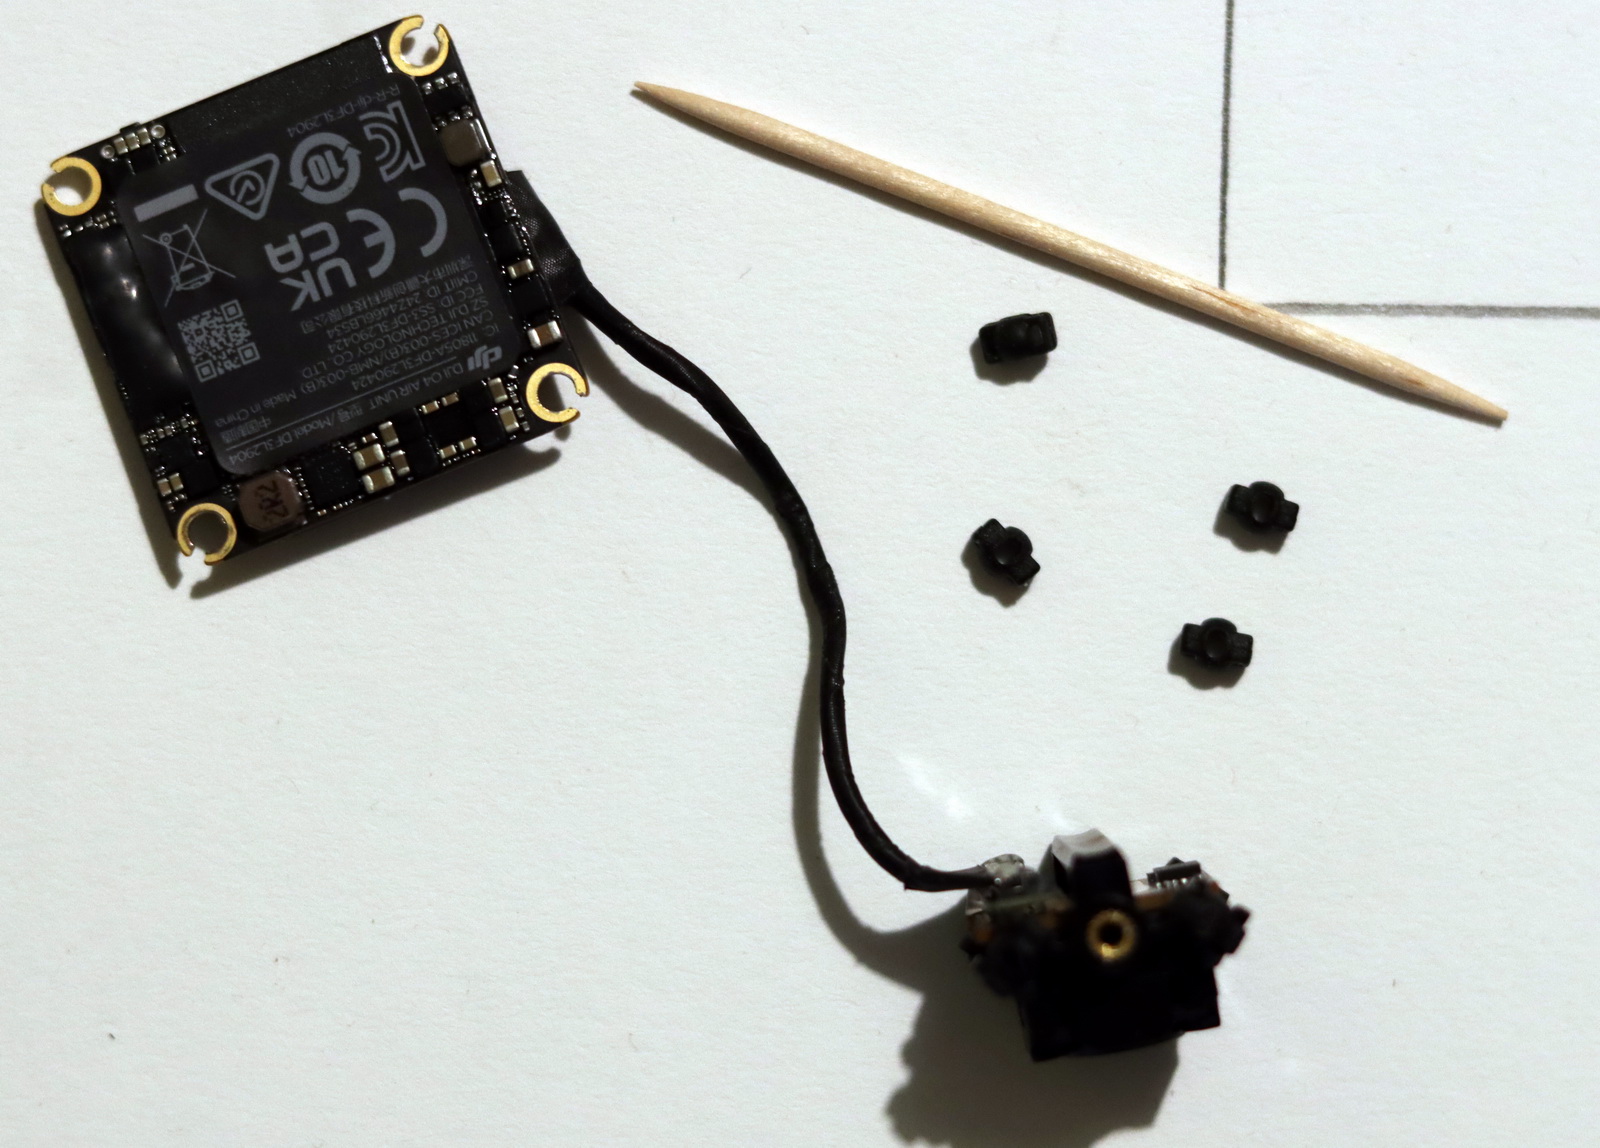
Remember to replace the stock O4 antenna with the one provided by BetaFPV. It is slightly shorter and fits better under the canopy. You should also use the included digital cable to connect the VTX to the flight controller.

Initial setup, ELRS & FPV goggles binding, and flight preparation
Just like the build process, the initial setup is straightforward. The drone comes pre-flashed with Betaflight 4.5.1 (target BETAFPVG473) and is already fine-tuned by BetaFPV for optimal performance. Aside from configuring stick assignments and making a few OSD adjustments, I didn’t need to tweak anything in Betaflight Configurator. It’s a clean, hassle-free setup that gets you in the air quickly, especially if you’re new to digital whoops.
If you misconfigure something, the stock FC firmware and CLI dump file can be downloaded here.
To bind the ELRS radio, you can either follow the standard power cycle sequence (power the receiver on and off three times) or use the “Bind Receiver” function available in the Receiver tab of BFC. As for the O4 Air Unit, if it is not already paired with your DJI Goggles, you can initiate pairing by entering bind mode on the FPV goggles, then pressing the bind button on the O4 VTX module. As the O4 Air Unit was already paired with my DJI Goggles 3, this step was unnecessary for me.
Price, availability, and options
The Meteor75 Pro O4 is available with and without the onboard DJI O4 Air Unit kit. The PNP (without FPV system) version shown in this review is priced at $79.99, and the RTF (with onboard O4) is priced at $199.99. If you’re comfortable with a bit of extra assembly, the PNP version could be a better option. Since the DJI O4 costs just $109, and by building it yourself, you could save 11 bucks for spare parts or extra batteries.
Since neither option includes a battery in the box, you’ll additionally need a set (4pcs) of compatible LAVA 1S 550mAh 75C batteries for an extra $25.99. If you’re planning to fly this Whoop a lot, or if it’s your first drone, I’d recommend grabbing a spare frame and a few extra parts. They’re cheaper when bundled, and you’ll be glad to have them on hand. The kit doesn’t include a charger, so add it to your basket if you don’t have one.
Key features
- [Optimized for DJI O4 Air Unit]: Engineered for a softer, more stable flying style, perfect for capturing smooth high-definition footage. Onboard recording in just 40 grams.
- [Advanced Flight Controller & Precision Flight Tuning]: Powered by the Matrix 1S 3IN1 HD FC, offering enhanced integration, performance, and seamless operation. With optimized PID parameters, extended throttle range, and adapted RATE configurations, Meteor75 Pro O4 ensures precise altitude control and natural camera movements—ideal for FPV filmmakers and content creators.
- [Redesigned Canopy and Increased Durability]: It incorporates shock-absorbing components for smoother, more stable HD footage and offers an adjustable camera angle range from 10° to 35° to achieve the perfect shot. Built for reliability and ease of use, it is designed to stand apart from the competition-focused Air Series while delivering a refined and enjoyable flying experience.
Meteor75 Pro O4: Flight performance and user experience
I can tell you from the beginning that the Meteor75Pro or similar-sized Whoop drones are not intended for long-range flights. Even ELRS and the DJI O4 Air Unit transmission distances up to 10 km. Due to their small size and short flight time, they are unsuitable for flying long distances. Instead, they’re fun toys for proximity park flying and indoor practice.
The first day I tested it, it was pretty windy, and to be honest, it struggled not to be taken by the wind. The battery also drained very quickly, and the jello effect drastically affected the footage. When you plug in the battery, remember to route the power cable along the battery and don’t leave it loose, as it can touch the propellers.
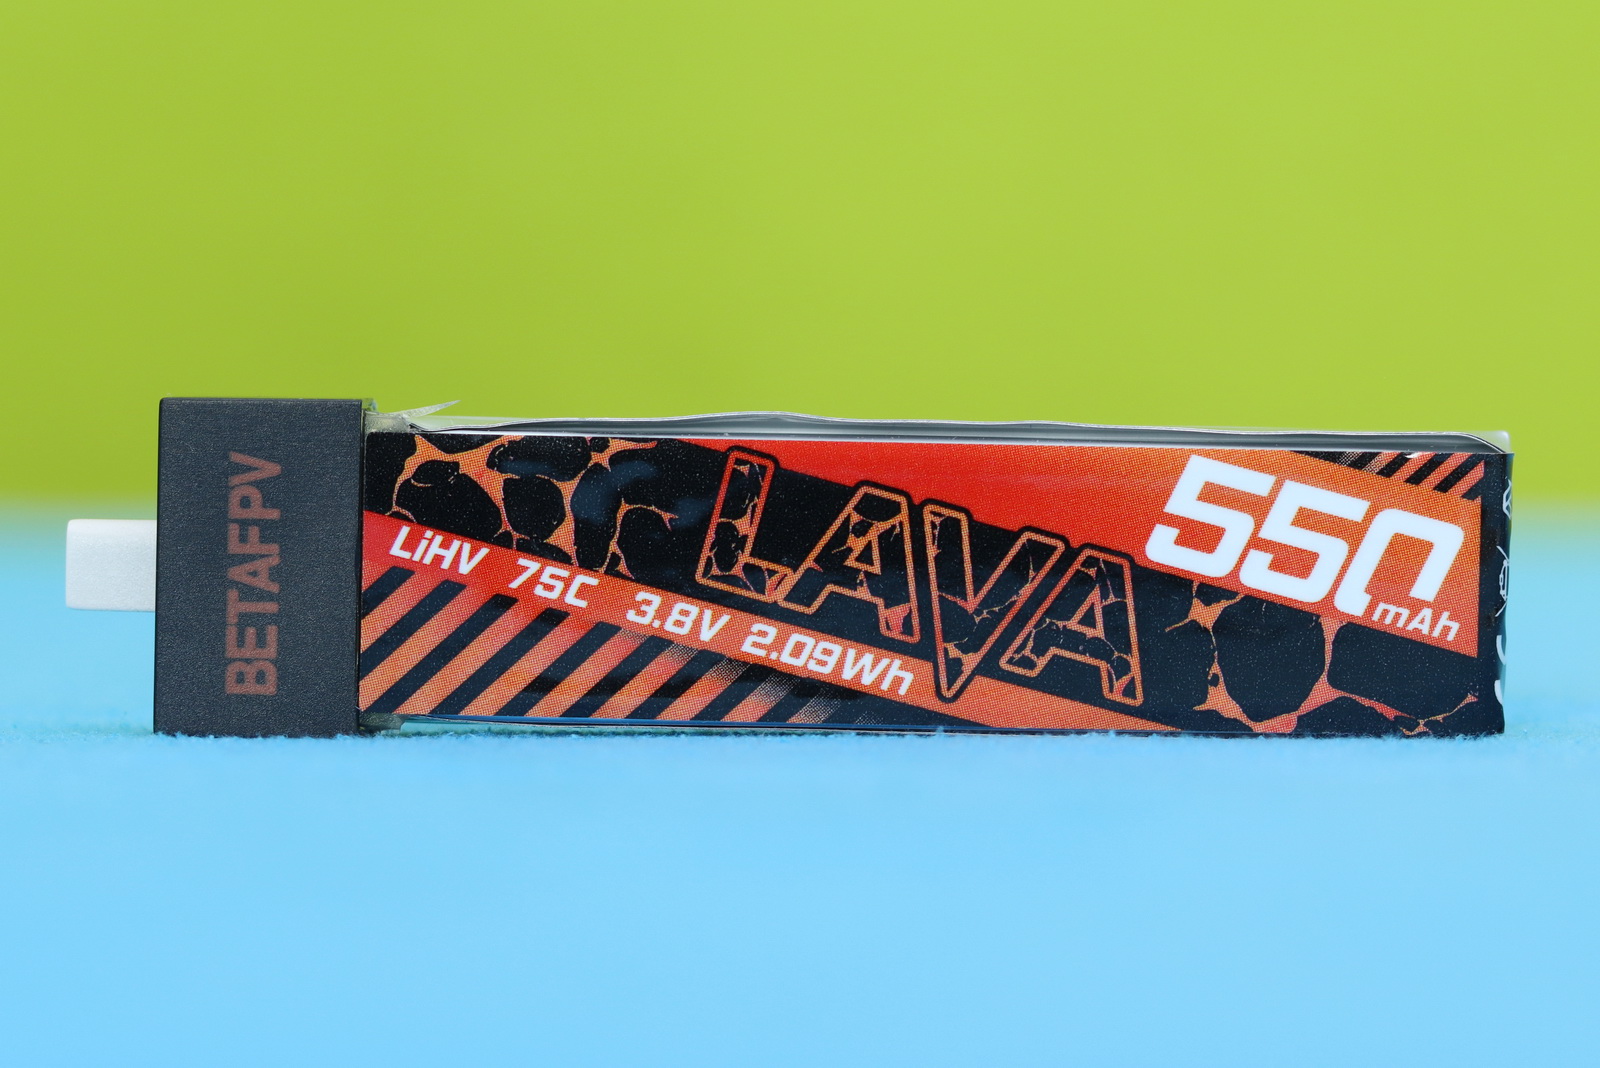
BetaFPV states the expected flight time using a LiHV LAVA 1S 550mAh battery is about 5.30 minutes. During my tests, I got an average of 4 minutes and 30 seconds, but since I charged the batteries only to 4.2V, it’s possible to gain a few extra seconds of flight time by charging them to 4.35V. On the last battery, I pushed it until the drone crashed due to low voltage. This happened at minute 5 of the flight, when the battery reached 2.5V. The onboard step-up 5V BEC did its job well, as up to that point, I hadn’t had any interruptions in the FPV video signal (check video below).
Despite being made of plastic, the frame is sturdy. I crashed a few times without any significant damage. Anyway, moving all the parts to a new frame can be easily done in less than one hour. The ESC beeping is barely audible, so if you crash it in high grass, be prepared—it will take time to find it.
My only problem with this tiny Whoop was the horrible jello in both the FPV feed and the recorded footage, which I thought wasn’t necessarily related to its design. Previously, I used the same O4 installed on the DarwinFPV CineApe20, and I had the same problem. Regardless, I tried improving the camera’s soft mount and changing the ESC’s frequency.
Fixing Jello on the Meteor75 Pro O4
Contacting BetaFPV, their support team sent me some recommendations on how to fix the jello:
- Make sure the tight screws do NOT overly compress the shock-absorbing balls that connect the canopy with Matrix 3IN1 HD FC.
- Ensure the cables for the camera DON’T touch the canopy, as this may affect the quality of your footage.
- Inspect whether any shock-absorbing balls have fallen off the shock-absorbing components.
- If the props are deformed or vibrate significantly during flight, try using the new HQ 45mm 3B/2B props.
- Ensure the cable between FC and VTX does not cover the white connector. Leave some space to ensure optimal performance.
Additionally, I flashed the latest DJI O4 Air Unit firmware, which suggests it makes the video more stable. To be honest, I didn’t think these steps would help much, but when I downloaded the videos from the O4, I was surprised at how much they improved and how smooth they became. In windy conditions, some vibration remains visible in the FPV footage; however, in calm weather, the footage is consistently smooth.
Further Reading:
Learn more about the DJI O4 Air Unit Lite https://www.firstquadcopter.com/reviews/dji-o4-air-unit-lite/
Meteor75 Pro HD Walksnail review: https://www.firstquadcopter.com/reviews/betafpv-meteor75-pro/
You Can Trust Our Reviews!
Since 2014, FirstQuadcopter has reviewed, thoroughly tested, and rated hundreds of products, including drones, gimbals, power stations, action cameras, 3D printers, video lights, and other high-tech gear to help you make better buying decisions.
We don’t do paid reviews or agree to affiliate links. All products are tested fairly and equally, and if anything changes over time, I will update the written reviews.
As always, if you found this review helpful, don’t forget to like, share, comment, and bookmark for more content like this!
Hey, I’m new to FPV—how does the Meteor 75 Pro compare with the Pavo Pico II?
Powered by 1S batteries, the Meteor 75 Pro O4 is less powerful than the Pavo Pico II O4 which uses 2S LIPOs. I would recommend the M75 Pro for indoor use, and the second-generation Pavo Pico for both indoor and windless outdoor flights.
Just order it from BG with eight 550mAh batteries, BT 1S charger, and O4 onboard for just 261,28€.