
The ELEGOO Neptune 4 Max is the largest 3D printer that I reviewed. With a massive 420*420*480mm build volume, you can print big models at once without the need to glue multiple parts together. The Klipper firmware will also be a first for me. Klipper is an advanced open-source 3D printer software developed by KevinOConnor that allows you to print faster and more accurately than Merlin or others.
I’m not a 3D printer expert like Uncle Jessy, so this review is written more from the perspective of a standard user who regularly prints all kinds of things needed around the house. I mainly use PLA and TPU filaments, but some functional parts require stronger CF filaments with a higher melting point. Most entry-level 3D machines reach 260° Celsius, which is insufficient for industrial-grade materials. The Neptune 4 Max’s hot-end has a 60-watt heating element with a brass heating block to allow up to 300 °C nozzle temperature.
Last year, I tested two models of the Neptune 3 series, which also had three build volume options. In addition to the higher nozzle temperature and faster printing speed, the operation system is the most significant difference between the Neptune 4 and 3 series. The N3 runs on Merlin, and the N4 runs on Klipper. Due to the advanced cooling system installed behind the print head, the build volume of the Neptune 4 series is slightly smaller than its predecessors – the Z-axis is shorter by 1.5-2cm.
Neptune 4 Max 3D printer review
I received the Neptune 4 Max last week. ∞Elegoo additionally included a 1 kg spool of PLA test filament. I received a sample unit from the first batch that arrived in Europe, so I cannot guarantee that you will get a product that performs the same as in my article.
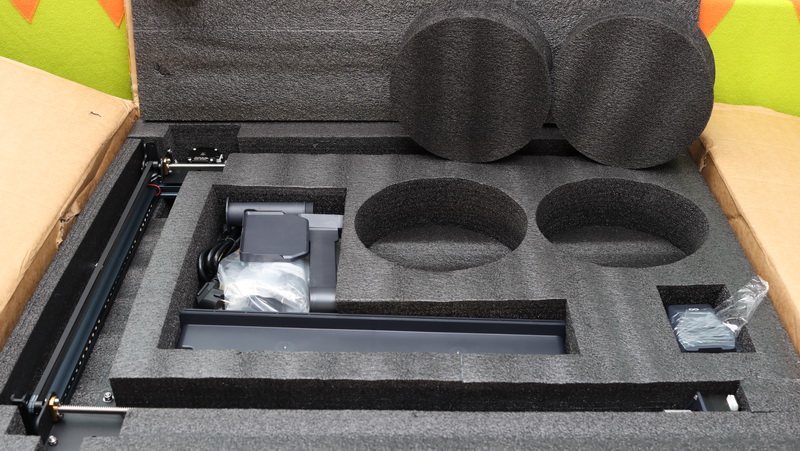
When I saw the huge box (79x69x27 cm), I realized it was not an office desk printer. It’s a huge and heavy machine. The cardboard packaging crumpled quite badly during the transport, but luckily, thanks to the thick foam padding, the printer remained intact inside. When I confirmed the package had arrived, they sent me the latest firmware files and instructions on upgrading the machine.

Elegoo is focused on providing easy-to-use printers out of the box, including all the necessary accessories and tools to be up and run in just one hour from unboxing. In addition to the labeled screw bags and IKEA-style printed step-by-step assembly instructions, ELEGOO provides a video guide on the USB stick.

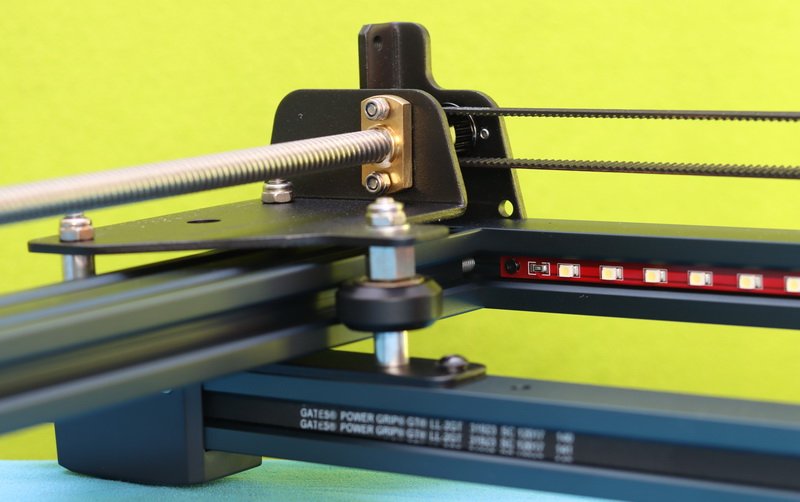
The machine consists of two main parts (base unit and Z-axis gantry) that you must assemble using the included screws and tools. Two extra aluminum tie rods are on the back for the Z-axis gantry, which makes the structure more solid. The print head, cooling unit, and spool holder also need to be installed by the user. All the connectors and sockets are labeled for easy wiring. In front, there is a small drawer to store maintenance tools and spare nozzles.
Huge size. Not an office desk 3D printer
The photo below shows the significant size difference between the Neptune 3 Pro and the Neptune 4 Max. You will need about 100x90x75cm (HxDxW) space to operate this machine comfortably. The 3D printer itself measures roughly 658x632x740mm and weighs more than 18kg.

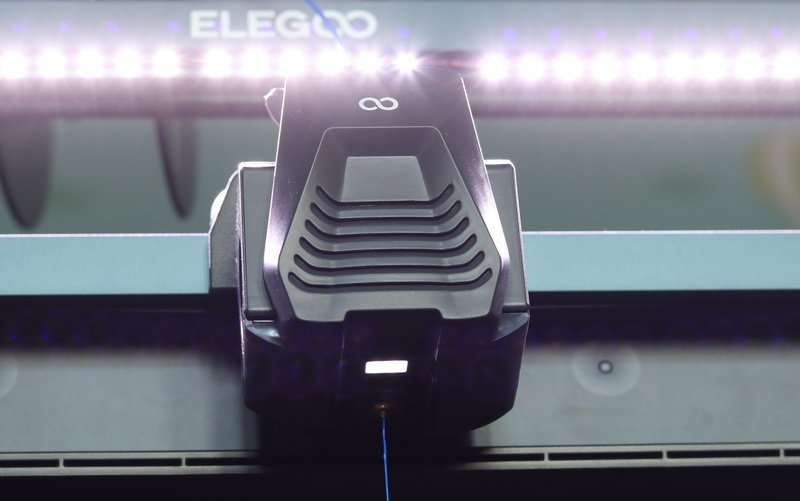
In addition to the top LED bar that illuminates the entire print area, it has an additional LED on the print head that directly illuminates the nozzle that would normally be in shadow.
Filament run-out sensor and power-loss recovery for huge prints
A filament run-out sensor is included in the box and needs to be installed on the top between the filament spool and the print head. This feature is a must-have for large-scale 3D printers, where you often need to use more than one 1kg spool to finish the project. For example, a Mandalorian Helmet with supports requires 1450 grams of material and close to two days to print. The Neptune 4 Max also features power-loss recovery, which means it will continue the print job after power is recovered.
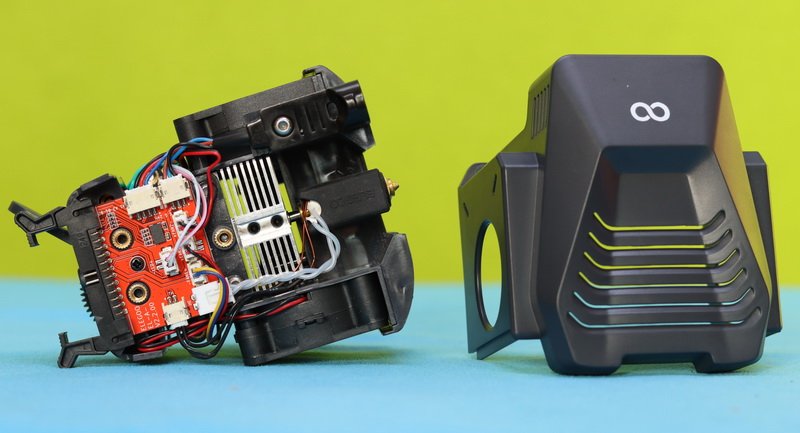
Neptune 4 Max: Print head
The print head on the Neptune 4 Max consists of a proximity dual-gear direct driver extruder, a 60-watt heating element with a brass heating block, three cooling fans, a 0.4mm nozzle, and an auxiliary LED light. To handle up to 300 °C temperatures, it uses an all-titanium alloy throat pipe.
The print head attaches to the Z-axis using three screws from the back and two from the front.

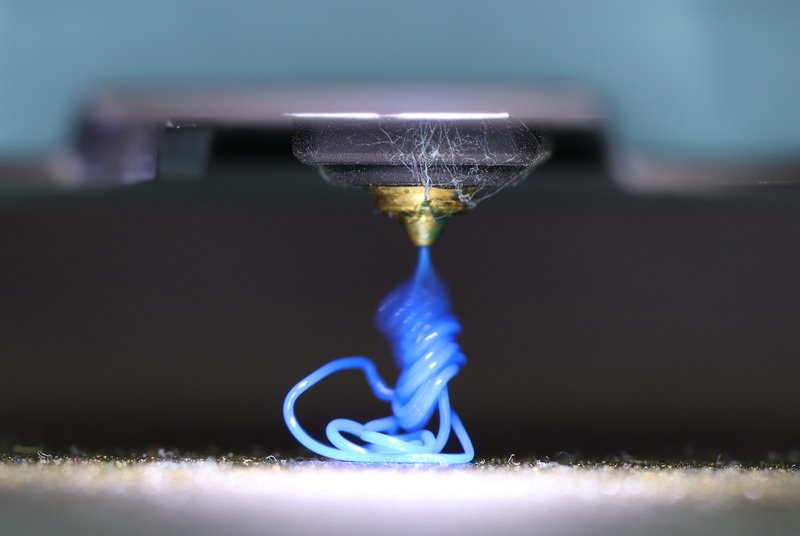
When I loaded my filament for the first time, and it started to purge, a different color material came out, proving that Eleggo tested the unit before shipping it out.

Neptune 4 Max: Heated print bed with PEI sheet and 121 points ABL
It takes a few good minutes till the bed reaches 60 °C, which is required by PLA and other types of filaments. While I was waiting for the printing to start, because of the loud noise of the fans, I had the feeling that I was sitting in a plane with all the turbines on, waiting to take off :).

The heated platform measures 420x420cm (usable area) and has a 320W heating element and six leveling knobs underneath. The PEI sheet is similar to the ones used across the Neptune 3 and Neptune 4 series. Most filaments stick to it well, and removing the model is easy; you need to bend it a bit, and it will pop off.
In addition to manual bed leveling, the Elegoo N4 Max features 11×11 automatic bed leveling (ABL). To check and compensate for the flatness of the platform in all 121 points takes a few minutes. Note: DO NOT run ABL without the PEI sheet!
Neptune 4 Max: Is that fast?
Yes! When you put it to work, even with closed eyes, you know this printer is much faster than most hobbyist machines. It makes a noise like a hardworking bee on steroids :). The auxiliary cooling unit also adds additional noise to the system, making it very loud.
By default, the printing speed of the Neptune 4 Max is set to 250mm/s, but according to Elegoo, it can go up to 500mm/s. By comparison, my existing printer’s speed can be adjusted between 50 and 180mm/s. From the N4 Max’s control panel, you can toggle between three working modes (Silent, Normal, and Sport) and adjust print speed within 0-500%.
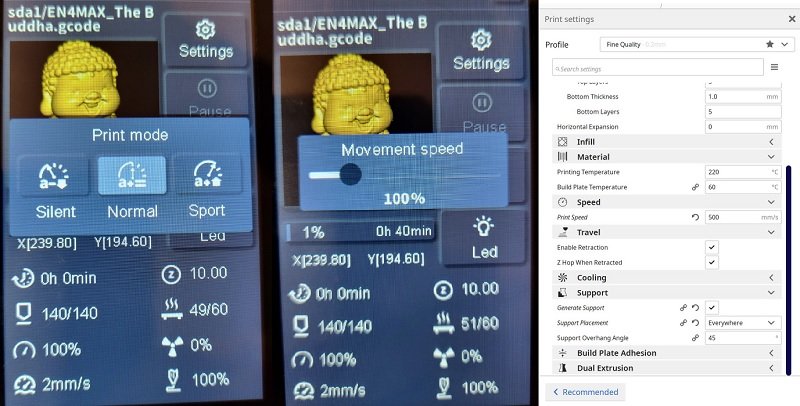
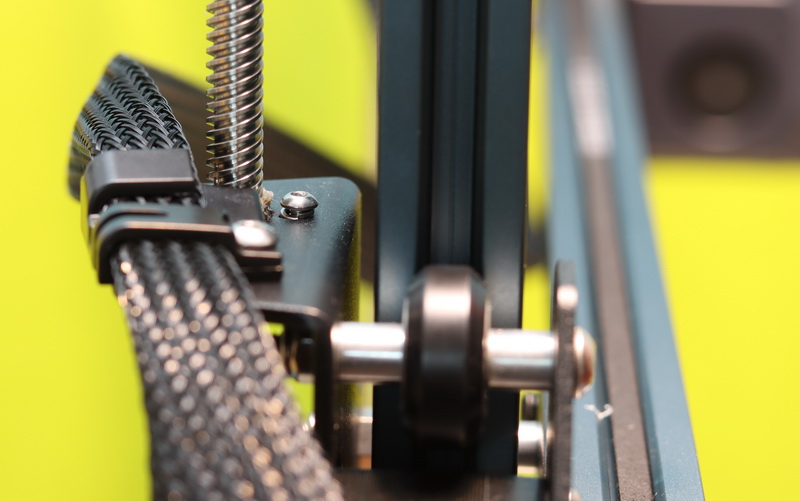
I did a few tests at various speeds. I noticed that increasing from 125mm/s to 250mm/s does not reduce the job time by half as you would expect. The same happened when I increased the speed from 250mm/s. The overall run time becomes shorter but not twice as fast. Instead, I noticed visible quality degradation at higher speeds -of course, this may vary according to the complexity (geometry) of the printed model. To work on 250-500mm/s also requires more accurate mechanical adjustments (leveling and belt tensioning).
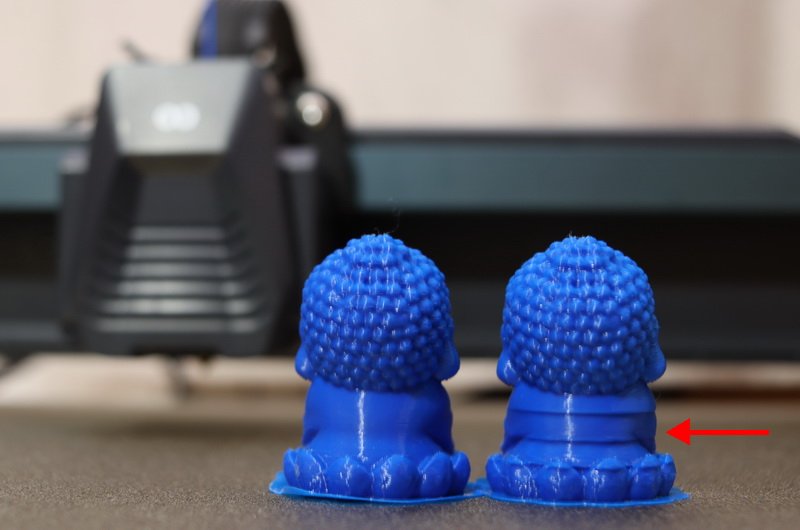
During my tests, I noticed that at high speeds, it is prone to layer shifting. In my opinion, max speed is great for prototyping, but not if you favor quality.
Another thing no one talks about when printing at top speed is that moving parts such as belts, bearings, rails, and rollers will wear out much faster than doing it at normal speed.

Neptune 4 Max: Connectivity and file transfer options
Elegoo’s latest large-scale 3D printer also excels in terms of connectivity. On the right side is an RJ45 connector for wired connectivity and a tiny rubber ducky antenna for the wireless WIFI controller. The print files can be loaded into the machine via a USB port from a memory stick or remotely via a web browser.

The Fluidd web interface can be accessed through the IP address assigned by your home router. Besides gcode file upload, the online UI provides remote control over the machine, allowing to adjust parameters such as:
- Movement Control: control the movement of each axis and can set compensation after leveling
- Fan and Output: control to turn on the printhead fan and lighting
- Printer Limit: the maximum acceleration control of the printer
- Temperature Display: display the machine temperature heating condition, and the preheating printhead temperature and hot bed temperature can be set in advance.
The Neptune 4MAX also has a Type-C port to connect it directly to your computer using a USB cable.
Pricing, availability, and options
Starting in September 2023, the Neptune 4 Max can be ordered from Elegoo’s official store for $470 or from their Amazon store. For faster order processing, they have six regional warehouses (US, CA, AU, JP, UK, and EU). According to your location, due to the limited stocks and high demand, the package will be shipped out in November or December. The N4 Max is also available in combo packs with included 1KG or 2KG filament.
Elegoo Neptune 4 Max: Who’s for?
If you want to print large objects such as wearable cosplay masks or decoration items, the Neptune 4 Max is the best bang for your buck 3D printer, around $500. It is also great for those who want to print multiple items simultaneously. By comparison, you can print at least 100 little buddhas simultaneously on the N4P (40x40cm) or 32 ones on a standard 23x23cm machine like the N3Pro. The beauty is that, due to the higher printing speed, the 100 prints will be done at the same time as using two or three 50-100mm/s machines.

I will not lie that the Neptune 4 Max is for everyone. The large build volume comes with its problems. First, you will need a dedicated room for this printer and a technical rack for installation. Regular office desks that do not have de necessary size. Installing it in a living space is not an option due to the noise this machine makes on high-speed printing. The big 40x40cm heated bed requires more energy and time to heat up to the desired temperature than regular 23x23cm platforms. During summer, in small spaces, the 320W heating element will raise the room temperature, requiring additional cooling.
Fancier features
- [Powerful Klipper-enabled hardware for light-speed printing] The versatile 1.5 GHz ARM 64-bit quad-core processor enables impressive printing speeds of up to 500mm/s (default 250mm/s) and up to 8000mm/s2 accelerations, supporting advanced features such as input shaping and pressure advancing. Acceleration sensors on the X and Y axes to maintain print quality by automatic calibration.
- [Up to 300 °C for high-temperature materials] The hotend has a 60-watt heating element with a brass heating block to allow up to 300 °C nozzle temperature. It has automatic calibration of the nozzle PID parameters for precise and constant temperature control. It uses an all-titanium alloy throat pipe to handle the high temps.
- [Spacious build volume] The impressive build volume of 420 x 420 x 480 mm opens new possibilities for creating unique objects in previously unattainable dimensions. Whether you want to print a large model or batch production of smaller items, the N4 Max has enough space for your work.
- [Auto Bed Leveling + Auxiliary Leveling] With 121 (11×11) points auto bed leveling, you can achieve consistent and reliable prints every time without the need for manual bed leveling. Additionally, the auxiliary leveling by hand-twist knobs allows for further fine-tuning of the print bed’s level for improved print quality.
Build Tips
I assembled it by myself, but at some stages, two extra hands would have been helpful, considering the size and weight of the equipment. I also made some rookie mistakes despite that is not the first 3D printer I put together.

- Before assembling, watch the build tutorial video included on the USB stick.
- Install the printhead only after the Z-axis gantry is attached to the base unit. I found
- Don’t over-tighten the screws from the beginning.
- Check that the cables are not caught under the screws or in the way of the moving parts.
- Calibrate the print platform manually before auxiliary ABL.
- Don’t panic if your first print fails. Check all the screws, belt tension, and roller wheels again, then repeat the leveling process.
How to upgrade the firmware on the Neptune 4 Max?
Being a new model, firmware upgrade files are not available yet on the Elegoo download section, but you can request them directly from the manufacturer. Mine arrived with firmware V1.2.2.26, and I updated it to V1.2.2.34 that premise to fix some known issues. After upgrading the firmware, the WIFI stopped working, generating new problems, too.
Upgrading the N4Max consists of two phases; first, you need to update the firmware of the machine and then the software of the LCD control panel.

- Main Control Firmware and Machine Configuration Files:
- Copy the “ELEGOO_UPDATE_DIR” folder into the root of a USB stick
- Insert the stick into the Neptune 3 Max’s USB port
- GO to the settings menu and select the “Information” (About machine) tab
- Click the upgrade button arrow and confirm the firmware update; after finishing, the system will reload
- Touch Screen Firmware Update
- Copy the “UI_4&4Pro-Universal” *.tft firmware file on a micro SD card (prior format it FAT32)
- Power off the 3D printer
- Remove the back cover of the LCD control unit and load the micro SD into the TF slot.
- Power on the 3D printer, the screen will show a status bar of the upgrade process.
- When finished, restart the machine.
Technical specifications
| Printing technology | Fused deposition modeling (FDM) |
| Firmware | Klipper |
| File transfer | WIFI/WLAN/USB transfer |
| Print Volume | 420x420x480mm³ |
| Max printing speed | 500 mm/s |
| Extruder | Dual-gear direct extruder |
| Max nozzle temperature | 300℃ |
| Throat pipe | All-titanium alloy |
| Hotbed | 320W, 85℃ |
| Auto bed leveling | 11×11 (121 points ABL) |
| Illumination | Z-axis: light bar with 30 beads Nozzle LED light: Yes |
You Can Trust Our Reviews!
Since 2014, FirstQuadcopter has reviewed, thoroughly tested, and rated hundreds of products, including drones, gimbals, power stations, action cameras, 3D printers, and other high-tech gear to help you make better buying decisions.
After getting everything calibrated, and fine-tuning filament temperature, I LOVE my Elegoo Neptune 4 Max !
I’m new to 3D printing and looking for a large 3D printer. Is the ELEGOO Neptune 4 Max a good option for someone like me, considering ease of use, large build volume, and reliability?
With what oil/vaseline do you use to maintain your Neptune 4 Max??
I love the MAX but leveling the bed is a nightmare compared to small sized 3d machines.
I need a large 3D printer. I’m looking at Artillery SW X4 Plus or Elegoo Neptune 4 Max. Which model would you recommend? Thanks for the suggestions.
Can I use the N4M without the main fan?
Yes, in some cases, you can just turn off the fan bar. Some Neptune 4 Max owners have even removed it. You will not need it if you print only with PLA filament.
After starting using Uncle Jessie’s Patreon profile, all my problems with the Neptune 4 Max have been solved
Getting my Neptune 4 Max this week. Excited to 3D print full helmets and other cosplay parts. Any recommendation for the best firmware version and PLA filament?
Can you upload files to the Neptune 4 Max through wifi and start printing?
Yes, you can do through the Klippe OS web interface.
The noise made by Neptune 4 Max is terrible!!!
After I switched to Prusa slicer all previous problems gone!
Those who are complaining regarding the first layer and other failures using the Neptune 4 Max should follow these basic steps (not my tips, found on Facebook and worked for me):
1. Preheat the bed for at least 10min at 60C before starting to print.
2. Run auto bed level.
3. Adjust until you get around 0.2mm deviation on the print bed
4. Save the good bed leveling.
5. In g-code add after bed heating ” G4 P300000″ to wait 5min after bed reaching 60° to wait for heat spreading so the bed gets flat, if you print immediately and homing, the bed level can get an error height up to 0.15-0.2mm because of twisting.
6. Then after G28 (homing) ad “BED_MESH_PROFILE LOAD=6” if u have 36point bed or “BED_MESH_PROFILE LOAD=11” if u use 121 points.
Good luck, hope this will help!
Thank you!
Reliability at such speeds is always a problem! I never go above 200mm/s.
The N4Max is a great printer for large-size models. The high-speed works only with PLA filament, for PETG, TPU and other materials you need to reduce the speed to 30-50mm/s!
Hi everyone
Which high-speed PLA filament do you recommend with the NEPTUNE 4 MAX?
It is available on BG, in the CZ location for Europe at the price of US$469.00. Did anyone try to order from them? What happens if the N4 Max is not working properly? Is it easy to replace it?
Neptune 4 Max Firmware V1.2.2.64 firmware available at Elegoo’s support page: https://www.elegoo.com/pages/3d-printing-user-support
Issues resolved:
1. Permission issue for saving Z-offset value on the web side
2. Moonraker timeout issue may occur after updating to firmware 1.2.2.51.
3. Optimize the power-off resume printing function
Mine goes back to ELEGOO. None of the firmware upgrades helped. Probably it has mechanical issues :(
Why exactly are you sending your n4 max back? I plan to order a second one. For it is the best big size printer
Do I need to use high-speed PLA with the Neptune 4 Max? If yes, what brand is recommended?
Thank you for the reply!
I also received mine. It’s printing perfect out of the box! Time for huge prints
Did you installed Obico remote control on your Neptune 4 MAX?
Look for the Logitech c270, is working with no issue with the Neptune 4 Max
Hot to install a USB camera on the Neptune 4 MAX?
Is it possible to use a glass bed with the Neptune 4 Max?
Please, I need your help!
I received the Neptune 4 Max, and I can make it to work. All test prints fail.
I leveled it at least 10 times, and none of my problems solved :(
Where from you get the firmware upgrades? I can’t find it on Elegoo’s support page…
Hello Trevors,
Besides leveling, you can try reducing the print speed. For me it worked.
The latest Neptune 4 Max firmware can be downloaded from Elegoo’s Discord group: https://discord.gg/shv7ZWyzdP
Thanks!
Latest, Neptune 4 Max V1.2.2.65 firmware is available here https://drive.google.com/drive/folders/1CLrAZaKKFDEME8ZsF5qB2Nh6NoFUca4o
Thanks Demon3D!
I have the same issue as you with the WIFI connectivity. Did you manage to solve it???
Yes, flash the n4max_1.2.2.51 firmware it solves wifi problems and other issues
Thanks!