
The GOFly Scorpion is, without question, the Best FPV Drone that GOFly-RC has ever produced (yet). In our review, Let’s discover how good a $200 racing drone can be!
Besides FPV drones, GOFly provides a wide range of related accessories for RC enthusiasts. On their website, you can find almost any part you need to build your own racing quadcopter, from frames to flight controllers.
Targeting professional drone racing pilots, the GOFly-RC Scorpion is built on a solid 3K carbon fiber frame with 230mm wheelbase. It is designed to be used with 5″ propellers. All the electronic parts are compatible with 4s, as well as with 5s LiPo batteries.
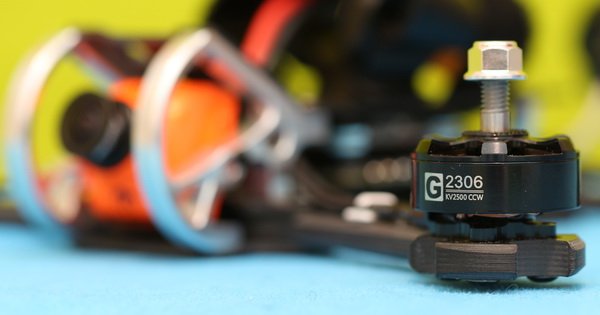
The lifting power is generated by 4 pieces of GoFly 2500KV brushless motors. For those who are new in the field, the number before “KV” refers to the constant velocity of the motor and it is measured by the number of revolutions per minute (rpm) that a motor turns when 1 volt is applied to it. So, theoretically, using a 5s LiPo (18.5V) should offer power increase of 25% over a 4s one (14.8V).
GOFly Scorpion 5″ FPV drone review
Disclosure: I received this FPV quadcopter from GoFly-RC in order to test it and make an in-depth review. Although the drone was offered for free, all opinions in this review remain my own and my partner in no way influenced me.
The package arrived quickly and smoothly, without extra taxes. By default, the Scorpion drone comes in a basic black box. In order to avoid any bad thing during overseas delivery, it was additionally packed in a hand-crafted heavy-duty cardboard box I could’ve stepped on without damaging anything.
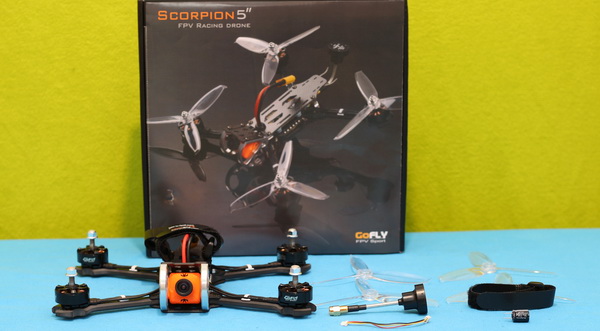
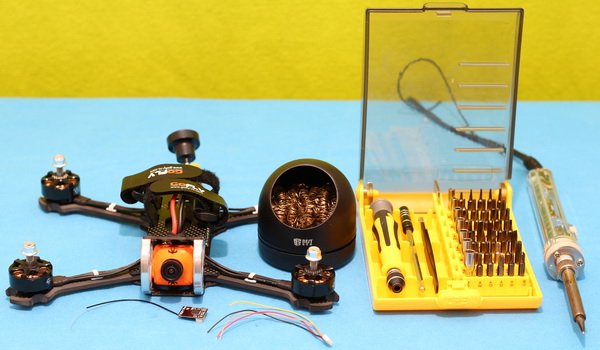
Box content is very minimalist. Besides the aircraft, I found the following accessories: 5.8G FPV antenna, extra velcro band (for battery or camera), receiver servo cable, 4 pieces of zip-ties, 35V/330μF capacitor and one set of GemFan WinDancer 5042-3 propellers. Instead of a detailed user manual, there is only a flyer with FC, ESC, VTX and camera pin-out.
At a glance
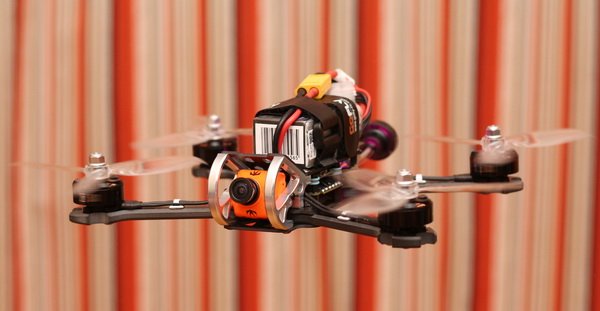
Opening the box, I was pleasantly surprised. The GOFly 5″ Scorpion frame incorporates carbon fiber and aluminum parts into a beautiful design. The frame structure is very solid, you can’t bend it in any direction. It adopts a horizontal “X” design instead of a vertical one, like most racing quads (it is more wider than longer). It weighs 333 grams without battery and propellers.
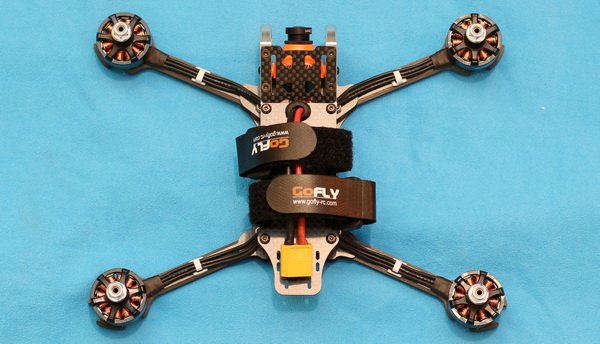
The battery is secured with two pre-installed Velcros. The XT60 connector comes out from the top plate through a protective rubber ring. Both, top and bottom, plates have 10cm length. Above the RunCam camera’s aluminum frame structure, there is a third 4x3cm plate that allows for the installation of a second camera. I tried to mount my Foxeer Legend 3 and Xiaomi Yi 4K, but no luck. It is suitable for cubic-shaped drone cameras only (GoPro Session & RunCam 3).
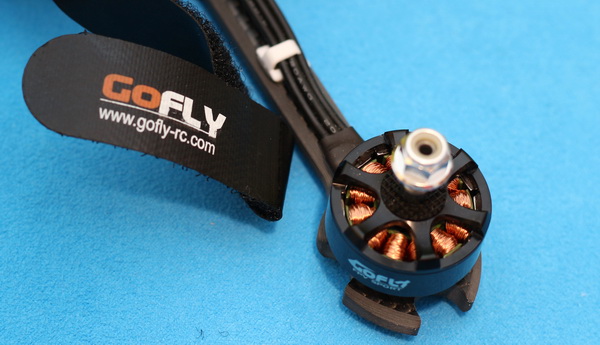
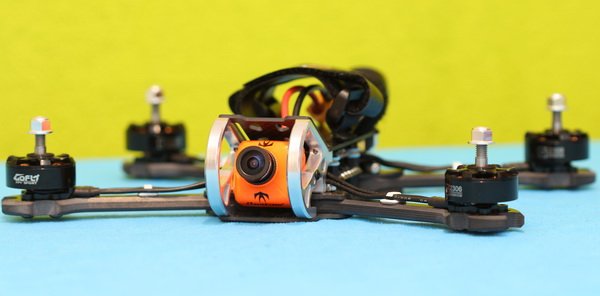
At the end of each 6mm thick arm, there is a 2500KV GoFly FPV Sport brushless motor. Wires are nicely organized using GOFLY-RC motor wire clips.
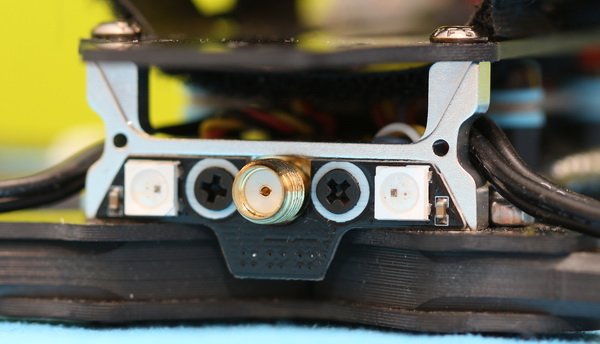
While the F4 flight controller and 40A ESC are stacked, the VTX is just bonded to the bottom board. Being hard to access the VTX’s control button, CH/Power settings can be done through VTX telemetry only. The Pagoda-2 RHCP antenna is linked to the TBS VTX through a short pigtail. Both micro USB and SBUS, connectors are easily accessible.
The RGB status lights at the back are easy to see, so it’s great for orientation. Also allows you to know whether the motors are armed (green color) or disarmed (blue color). At no radio signal, the LEDs will flash.
Key Features
- Robust 230mm sized 3K carbon fiber frame (6mm arms);
- 7075 Aluminum Alloy frame reinforcement;
- Horizontal X design (wider than longer);
- Versatile F4 flight controller w/ BetaFlight OSD (FW 3.5.2);
- 2306 2500KV brushless motors;
- 40A BLheli_32 32bits DShot1200 4in1 ESC;
- RunCam 600TVL camera with 1/3″ SONY Super HAD II CCD image sensor;
- TBS 5.8G/48CH 25-200mw video transmitter (VTX);
- On-board buzzer;
- 4-5S LiPo compatibility.
GOFly Scorpion review: Camera, FPV and OSD
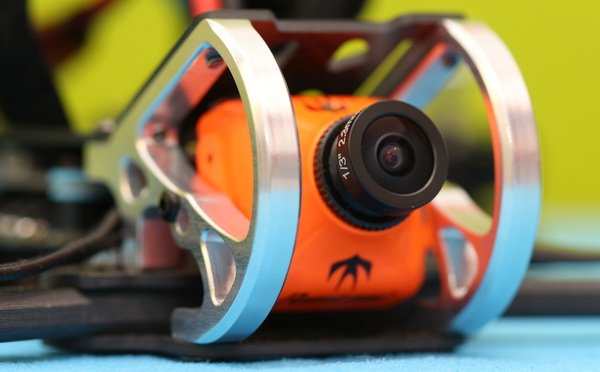
GoFly opted to mount a RunCam cam in front of the Scorpion quadcopter, which is one of the most popular FPV camera brands among racing pilots. The camera is paired with a 5.8G/48CH video transmitter. Both camera and VTX, settings can be accessed remotely through the transmitter. By default, broadcast power is set to 200mW.
The camera angle can be conveniently adjusted according to your flight style. As crashes are inevitable, it is good to know that the camera is well-protected by a stylish aluminum frame. The 2.3mm lens provides about 150° field of view (FOV).
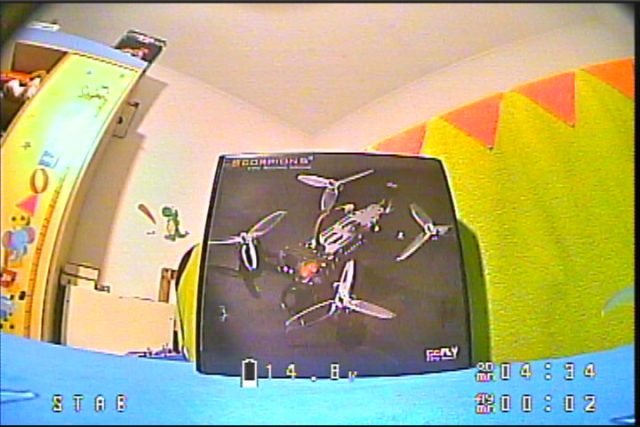
By default, elapsed flight time, flight mode and battery voltage OSD values are displayed on the FPV monitor. Of course, you can add more OSD info like virtual horizon and instant current.
The image quality is great, as we expect from a Runcam product. The camera features wide dynamic range (WDR), ideal for FPV.
Parts and things needed to complete
First of all: Do not power ON the GoFly Scorpio 5 with installed propellers till everything is configured correctly and double-checked. Those GemFan props are damn sharp! Also, prior to connecting the battery, it is highly recommended to attach the FPV antenna.
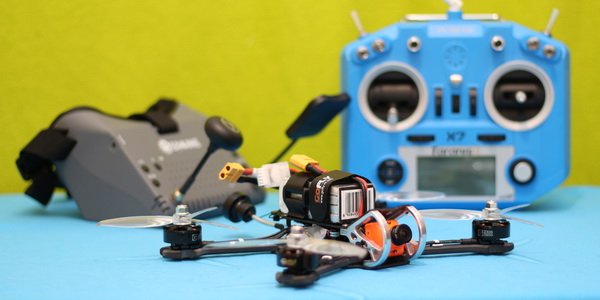
To get it in the air, PNP version requires a radio receiver, transmitter, and battery. For FPV flights, you will also need an FPV monitor or headset, as well.
I opted to use a FrSky radio receiver. A radio servo cable was included, but unfortunately, it was not compatible with my radio board. Anyway, for better reliability, I suggest a soldering approach versus connectors. You don’t want to lose the video contact or control during a long-range flight due to some unplugged connector.
The communication between the radio receiver and flight controller requires only 3 wires (+5V, GND and SBUS). Luckily, in order to have access to the solder pads, you need to remove the top plate only.

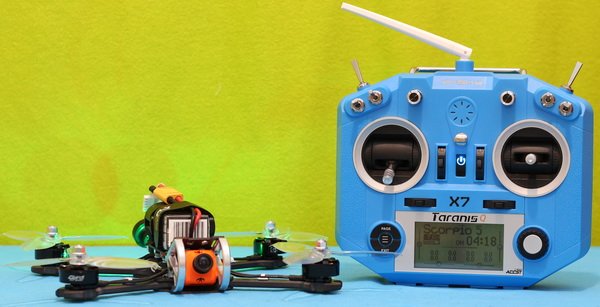
Binding the Scorpio5 with Taranis Q X7
Firstly, I created a new model on my RC and named it “Scorpion 5”. Secondly, under the “Model setup” screen, I set “Internal RF” and operation mode to “D8”. After these two steps, you can select the “Bind” option. When the FrSky Q X7 enters into “Bind” state, it makes a high-pitched beeping. The last step is to power on the receiver while you hold the “F/S” button. Successful binding will be confirmed by solid blue light (of course, this can vary according to your receiver model).
BetaFlight configurator mandatory settings
If you are completely new in the field, I suggest you to edit only the following settings:
- Un-check “Don’t spin motors when armed“;
- Channel mapping & switch assignment. Here you need to assign switches to arm/disarm motors to toggle between flight modes and to activate the buzzer;
- OSD values: You can add more telemetry info to your OSD screen.
BetaFlight OSD menu can be activated by following the stick combination: Throttle Mid + YAW Left + Pitch UP.

Flight performance
As safety measurements, the motors can’t be unlocked in factory defaults. You can disable this feature by powering on the drone with the throttle stick at lowest right position.
I used the recently reviewed Tattu FunFly batteries (4s – 100C rated) for the tests. I like these LIPOs because they have an excellent power/weight ratio.
From the first throttle, I can tell if I am dealing with a racing quad or just a toy. Even with a 4S LiPo, the GOFly-RC Scorpion5 is SUPER FAST and AGILE!
In Angle mode, it is very stable and easy to control. Switching to Horizon mode, I performed easily some cool flips.
Frankly, flying with such a powerful drone is comparable to the feeling of driving a Tesla car.
Both LIPOs (1300mAh & 1500mAh) offered more than 4 minutes of flight time.
Price and Availability
The GOFly Scorpion 5 became available at the end of August 2018. In addition to a frame-only version, GoFly-RC sells the Scorpion 5 in a ready-to-fly PNP version (no receiver, transmitter or battery) for US$219. This price includes one set of GemFan 5042-3 WinDancer propellers. You can also order it from Banggood, now with 23% off.
The rivals
You can find various similar FPV drones in its price range, but frankly, only a few feature a solid frame. The HOBBYMATE 5″ COMET could be its direct competitor regarding features and specs. For a higher budget, you could check the HolyBro Kopis 2 SE, which is my personal favorite in terms of flight performance.
Visitor Rating: 5 Stars
Visitor Rating: 5 Stars
Visitor Rating: 5 Stars
Visitor Rating: 3 Stars
Visitor Rating: 3 Stars
Visitor Rating: 3 Stars
Visitor Rating: 5 Stars
Visitor Rating: 5 Stars
Visitor Rating: 3 Stars
Great website, great review!
I have built myself my first FPV drone now and is building my second as we speak.
This hobby is so cool!
Benny
Visitor Rating: 5 Stars
Visitor Rating: 3 Stars
Visitor Rating: 3 Stars
Visitor Rating: 4 Stars
Visitor Rating: 3 Stars
Visitor Rating: 4 Stars