
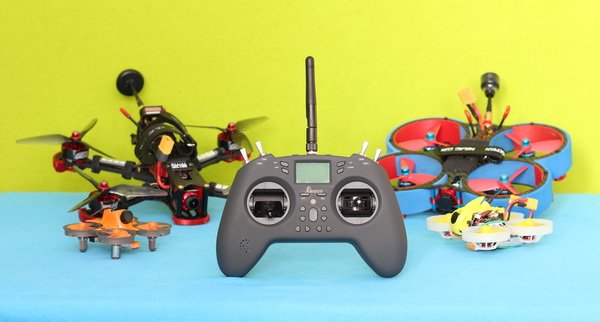
First rumors about Jumper T-Lite transmitter appeared in December 2020. The FPV community has long wanted such a compact and versatile drone controller. Our Jumper T-Lite review covers unboxing, controls, compatibility, user experience, and rivals.
In addition to the cool gamepad style design, T-Lite’s beauty is that it runs OpenTX firmware, which is the most popular operating system for radios. T-Lite is the smallest and lightest remote controller of Jumper-RC. Of course, the ‘Lite’ word covers some lack in features compared to the top-end T18 series.
Jumper/Makerfire T-Lite features
- Gamepad style design;
- Powerful STM32F205 MCU with OpenTX firmware;
- Built-in CC2500/JP4IN1 multi-protocol RF System and optional external module;
- Up to 16CH working mode;
- Compatible with more than 50 radio protocols;
- Hall Sensor Gimbals and four shoulder switches;
- Voice and Vibration alerts;
- Built-in 1.3″ status screen;
- Removable 18650 battery and built-in charging unit (via USB Type-C port).
Jumper T-Lite transmitter hands-on review
Disclosure: I received this transmitter from MakerFire in order to test it and do an in-depth review. Although the RC was offered for free, all opinions in this article remain my own, with no influence from my partner.
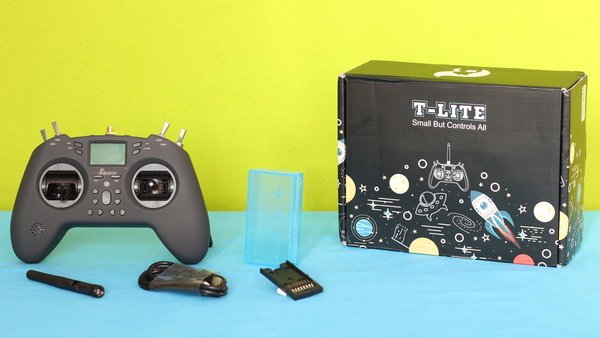
To avoid DHL’s complicated and unfriendly customer clearance, I opted for slower standard shipping. The package arrived in just 17 days, which is not bad for overseas shipping. The package included the radio, rubber ducky antenna, a USB Type-C, external module bay, battery holder, user guide, and some nice stickers that allow personalizing your RC. Upon my request, they also included two pieces of Sony VTC5A 18650 2600mah batteries.
I wanted to review the JP4IN1 version, but I received the CC2500 one. As the box is not labeled with the RF module type, I realized the mistake only when I tried to pair it with a Syma drone. Apparently, both editions run the same OpenTX version and are listed all known protocols regardless of the actual RF module inside.
At a glance
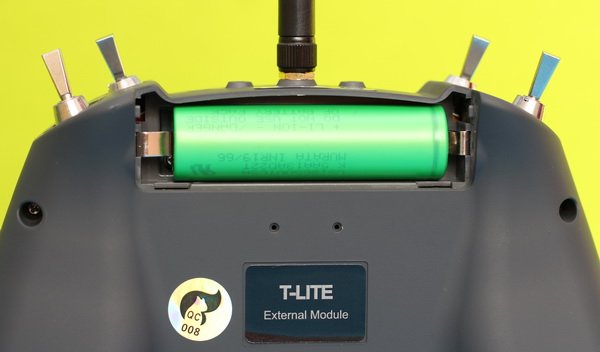
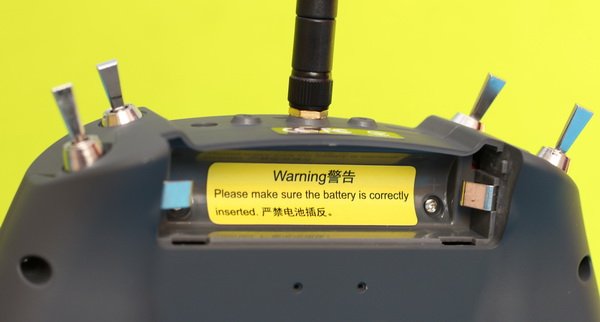
The first impact when you receive a new product is its packaging quality. Maybe the painting on the box looks a bit childish, but personally, I truly like it. Inside, the controller is between two plastic housing, which provides extra protection during shipping. The T-Lite Jumper comes with two yellow warning stickers that you should read and follow before removing them. One refers to battery installation; you need to pay attention to the polarity, otherwise, you can permanently damage the remote. The second one indicates that installing the antenna before power ON the RC is mandatory.
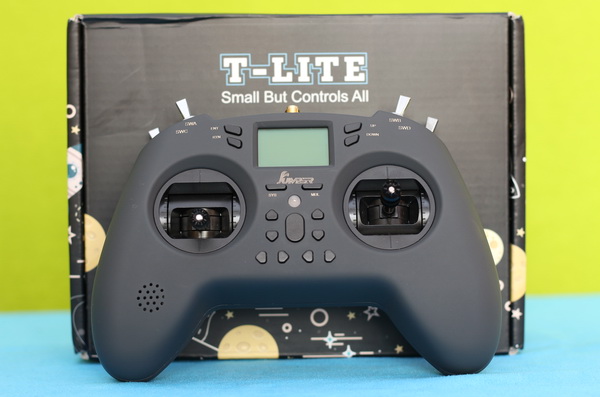
The T-Lite radio has a similar shape as an Xbox One controller. It has a nice soft-touch coating which grants the feel of a high-quality product. The front panel has 2 control sticks, 15 buttons, a loudspeaker, a status LCD, and a Power LED. To be honest, I don’t know how that LED passed the test crew; it is so bright that it blinds you, making it hard to see the control keys. Flying through FPV goggles should not be an issue, but it isn’t enjoyable during the configuration process.
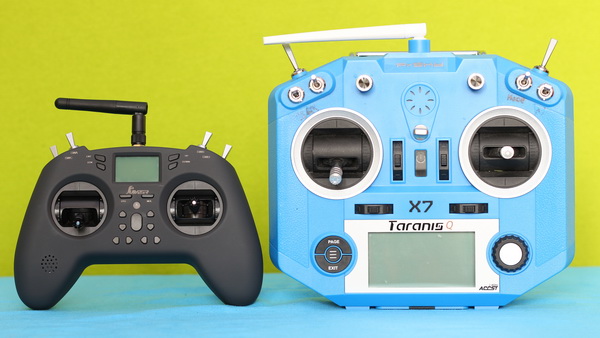
The transmitter measures 66x106x56mm and weighs about 250 grams with a loaded battery. In the picture below you can see a size comparison between the Jumper T-Lite and Taranis Q X7.
On the top of the transmitter, there are 4 shoulder switches, a 3.5mm trainer port, USB Type-C charging/data port, micro SD slot, SMA antenna connector, and two FPV monitor mounting holes. When you connect the T-Lite to your computer via USB will ask you whether you choose HID Joystick mode (for drone simulators) or Storage mode (card reader). By default, it comes with haptic feedback (vibration alert), but it can be also configured with voice alerts by loading the appropriate .wav audio files on a micro SD card.

Price, availability, and options
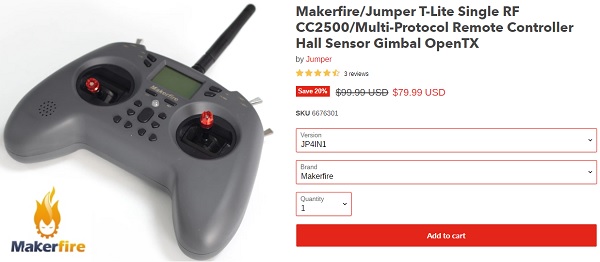
The T-lite controller is available with two types of built-in radio modules. Originally was released under the Jumper brand, but now you can find it with the MakerFire logo on it as well. While the T-Lite CC2500 is available for $69.99 (18% off), the JP4IN1 Multi-Protocol edition for $79.99 (20% off). The extra 10 bucks will give you compatibility with lots of more drones. Remember to order together with the controller a compatible 18650 battery.
Jumper T-Lite review: Controls
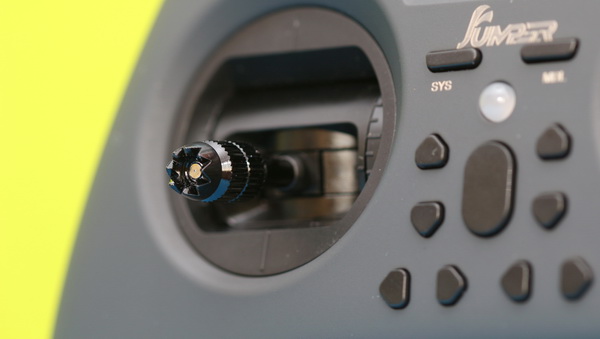
The hall sensor gimbals are super smooth and have removable stick ends, which allows replacing with larger ones or rubberized ones. Here I should mention that apparently, the only difference between Jumper T-Lite versus MakerFire T-Lite is the color of the stick-end (black vs. red).
All the important keys are placed around the 1.3″ LCD screen. You have Enter, Return on left, Up and Down on the right, System, and Mode underneath. The MDL button allows toggling between the model setting pages (1-12).
There are two shoulder levers on each side of the controller. SWA & SWB (frontal ones) are 3-position switches and SWC & SWD (rear ones) are 2-position switches.
Jumper T-Lite review: Compatibility
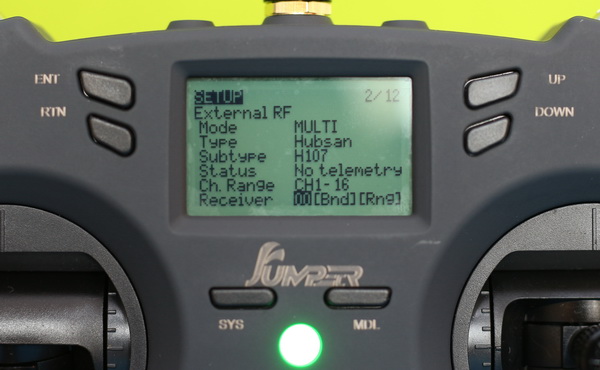
As I previously mentioned, the T-Lite has two built-ti radio editions. The ‘Pro’ version comes with a JP4IN1 multi-protocol module and it is compatible with most drone communication protocols, including popular toy-drone brands such as Syma and Hubsan. In contrast, the ‘Basic’ edition has the low-cost CC2500 RF transceiver with reduced compatibility. Find below the difference between the versions:
- CC2500:
- Frsky, Futaba SFHSS, Hitec, Radiolink, Esky, and Corona.
- JP4IN1:
- A7105: Flysky, Hubsan, AFHDS2A, etc;
- CC2500: Frsky, Futaba SFHSS, Hitec, Radiolink, Esky, Corona, etc;
- CYRF6936: DSM / DSMX, Walkera Devo, Wfly, etc;
- NRF24L01: HISKY, Syma, ASSAN, etc.
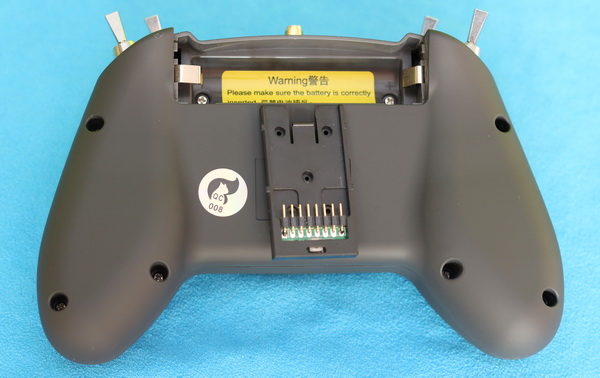
The T-Lite remote controller can also be equipped with an external radio module. For this purpose, the manufacturer includes a module bay. This can be installed on the back of the transmitter. Unfortunately, you need to take apart the radio in order to have access to the external RF plug.
User experience
First of all, user experience widely varies by who actually is using the transmitter. For a 60th years old FPV veteran with big hands, using the T-Lite will be a nightmare. On the opposite side, for the young generation who has truly grown up with a game controller in their hands, the size and shape will be definitely appreciated.
Those yellow stickers scared me at the beginning. I’m sure that I will forget to attach back the antenna before power on or load the battery reversed sooner or later. They should add some kind of electronic protection to counteract these mistakes.
Despite that the LCD is small, all the texts are readable. The buttons are also tiny and close to each other. If you have big thumbs, it won’t be easy to access them. Using a dial-knob instead of navigation keys (up/down) would be a great improvement to the user experience. The brightness level and position of the status LED are also not a great choice. I would also use software trims instead of hardware buttons. This way, the front panel would be much cleaner and user-friendly.
Finally, the included quick start guide does not provide many details about how to configure the controller. I checked Jumper-RC’s download section for a detailed user manual, but the T-lite is not even listed there. Therefore newbies will need to spend lots of research hours on YouTube and dedicated forums till they figure out how to bind with their drones.
Jumper T-Lite rivals
Lately, many manufacturers have started to switch from a square shape to a much attractive gamepad style design. As the name suggests, it aims to be an affordable alternative for the popular FrSky X-Lite radio. Obviously, equipped with the JP4IN1 multi-protocol module it has much wider drone compatibility.
RadioMaster is also about to release a new gamepad-shaped controller. The T8 Pro as well features half sensor gimbal, but instead of a built-in status screen, it has a foldable one.
BETAFPV’s LiteRadio 2 SE can be also categorized in the gamepad style transmitters, but it is limited to FrSky protocol. Without an LCD screen, it’s quite complicated to configure it.
Priced for 200 bucks, the TBS Tango 2 is equipped with folding HAL sensor gimbals and runs full-featured FreedomTX firmware.
Useful resources
- Jumper T-Lite User’s FaceBook Group (a growing community with more than 500 members);
- RCGroups T-Lite forum group;
- Neck strap mount cover 3D print file;
- 3D print mount for Hawkeye Little pilot FPV monitor;
- Tbs Crossfire Fullsize Retrofit mod;
- Compatible voice SD card content (T12);
- OpenTX downloads.
The Jumper T-Lite is the perfect RC for beginners. I purchased one for my son after I read your review. I appreciate your work!
Great review! I’m considering purchasing the Jumper T-Lite, and your review has helped me make up my mind. I love how you highlighted the durability and reliability of the remote controller. As a beginner, I appreciate the ease of use and the fact that it’s easy to configure. Overall, I think the Jumper T-Lite is definitely worth the money. Thanks for sharing your thoughts!
What external elrs module is best for the Jumper TLite? Thanks
I like the Jumer T-lite. It is easy to get started, binds immediately, and very easy to program.
I really like this Jumper RC, but the screen could be bigger!
I recently got a T-lite Jumper, and I am really liking it. But that screen should be much bigger!
Great and honest review! Thanks!!!
Visitor Rating: 5 Stars
Hey Guys, I can’t find how to check the OpenTX version on my Jumper T-Lite radio. Any idea?
long press ‘sys’ button
Just placed my order for a Jumper Tlite I wanted something precise, universal, and compact so it doesn’t take up much space and weight when traveling!
Visitor Rating: 4 Stars
Nice all-arround drone radio!
Visitor Rating: 2 Stars
Can this be used with budget camera drones like the F11 4k Pro, HolyStone HS510? As well as my DJI Mavic Mini 2? And i will buy my 1st fpv drone (Explorer LR 4), how do i connect it to the drone?
And where do i get a detailed manual on how to set it up and use it, any website or page?
This is my 1st fpv radio controller…
Visitor Rating: 5 Stars
I want to use my Jumper T-LITE as a joystick on windows 10 with USB. Is it possible?